
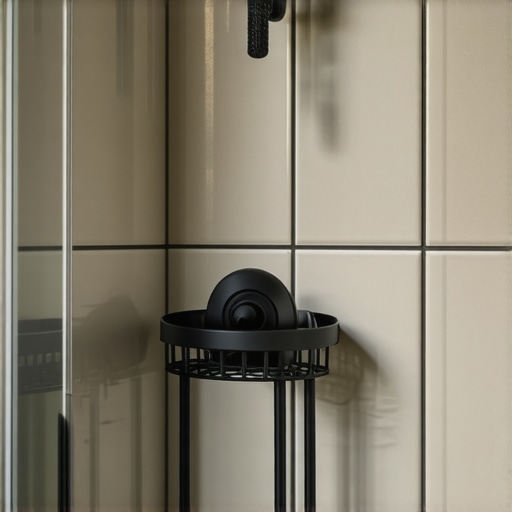
How to Install a Corner Shower Caddy Without Drilling the Tile
Most guys skip the leveling compound. They think the underlayment will hide the dip. It won’t. I spent three days grinding concrete on a job last month just so the floor wouldn’t click like a castanet. I bring that same obsession to every shower wall I touch. You think a shower caddy is just a place to put your shampoo. I see it as a structural challenge involving surface tension, vapor pressure, and the molecular integrity of glazed ceramic. Drilling into tile is a rookie move that risks cracking a $40 porcelain slab or piercing a waterproofing membrane like Schluter-Kerdi, which leads to rot in the studs. You don’t need a drill bit. You need a better understanding of physics and chemistry. If your walls are prepped right, a no-drill solution will outlast the house. If they aren’t, your caddy will be on the floor before the grout even dries. We are looking at engineering a permanent bond in a 100 percent humidity environment. This requires precision. This requires respect for the material. We start with the surface because the tile is the substrate that dictates every success or failure.
The tragedy of the shattered porcelain wall
Installing a corner shower caddy without drilling relies on understanding that suction, tension, and chemical adhesives provide enough shear strength to support typical bathroom loads. The secret to success lies in the microscopic cleaning of the tile glaze to allow for a vacuum or polymer bond. Most failures happen because of soap scum, which acts as a lubricant at the molecular level. I have seen countless homeowners try to save five dollars on a suction caddy only to have it fall and crack their expensive acrylic base. It is a mess that could have been avoided with better prep. I once walked into a job where a homeowner tried to drill through a rectified porcelain tile with a standard masonry bit. He didn’t just crack one tile, he sent a hairline fracture through the entire corner. That is a multi-thousand-dollar mistake for a ten-dollar shelf. We avoid the drill because the tile is brittle and the space behind it is a mystery of pipes and wires. Using no-drill methods keeps the water barrier intact and keeps your sanity in check. You need to treat the shower wall like an aircraft wing. It has to be clean, stable, and ready for high-stress loads in a changing environment.
The molecular reality of surface tension
Suction cups work by creating a vacuum that uses the atmospheric pressure of the room to hold the rubber against the tile. To make this work, the tile must be non-porous and perfectly smooth so that no air molecules can leak into the vacuum chamber. If you have natural stone like travertine or slate, suction is a fantasy. These materials have microscopic pores that allow air to pass through, breaking the seal in minutes. Glazed ceramic and glass are your best friends here. You have to consider the surface energy of the material. A high-energy surface allows the suction cup to “wet” the area more effectively. When you press the cup, you are displacing air. If even a single grain of mineral deposit from hard water remains, the seal is compromised. This is why I tell people to check their tile cleaning tips for a sparkling bathroom in 2025 before they even think about mounting hardware. You are not just cleaning for looks. You are cleaning for structural adhesion. You need a solvent like isopropyl alcohol to strip away the fatty acids found in modern soaps. Those soaps are designed to stick to skin, and they stick to tile just as well. If they are there, your caddy is a ticking time bomb.
“A floor is only as good as the subfloor beneath it; deflection is the enemy of every joint.” – Master Flooring Axiom
Tension rods and the physics of compression
Floor-to-ceiling tension rods use a high-gauge internal spring to exert constant vertical force between the shower floor and the ceiling. This creates a stable friction-based anchor point that does not require any adhesive or suction on the tile walls. The engineering here is simple but demanding. You need a rod with a high spring constant. If the spring is weak, the rod will bow under the weight of several liters of soap. You also have to look at the feet. Most cheap units use a hard plastic foot. That is garbage. You want a thermoplastic rubber foot with a high coefficient of friction. This prevents the rod from sliding on a wet surface. You have to align it perfectly plumb. If the rod is off by even half a degree, gravity starts working against you. The force becomes a lever rather than a vertical support. I always use a four-foot level to set my tension rods. People laugh until they see my rods stay up for a decade while theirs fall every six months. The ceiling also matters. If you have a drop ceiling or a thin drywall patch, the tension rod can actually punch a hole through it. You need a solid joist or a wide mounting plate to distribute that force. It is about load distribution. It is about respect for the structure.
Chemical bonding with waterproof adhesives
Silicone-based adhesives and modified polymers provide a permanent, non-mechanical bond that can hold up to 30 pounds when cured properly on a clean tile surface. This is the heavy-duty way to do it. We are talking about two-part epoxies or high-grade bathroom silicones. These materials create a chemical bridge between the metal of the caddy and the silicate of the tile glaze. The chemistry is fascinating. These adhesives are designed to be hydrophobic. They repel water while they cure. However, they need a dry surface to start. If there is a film of moisture on the tile, the adhesive will bond to the water molecules instead of the tile. This results in a failure called “cohesive skinning.” The adhesive looks like it stuck, but it just slides off. You have to use a heat gun or a hair dryer to ensure every molecule of water is gone from the corner. Once you apply the adhesive, you have to support the caddy with painter’s tape for 24 to 48 hours. The polymer chains need time to cross-link and harden. If you load it too early, you break those chains and the bond will never reach its full strength. It is patience versus gravity. Gravity never sleeps.
| Mounting Method | Weight Capacity | Best Tile Type | Durability Level |
|---|---|---|---|
| Suction Cups | 5-10 lbs | Glazed Ceramic / Glass | Low to Moderate |
| Tension Rods | 15-25 lbs | Any (with solid ceiling) | High |
| Adhesive Strips | 10-15 lbs | Smooth Porcelain | Moderate |
| Modified Polymers | 25-40 lbs | Non-porous surfaces | Extreme |
Why your grout holds the secret to stability
Grout lines are the weak point of any no-drill installation because they are porous and textured, which prevents suction cups from forming a seal. If you are using adhesive or suction, you must avoid the grout joints and stay entirely on the face of the tile. I see people try to bridge a suction cup over a grout line all the time. It is physics. The air will travel through the sand and cement of the grout and equalize the pressure. Your caddy will drop. If your grout is old and crumbling, it can also release dust that ruins adhesive. You might need to look at how to refresh grout without replacing it to ensure the surrounding area is stable. A solid grout joint provides the lateral support for the tile itself. If the tile is loose because the grout is gone, your caddy will pull the tile right off the wall. I have seen it happen with large format tiles that were spot-bonded instead of back-buttered. The weight of the caddy becomes a pry bar. You have to think about the whole system. The caddy, the adhesive, the tile, and the thin-set behind it. It is a vertical sandwich of materials that all have to work together.
“The bond between an adhesive and a substrate is determined by the surface energy of the material and the viscosity of the bonding agent.” – Master Flooring Axiom
The 1/8 inch that ruins everything
Levelness and plumbness are not just for aesthetics; a caddy that is slightly tilted will experience uneven torque, causing suction cups to peel from one side. This is the geometry of failure. If your corner is not a perfect 90 degrees, a rigid corner caddy will have a gap. Many builders are lazy. They don’t check their studs for plumb before they hang the backer board. You end up with a corner that is 92 degrees. You try to force a 90-degree metal caddy into that space and you are building tension into the system. That tension wants to pull the caddy away from the wall. You are fighting the metal. In these cases, I always recommend flexible mounting systems or individual shelves that don’t rely on a perfect corner. When you are looking at showers with a style trendy ideas for small bathrooms, remember that function dictates form. A beautiful shelf that won’t stay up is just a piece of trash in your way. You have to measure your corners before you buy your hardware. Use a square. Don’t guess. Precision is the difference between a job that lasts and a job you have to do twice.
The pre-installation checklist for success
- Scrub the tile with a phosphoric acid cleaner to remove calcium deposits.
- Wipe the area with 91 percent isopropyl alcohol to remove soap films.
- Dry the surface using a lint-free microfiber cloth and a heat source.
- Check the corner for squareness using a machinist square or a simple template.
- Mark the placement using a grease pencil to avoid touching the cleaned area with fingers.
- Ensure the adhesive or suction cup avoids all grout lines by at least 1/4 inch.
- Allow adhesive to cure for the full manufacturer-recommended time without moisture.
The weight capacity lie
Manufacturer weight ratings are often calculated in perfect laboratory conditions on brand new glass, not on 10-year-old bathroom tile covered in hard water spots. You have to de-rate everything. If the box says it holds 20 pounds, assume it holds 10. Consider the dynamic load. When you pump a bottle of shampoo that is sitting on the shelf, you are applying downward force. That force can be double the static weight of the bottle. If you have three large bottles and you are pumping away, you are putting 30 or 40 pounds of pressure on those suction cups. This is why many caddies fail during use. It is the impact force. I always suggest people take the bottles off the shelf to pump them if they are using a suction-based system. Or, better yet, use a modified polymer adhesive that can handle the shear stress. For those looking for showers that wow modern designs for 2025, integrated niches are the gold standard, but a high-end adhesive caddy is the next best thing for a retrofit. Just don’t trust the marketing. Trust the physics of the bond. If the surface area of the suction cup is small, the load-bearing capacity is small. It is a simple ratio of square inches to pounds. Always go for the largest contact patch possible.