
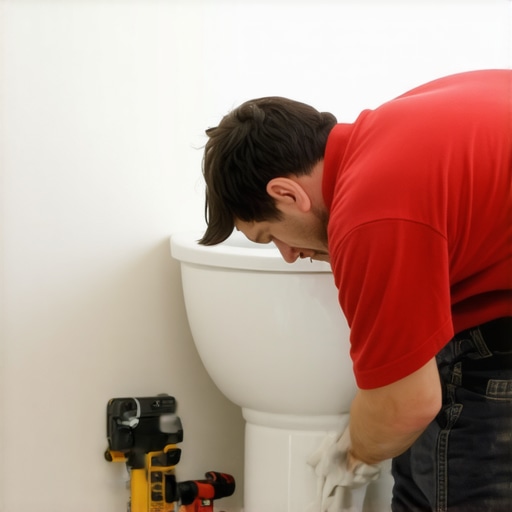
Replacing a Rotted Baseboard Behind a Toilet
I once walked into a bathroom where the homeowner thought they just needed a touch of paint on the trim. When I touched the baseboard with a putty knife, it disintegrated into a black slurry. The wax ring had been weeping for months, and the MDF baseboard acted like a wick, pulling moisture six feet down the wall. It was a mess. Most guys skip the leveling compound and ignore the wet studs. They think the new trim will hide the rot. It won’t. I spent three days grinding concrete on a job last month just so the floor wouldn’t click like a castanet, and that’s the same level of obsession you need for a simple baseboard behind a toilet.
The physics of a failing seal
Replacing a rotted baseboard behind a toilet requires precision moisture assessment, removal of organic debris, and the installation of inorganic materials like PVC to prevent future microbial growth. You must first address the leaking wax ring or condensation issues that caused the cellular breakdown of the previous wood trim. If you ignore the source, your new baseboard will be trash in six months. Water moves through porous materials via capillary action, where the surface tension of the liquid pulls it into the microscopic voids of wood fibers or medium-density fiberboard. This is why a small leak at the flange can ruin a baseboard five feet away. The water travels horizontally along the wall plate, saturating the bottom edge of the trim. Once the moisture content exceeds 20 percent, fungi begin to digest the lignin and cellulose, leading to the structural collapse of the material. You can find more on the visual side of these elements at chic baseboard designs that transform rooms in 2025 if you want to see what a healthy installation looks like.
“A floor is only as good as the subfloor beneath it; deflection is the enemy of every joint.” – Master Flooring Axiom
Identifying the source of the rot
Before you pull a single nail you must determine if the water is coming from a faulty wax ring, tank condensation, or a leaking supply line. A moisture meter is your best friend here. Pin-type meters can penetrate the surface to give you a reading of the subfloor and the studs behind the drywall. If the subfloor is wet, the toilet has to come up. There is no way around it. If you just replace the trim, the rot will continue to eat the floor joists. Check the grout lines around the base of the toilet too. If the grout is cracked or missing, water from cleaning or missed aims has likely seeped underneath. For tips on keeping these areas maintained, see tile cleaning tips for a sparkling bathroom in 2025. Condensation is another silent killer. In humid climates, the cold water in the tank causes the outside of the porcelain to sweat. That sweat drips down the back of the tank and pools right at the baseboard. This is why I always recommend PVC trim for bathrooms. Wood is a sponge and MDF is a death wish in a wet room.
Removing the damaged trim safely
Removing rotted baseboards involves scoring the caulk line, prying gently from studs, and extracting rusted fasteners to avoid damaging the underlying drywall or tile. Start by taking a sharp utility knife and cutting the seal between the top of the baseboard and the wall. If you skip this, you will peel the paper off the drywall, making your job twice as hard. Use a wide stiff putty knife to protect the wall and a small pry bar to pull the trim away. If the wood is soft, the pry bar might sink right into it. In that case, you have to find where the nails are and pry near them. Be careful around the toilet. You do not want to whack the porcelain with a hammer. One wrong move and you are buying a new toilet. Once the trim is off, look at the drywall. If it is soft or black, it has to go. You cannot nail new trim to mush. You might need to perform some grout restoration secrets for long-lasting results if the tile edges were damaged during the rot phase.
Subfloor preparation and waterproofing
A clean subfloor must be mechanically scraped, treated with antimicrobial solution, and dried to a moisture content below 12 percent before any new installation begins. I use a 10 percent bleach solution or a commercial fungicide to kill any remaining spores. If the subfloor is plywood and it has delaminated, you are looking at a patch job. You have to cut out the soft spots and bridge the joists with new 3/4 inch exterior grade plywood. If it is concrete, you are lucky, but you still need to make sure it is level. A dip in the floor behind the toilet will leave a massive gap under your new baseboard. I like to use a rapid-setting floor patch to fill any voids. This creates a solid foundation for the trim and the toilet. While you are down there, check the flange. If it is cracked or sitting too low, now is the time to fix it. A floor is a system, not a collection of parts.
| Material | Moisture Resistance | Janka Hardness | Acclimation Time |
|---|---|---|---|
| MDF | Very Low | N/A | 48 Hours |
| Solid Pine | Low | 380-420 | 72 Hours |
| Solid Oak | Medium | 1290-1360 | 7-10 Days |
| PVC Composite | High | N/A | None |
Material science of replacement baseboards
Selecting a replacement material involves evaluating thermal expansion, hydrophobic properties, and chemical resistance to common bathroom cleaners. For bathrooms, I push my clients toward cellular PVC. It looks like wood, it paints like wood, but it can sit in a bucket of water for a month and not change shape. Wood trim, even when primed on all six sides, will eventually fail if there is a persistent leak. If you must use wood, use a rot-resistant species like cedar or white oak, though white oak is overkill for a painted baseboard. If you are looking for design inspiration, check out baseboards makeover ideas to elevate your space. When buying your trim, make sure it matches the thickness of the existing trim in the rest of the house. Nothing looks worse than a 1/2 inch baseboard meeting a 9/16 inch baseboard at a corner. The transition will look like a mistake. I measure the thickness with a digital caliper because even a 1/32 inch difference shows up under a coat of semi-gloss paint.
Precision installation in tight spaces
Successful installation in a bathroom requires back-priming all cuts, using stainless steel fasteners, and maintaining a 1/16 inch expansion gap at the floor transition. The space behind a toilet is tight. You will likely need a trim nailer with a compact head or a short-handled hammer. Cut your pieces to length, but don’t just measure the wall. Measure the angle of the corners. Most house corners are not 90 degrees. They are 89 or 91. Use a miter protractor to get the exact cut. If you are using wood, you must prime the cut ends. This is where most guys fail. They prime the face but leave the end grain open. The end grain is like a bundle of straws. It will suck up any moisture on the floor. I use a high-quality oil-based primer for this. It seals the fibers better than water-based stuff. For the fasteners, use 15-gauge or 18-gauge finish nails. If the wall is plaster, you might need to find the studs with a magnet or use a construction adhesive like Loctite Power Grab to assist the nails.
- Inspect the toilet flange for hairline cracks or height issues.
- Remove all rotted drywall and replace with purple moisture-resistant board.
- Apply a bead of pure silicone to the bottom edge of the baseboard before installing.
- Use stainless steel finish nails to prevent rust bleed-through.
- Seal the top gap with a high-performance elastomeric caulk.
The final sealant defense
The final seal must use a 100 percent silicone or high-grade polymer to create a flexible waterproof barrier between the trim and the tile floor. Do not use cheap painter’s caulk here. It will shrink and crack within a year. You need something with at least 25 percent movement capability. While most people want the thickest underlayment or the heaviest bead of caulk, too much cushion actually causes the locking mechanisms on flooring to snap and caulk beads to pull away when the house shifts. A thin, consistent bead is better than a giant glob. I like to tape off the baseboard and the floor with blue painter’s tape to get a perfect line. Run your bead, smooth it with a wet finger, and pull the tape immediately. This creates a gasket that prevents water from ever reaching the subfloor again. If you have done your job right, you have turned a structural engineering challenge into a long-term solution. No more black slurry. Just a rock-solid wall. If you need more help with the surrounding areas, consider contacting us for specific advice. Every bathroom is different, but the physics of water never change.