
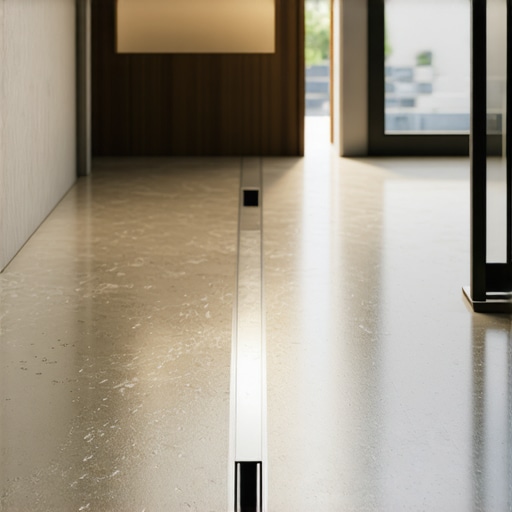
How to Slope a Shower Floor Toward a Linear Drain Perfectly
I spent three days grinding concrete on a job last month just so the floor wouldn’t click like a castanet. Most guys skip the leveling compound. They think the underlayment will hide the dip. It won’t. I have been doing this for twenty five years and I have seen it all. A floor is a performance surface, not a piece of art to be looked at. When you move to showers that wow modern designs for 2025, you are often moving away from the traditional four-way pitch of a center drain. The linear drain is a different beast entirely. It requires a single, flat plane that slopes in one direction. If you mess up the math by even an eighth of an inch, you end up with standing water, soap scum buildup, and a client who calls you back six months later because their grout is turning black. This guide is about the physics of that slope and the chemistry of the bond that keeps it there.
The physics of the one way pitch
A linear drain slope must maintain a minimum of one quarter inch of fall per linear foot to ensure gravitational force overcomes the surface tension of water on tile. This mathematical constant is the bedrock of the TCNA guidelines. Unlike a center drain where you can fudge the edges, a linear drain demands a monolithic plane. If your shower is four feet deep, the back wall must be exactly one inch higher than the drain throat. We do not use levels that are close enough. We use digital levels and rotating lasers to verify that the screed sticks are hitting the mark. Any deviation creates a birdbath where water will sit and breed bacteria. This is where the structural integrity of your subfloor becomes the deciding factor in your success. If the joists are bouncy, your slope will fail before the first drop of water hits the tile.
“A floor is only as good as the subfloor beneath it; deflection is the enemy of every joint.” – Master Flooring Axiom
Why your subfloor is lying to you
Subfloors are rarely level or flat and must be corrected with self leveling underlayment or mechanical grinding before any slope work begins. You cannot build a perfect pitch on a crooked foundation. I have walked onto sites where the slab has a half inch hump in the middle. If you try to screed your mud bed over that, you will have a thin spot that will crack under the weight of a person. I always start by checking the L over 360 rating for deflection. For large format tile, which is common with linear drains, you need L over 720. This means the floor should not move more than a fraction of an inch under a heavy load. I have spent countless hours with a diamond cup wheel on a grinder, eating dust and making noise, just to get the substrate within tolerance. It is the part of the job that no one sees but everyone feels under their feet. It is about the bond between the mortar and the substrate.
[image_placeholder]
The chemistry of the mortar bed
The traditional mud bed consists of a four to one ratio of kiln dried sand to Portland cement mixed to a dry pack consistency that supports immediate tile installation. We call it dry pack because it should hold its shape when squeezed in your hand without getting your glove wet. This aggregate mix is the skeleton of your shower floor. The sand must be sharp edged to allow the cement to grab hold. If you use rounded beach sand, the bed will crumble. When you are packing this mud toward a linear drain, you are creating a wedge. That wedge must be compressed with a wood float until it is as hard as a sidewalk. This is not the time for lightweight materials. You want density. Density prevents moisture from lingering in the bed through capillary action. If you want your floor to last, you need to understand how grout restoration secrets for long lasting results begin with a solid, non shifting base.
| Span Distance | Required Elevation Change | Minimum Drain Flow Rate |
|---|---|---|
| 2 Feet | 0.50 Inches | 5 GPM |
| 4 Feet | 1.00 Inches | 8 GPM |
| 6 Feet | 1.50 Inches | 12 GPM |
| 8 Feet | 2.00 Inches | 15 GPM |
The myth of waterproof tile and grout
Ceramic tile and cementitious grout are not waterproof materials and they allow moisture to pass through to the underlying membrane via capillary action. This is the contrarian truth that most big box retailers will not tell you. They sell you the tile as if it is a plastic shield. It is not. It is a decorative wear layer. The real work happens at the membrane level. Whether you are using a topical liquid membrane or a bonded sheet membrane like Kerdi, that layer must be continuous. When you are installing a linear drain, the connection between the drain flange and the membrane is the most common failure point. I always double strip my corners and use a high quality sealant at the drain throat. You are building a tank that happens to have a hole in the bottom for the water to escape. If you ignore the moisture management, your tile cleaning tips for a sparkling bathroom in 2025 will be useless because the mold will be growing from the inside out.
- Verify the subfloor is flat within one eighth inch over ten feet.
- Install a pre slope to ensure water doesn’t sit on the subfloor.
- Bond the waterproofing membrane to the drain flange with manufacturer approved adhesive.
- Perform a twenty four hour flood test before laying a single tile.
- Maintain the one quarter inch per foot slope across the entire surface.
The ghost in the expansion gap
Expansion gaps at the perimeter of the shower floor prevent the tile assembly from tenting or cracking during thermal cycles. Every material expands and contracts. When you turn on the hot water, your tile expands. If you have jammed your tile tight against the wall, that energy has nowhere to go but up. This results in cracked grout lines and popped tiles. I always leave a quarter inch gap at the perimeter and fill it with 100 percent silicone caulk, never grout. Grout is rigid and will crack. Silicone is flexible and moves with the house. This transition is also where you have to think about how your chic baseboard designs that transform rooms in 2025 will meet the wet area. If you don’t plan the transition, you end up with a messy look that ruins the high end feel of a linear drain system.
“Water follows the path of least resistance; if your slope is lazy, the water will find a way to stay.” – Tile Council of North America Standard
The eighth inch that ruins everything
A single high tile near the drain can cause a damming effect that prevents the shower from ever fully drying. When you are using large format tiles on a one way slope, you have to be obsessive about lippage. Lippage is the vertical displacement between two adjacent tiles. Even a tiny lip will catch water. I use a leveling clip system on every single linear drain install. It is the only way to ensure the plane remains true. If you are using a stone tile, you have to be even more careful because the thickness can vary from piece to piece. I back butter every tile to ensure 100 percent coverage. If you leave voids in the thinset, those voids become little reservoirs for stagnant water. You are not just laying tile, you are engineering a drainage plane. The goal is for the shower to be bone dry within an hour of use.
Final inspection of the drainage plane
When the job is done, I take a bucket of water and I dump it at the furthest point from the drain. I watch how it moves. I want to see a steady, purposeful flow toward the grate. I don’t want to see any swirling or slowing down. If I see a spot where the water lingers, I know I have failed. This trade is about discipline. It is about not taking shortcuts when your back hurts and the day is long. It is about knowing that the chemistry of the modified thinset and the physics of the slope are the only things standing between a happy customer and a catastrophic leak. If you follow the math and respect the materials, you will build a shower that outlasts the house itself. That is the mark of a master installer. It is about doing the hard work that no one sees so the beauty of the floor can last forever. Don’t let a bad subfloor or a lazy slope ruin your reputation. Grind the concrete, pack the mud, and check your laser one more time.