
I have spent twenty-five years on my knees with a trowel and a moisture meter. I have seen every mistake in the book. Most guys skip the leveling compound. They think the underlayment will hide the dip. It won’t. I spent three days grinding concrete on a job last month just so the floor wouldn’t click like a castanet. When it comes to pebble shower floors, the problem is usually a mix of bad physics and worse chemistry. Most homeowners think a pebble floor is just a aesthetic choice. It is actually a complex drainage machine. If you treat it like a flat ceramic tile, you will destroy it in eighteen months. I smell like oak dust and WD-40 most days, and I can tell you that the wrong cleaner is like acid on a car engine. You have to understand what is happening at the molecular level with your stones and your grout or you are just throwing money down the drain. This guide will show you how to maintain that finish without stripping the life out of the stone.
The hidden physics of pebble drainage
A pebble shower floor requires a specific drainage slope of at least one quarter inch per foot to prevent stagnant water from sitting in the grout valleys. Most installers fail to realize that the irregular surface of the pebbles creates hundreds of micro-dams. These dams trap soapy water and skin cells. If the water does not evacuate quickly, it begins to break down the sealant. This leads to a cycle of mold and mineral buildup that is impossible to scrub away without ruining the finish. You need to verify that your floor was built on a proper mud bed. If you have standing water in the grout lines ten minutes after your shower, you have a structural problem, not a cleaning problem. You should look into tile cleaning tips for a sparkling bathroom in 2025 to understand the basics of surface maintenance before tackling the deep grime.
“A floor is only as good as the subfloor beneath it; deflection is the enemy of every joint.” – Master Flooring Axiom
Chemical warfare on natural stone surfaces
Natural pebbles are often made of sedimentary rocks like limestone or metamorphic rocks like marble which react violently to acidic cleaners. Many big-box store cleaners contain citric acid or phosphoric acid. These chemicals do not just clean. They eat. They dissolve the calcium carbonate in the stones. This process is called etching. Once a stone is etched, it becomes porous and dull. It will never shine again without professional mechanical polishing. You need a pH-neutral cleaner. I tell my clients to use a diluted mixture of distilled water and a tiny drop of high-quality stone soap. Avoid anything with a lemon or vinegar scent. If you smell citrus, you are likely melting your floor. The chemistry of the bond between the stone and the grout is delicate. If you introduce harsh alkalis or acids, you weaken the polymer chains in the grout. This is why people see their grout crumbling. For those with damaged joints, you might need to check out grout restoration secrets for long-lasting results to fix the structural integrity of the floor.
The myth of the maintenance free shower
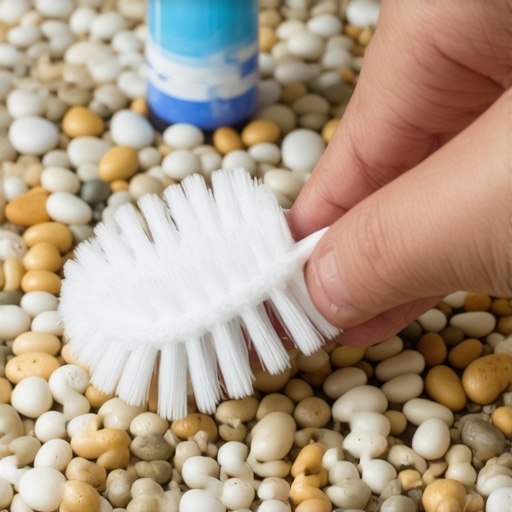
There is no such thing as a maintenance free pebble floor because the high surface area of the grout requires frequent resealing. Most people think they can seal it once and forget it. That is a lie. In a high-moisture environment like a shower, the friction of your feet and the heat of the water wear down the sealer. You are walking on a microscopic layer of protection. When that layer goes, the stone starts absorbing body oils. These oils go deep into the stone. Once an oil stain is inside a river rock, it is there for life. You need to test your sealer every three months. Drop a few beads of water on the pebbles. If the water doesn’t bead up within thirty seconds, the finish is gone. You are now scrubbing the raw stone. This is the stage where most people ruin their floors by using stiff plastic brushes. A soft nylon brush is all you should ever use. Hard bristles create micro-scratches that act as hooks for soap scum. This is especially true if you have transitioned from a shower to chic baseboard designs that transform rooms in 2025 where the moisture levels change rapidly at the threshold.
| Stone Type | Porosity Level | Acid Sensitivity | Recommended Sealer |
|---|---|---|---|
| River Pebble | Medium | High | Penetrating Silane |
| Sliced Basalt | Low | Low | Fluorinated Polymer |
| Marble Pebble | High | Extreme | Impregnating Solvent |
| Glazed Ceramic | Zero | Low | None Required |
The 1/8 inch that ruins everything
The depth of your grout joints should never be flush with the top of the pebbles because it creates a flat surface that kills the tactile feel and the drainage. I have seen installers who are lazy and just dump grout over the stones. They don’t take the time to sponge out the excess. This leaves a thick film on the stone faces. If you try to clean this off later with a scraper, you will ruin the finish. You need to ensure the grout is recessed by at least one eighth of an inch. This allows water to channel around the stones toward the drain. If your grout is too high, it traps water on top of the stones. This water evaporates and leaves behind calcium deposits. This is why your floor looks white and chalky even after cleaning. It is not dirt. It is mineral buildup from poor drainage geometry. If you are planning a new build, consider showers with a style trendy ideas for small bathrooms to see how modern pans handle this better than older mud-set methods.
- Use only distilled water for the final rinse to prevent hard water spotting.
- Apply a penetrating sealer every six months in high-use stalls.
- Squeegee the floor after every single use to remove standing water.
- Avoid the use of steam mops which can delaminate the pebble mesh.
- Check the integrity of the perimeter caulk where the floor meets the wall.
Why your sealer is failing you
Most topical sealers create a plastic film that traps moisture inside the stone and causes a cloudy white appearance known as blushing. This is a common failure. People want a shiny floor, so they use a high-gloss topical sealer. But stones breathe. Water vapor moves through the stone from the subfloor. If a plastic film is on top, the vapor gets trapped. It turns into liquid water. This water reacts with the chemicals in the sealer and turns it white. It looks like a foggy mess. You cannot clean this off. You have to strip the sealer with toxic chemicals and start over. I always recommend an impregnating sealer. It works by changing the surface tension of the stone at a molecular level. It makes the stone hydrophobic without blocking the pores. This allows the stone to breathe while still repelling oil and water. It is a more expensive product, but it is the only way to protect a pebble floor for the long term. If you find yourself needing a total refresh, read about how to refresh grout without replacing it before you tear anything out.
“The TCNA Handbook states that for natural stone, the maximum allowable deflection under all combined design live and dead loads shall not exceed L/720.” – TCNA Standards
The ghost in the expansion gap
Expansion gaps at the perimeter of the shower are vital for preventing the grout from cracking as the house settles and shifts. Every material expands and contracts with temperature. Pebbles and grout are no different. In a hot shower, the floor expands. If there is no gap at the wall, the floor has nowhere to go. It buckles. This creates micro-cracks. These cracks are where mold starts. You cannot clean mold out of a crack. You have to prevent the crack from forming. I always leave a quarter inch gap at the perimeter and fill it with a high-grade 100 percent silicone caulk. Never use grout in the corners. Grout is rigid. Silicone is flexible. This is a basic rule of the trade that most DIY installers ignore because they want a uniform look. They regret it when the floor starts popping up like a potato chip. If you are looking for more sustainable options for your next project, see eco-friendly tile solutions for sustainable homes in 2025 for materials that handle thermal expansion better than natural stone.
The danger of over cleaning
Scrubbing your pebble floor daily with a stiff brush will actually accelerate the accumulation of dirt by creating a rougher surface. People get obsessed with cleanliness. They think more friction is better. It is the opposite. Every time you scrub hard, you are removing microscopic amounts of the stone and the sealer. You are making the surface more abrasive. A rougher surface has more surface area for soap scum to grab onto. It is a death spiral. The best way to clean is a gentle soak. Apply your pH-neutral cleaner. Let it sit for five minutes. Let the chemistry do the work of breaking down the oils. Then rinse it with a handheld shower head. If you have to scrub, use a microfiber cloth. It is enough to lift the dirt without damaging the finish. This is the secret that keep professional installs looking new for years while homeowner-maintained floors look like trash after six months. If your floor is already beyond help, you might need to check showers that wow modern designs for 2025 for a fresh start. Use the contact us page if you need professional guidance on a complex restoration. Always check the privacy policy before submitting your job site data online.