
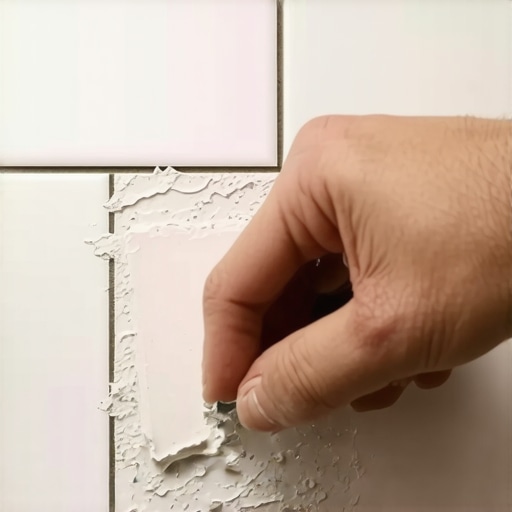
The Master Guide to Fixing a Loose Tile Without Removing the Neighboring Pieces
Most guys skip the leveling compound. They think the underlayment will hide the dip. It won’t. I spent three days grinding concrete on a job last month just so the floor wouldn’t click like a castanet. I had to fix a job where the installer just slapped tile over a ridge in the slab. Three months later, every tile in the kitchen was singing a song of failure. You hear that hollow sound? That is the sound of a homeowner getting ripped off by a lazy installer. Fixing a loose tile without ripping out the whole floor is a surgical operation. It requires a deep understanding of the chemistry of adhesives and the physics of subfloor deflection. If you move too fast, you break the surrounding pieces. If you use the wrong resin, the fix won’t last a season. You have to be precise. You have to be patient. And you have to have the right tools to get the job done right the first time.
The physics of a hollow bond
A loose tile happens because the bond between the mortar and the substrate has failed. This is usually due to poor coverage, structural movement, or excessive deflection. Fixing it without removal requires injecting a high-strength adhesive into the void to restore stability and prevent cracking. When a tile is loose, it acts like a lever. Every time you step on it, the edges put pressure on the surrounding grout. If you don’t address it, the movement will eventually crack the neighboring tiles. This is often caused by a lack of back-buttering or by the installer allowing the thin-set to skin over before the tile was set. Once that bond is gone, you have a pocket of air that resonates when tapped. This is the hollow spot. To fix it, we have to replace that air with a structural material that has the same compressive strength as the original mortar bed.
“A floor is only as good as the subfloor beneath it; deflection is the enemy of every joint.” – Master Flooring Axiom
Why your subfloor is lying to you
Subfloor deflection is the most common reason for bond failure in residential settings. Standard building codes often allow for L/360 deflection, which means a floor can flex up to 0.4 inches over a 12-foot span. This is too much movement for brittle materials like porcelain or ceramic. When the plywood or OSB under the tile bends, the mortar cannot. Mortar has high compressive strength but almost zero tensile strength. It snaps. If you have a loose tile in the middle of a room, check the crawlspace. You might find a support beam that has settled or joists that are spaced too far apart. In humid regions, the wood can swell and contract, further weakening the bond. You might also need to look into how to refresh grout without replacing it once the structural repair is complete because a moving tile always ruins the grout lines.
Surgical precision with the oscillating multi-tool
The first step in a repair is removing the grout around the affected tile without chipping the edges of the good ones. Use an oscillating multi-tool with a diamond-grit blade to carefully grind away the grout. Do not use a hammer and chisel. The vibration from a hammer will travel through the subfloor and loosen the neighboring pieces. You want a clean, deep channel all the way around the tile. This channel serves two purposes. It isolates the loose tile from the rest of the floor and it creates an entry point for the injection resin. Smelling the burnt dust of the grout and the concrete is part of the job. It tells you when you have hit the mortar bed. Keep a vacuum running to suck up the dust immediately. Any debris left in the channel will block the flow of the adhesive and ruin the repair.
The chemical reality of injection resins
Standard wood glue or thin-set won’t work for an injection repair because they are too thick to flow into the capillary gaps under the tile. You need a low-viscosity structural adhesive, typically a specialized acrylic or epoxy resin designed for flooring repair. These liquids have a low surface tension, allowing them to seep deep into the void. Once they cure, they create a permanent bond that is often stronger than the original thin-set. Some of these resins are moisture-cured, which is helpful if you are working on a slab. However, if you are working on trendy shower ideas, you must ensure the area is bone dry. Any moisture trapped under a shower tile will prevent the resin from bonding and can lead to mold growth in the future.
| Repair Method | Success Rate | Cure Time | Skill Level Required |
|---|---|---|---|
| Total Tile Removal | 99% | 24 Hours | Professional |
| Resin Injection | 85% | 12 Hours | Intermediate |
| Grout Patching | 5% | 4 Hours | Novice |
| Liquid Latex Fill | 40% | 48 Hours | Intermediate |
The vacuum method for debris extraction
Before you inject any chemicals, you must clear the air pocket. Use a high-powered shop vacuum and press the nozzle firmly against one corner of the cleared grout line. Block off the other sides of the tile with painter’s tape, leaving only a small opening on the opposite corner. This creates a pressure differential that pulls the dust and loose mortar chips out from under the tile. If you skip this, the resin will just sit on top of a layer of dust. That’s a floating bond, and it will fail in a month. You want to hear the whistle of the air moving under the tile. That is how you know the cavity is clear. In some cases, you may need to drill a few 1/8 inch holes through the grout line at a 45-degree angle to provide better access for the vacuum and the injection tip.
Injecting the resin for a permanent fix
Once the cavity is clean, load your injection syringe with the resin. Start at one end of the tile and slowly pump the liquid into the void. Watch the other end of the grout line. When you see the resin start to bubble up on the opposite side, the void is full. This is where the physics of capillary action helps you. The liquid wants to fill the space. Do not over-fill it to the point where the resin overflows onto the face of the tile. Keep a wet rag nearby to wipe up any spills immediately. Most of these resins are nearly impossible to remove once they harden on the surface. After the injection is complete, place 50-pound sandbags or heavy buckets of water on the tile to hold it level while the adhesive cures. This ensures that the tile sets flat and doesn’t “proud” above the neighboring pieces.
“Adhesion is a function of surface area and clean contact; dirt is the death of a repair.” – Tile Council of North America standards
Protecting the perimeter and baseboards
A loose tile near a wall is often the result of a missing expansion gap. If the tile was installed tight against the wall, the house’s natural movement has nowhere to go but up. This pressure pops the tile off the floor. Before you finish your repair, check the perimeter. You should have a 1/4 inch gap between the tile and the wall. This gap is usually hidden by the baseboards. If the gap is missing, use your multi-tool to cut one. This is a great time to look at baseboard makeover ideas if your current ones are damaged from years of floor movement. Proper expansion joints are not optional. They are a structural requirement for any hard surface flooring. Without them, even the best resin injection will eventually fail under the pressure of thermal expansion.
Grout restoration and final aesthetics
After the resin has cured for at least 12 hours, you can regrout the channels. Make sure the color matches the existing floor. If the old grout is faded or dirty, you might need to apply a grout stain to the whole room to get a uniform look. You can find more grout restoration secrets to ensure your repair is invisible to the naked eye. The grout doesn’t just look good; it also protects the edges of the tiles from impact. Use a high-quality polymer-modified grout for better flexibility. Once the grout is dry, seal it. This prevents moisture from getting back under the tile and starting the whole process of bond failure all over again. A well-executed repair should be indistinguishable from the rest of the floor and should last as long as the house stands.
- Identify the hollow spot with a sounding rod or a heavy coin.
- Remove the grout around the loose tile using a diamond-grit multi-tool blade.
- Vacuum the dust from beneath the tile using a pressure differential setup.
- Inject a low-viscosity structural resin into the void until it overflows the opposite side.
- Weight the tile for 12 to 24 hours to ensure a flat, level bond.
- Check the perimeter expansion gaps and clear any debris.
- Regrout and seal the repaired area to match the existing floor.
Precision is everything in flooring. I have seen too many DIY jobs where the person thought they could save time by skipping the vacuuming or using a thick construction adhesive. It never works. The tile will just pop again. You have to treat the subfloor like a machine. If one part is loose, the whole system is at risk. Take the time to do the prep work. Clear the dust. Use the right chemistry. If you follow these steps, you won’t have to worry about that tile ever moving again. And for heaven’s sake, stop buying the cheap thin-set from the clearance aisle. Your floor deserves better.