
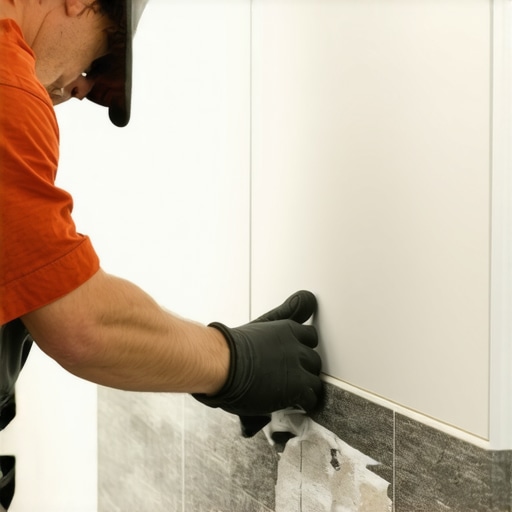
I spent three days grinding concrete on a job last month just so the floor wouldn’t click like a castanet. That job taught me that the details you cannot see are the ones that save your reputation. Most guys skip the leveling compound. They think the underlayment will hide the dip. It won’t. This same logic applies to the edge of your backsplash. When you reach the end of a run and realize the manufacturer never made a matching bullnose tile, you are left looking at a raw, ugly clay body. It is a moment of truth for an installer. You can either slap some plastic trim on it or use the physics of masonry to create a finish that looks like it belongs in a high-end gallery. Finishing a backsplash without bullnose requires a deep understanding of edge profiles, mechanical bonds, and the chemical properties of epoxy grouts. We are moving beyond the simple decorative choices and entering the realm of structural integrity and precision geometry.
The metal profile as a structural termination
Metal edge profiles provide a crisp and durable termination point for tile backsplashes by shielding the vulnerable raw edges of ceramic or porcelain. These profiles, often called Schluter strips or transition tracks, act as a structural frame for your tile installation. They come in various shapes like the L-shaped Schiene or the square-edged Quadec. When you use these, you aren’t just hiding an edge. You are creating a movement joint that allows the wall and the tile to expand and contract at different rates without cracking the grout. The metal is embedded into the thin-set mortar, creating a mechanical lock that is far stronger than any adhesive strip. Most homeowners ignore the mil-thickness of the metal, but a professional knows that a 12.5mm profile is required for a 10mm tile once you account for the mortar bed thickness beneath the piece.
“The integrity of a tile installation is dependent upon the proper management of expansion and contraction through perimeter joints and appropriate edge protection.” – Master Flooring Axiom
The precision of the mitered edge finish
A mitered edge involves cutting two tiles at a forty five degree angle to create a seamless ninety degree corner without exposing any raw material. This is the gold standard for high-end kitchen architecture. It requires a wet saw with a high-quality diamond blade and a steady hand. You are essentially shaving the back of the tile down until only the glaze remains at the very tip. If you go too far, the glaze chips. If you don’t go far enough, the joint looks bulky. Once the two mitered pieces meet, you fill the tiny void with a color-matched epoxy resin or a high-performance grout. This technique creates the illusion of a solid block of stone or ceramic. It is a labor-intensive process that demands patience and a collection of diamond polishing pads to smooth out the transition after the cut is made.
The science of the pencil liner transition
Pencil liners are thin strips of stone or ceramic that provide a decorative and functional border to transition from tile to drywall. These are often made from marble or travertine and can be paired with almost any tile type. The key here is the chemical bond. Because pencil liners are often heavier than the field tile, you must ensure your thin-set has high sag resistance. I always recommend an ANSI A118.4 modified mortar for these transitions. This ensures that the heavy stone doesn’t slide down the wall before the cementitious bond cures. If you are working in a kitchen with high heat near the stove, the thermal expansion of the stone liner must be considered. Always leave a 1/16 inch gap for a silicone-based caulk rather than hard grout where the liner meets a different material surface.
| Edge Method | Durability Rating | Installation Difficulty | Average Cost Factor |
|---|---|---|---|
| Metal Profile | High | Moderate | Low |
| Mitered Joint | Medium | High | High |
| Pencil Liner | High | Moderate | Medium |
| Caulk Finished Edge | Low | Low | Low |
| Polished Edge | High | High | Medium |
The polished edge technique for natural stone
Polishing the raw edge of a natural stone tile using diamond grit pads allows for a finished look without any additional materials. This only works with through-body tiles like marble, granite, or some high-end porcelain. You start with a coarse 50-grit diamond pad on a variable speed polisher and work your way up to 3000-grit for a mirror finish. This process closes the pores of the stone, making it resistant to moisture and staining. It is a messy, wet process, but the result is a clean, minimalist look that is impossible to achieve with trim pieces. For those looking for tile cleaning tips for a sparkling bathroom in 2025, a polished edge is the easiest to maintain because there are no crevices for mold to hide in.
- Select a tile with consistent internal color.
- Use a variable speed wet polisher to avoid heat cracks.
- Progress through all grit levels without skipping steps.
- Apply a high-quality impregnating sealer to the finished edge.
- Buff with a dry cloth to check for uniform light reflection.
The air gap behind your tile
Expansion gaps at the edge of a backsplash prevent the tile from buckling when the house settles or the temperature fluctuates. Many installers make the mistake of grouting the tile directly against a cabinet or a window frame. This is a recipe for disaster. You must leave a small gap, usually 1/8 inch, and fill it with a flexible 100 percent silicone sealant. This allows the tile assembly to breathe. In humid climates, the wood studs behind your drywall will swell and shrink. If the tile is locked tight, it will pop off the wall or the grout will pulverize into dust. This is especially true when integrating baseboards makeover ideas to elevate your space near the floor-to-wall transition. Proper movement joints are the difference between a floor that lasts fifty years and one that fails in five.
“Failure to provide movement joints in a tile installation is the leading cause of ceramic tile finish failures.” – TCNA Handbook Principle
The lies your drywall tells you
Drywall is rarely perfectly flat, and a straight tile edge will expose every hump and dip in the wall surface. Before you even think about the edge finish, you need to check the substrate with a six-foot straightedge. If the wall is wavy, your Schluter strip or mitered edge will look like a mountain range. I often have to skim coat the wall with a setting-type joint compound or a thin layer of mortar to create a dead-flat plane. This is the structural zooming that separates the pros from the amateurs. You aren’t just sticking tile to a wall. You are engineering a flat surface in a crooked world. For those interested in grout restoration secrets for long-lasting results, remember that a flat wall ensures uniform grout joints which are much easier to maintain over time.
The tiny measurement that breaks the design
A single 1/16 inch error in your layout can result in a sliver cut at the edge that is impossible to finish cleanly. Layout is everything. You should always dry-lay your tiles or use a laser level to project your grid before the first scoop of thin-set hits the wall. If you end up with a tiny piece at the edge, the bullnose or the metal trim will look unbalanced. I prefer to center my layout on the most visible part of the wall, usually the space above the sink or stove. This ensures that the cuts at the edges are large and intentional. When planning your layout, consider how the backsplash interacts with other elements, such as showers that wow modern designs for 2025, to maintain a consistent aesthetic language throughout the home.
The moisture barrier and adhesive chemistry
The chemical bond between the tile and the substrate is affected by the porosity of the wall and the type of adhesive used. For backsplashes, I avoid organic mastics because they can support mold growth if moisture gets behind the tiles. Instead, I use a high-polymer thin-set. This creates a crystalline structure that locks into the back of the tile and the wall board. In areas near sinks, applying a liquid-applied waterproofing membrane before tiling is a smart move. This prevents water from wicking into the drywall and causing the paper to delaminate. If you are exploring eco-friendly tile solutions for sustainable homes in 2025, look for low-VOC mortars that still provide a high-strength bond. The physics of the bond are simple. You need more surface area contact for a better hold. Always back-butter your edge tiles to ensure 100 percent coverage.
The final caulk bead and aesthetics
Using a color-matched silicone caulk at the edge of the backsplash creates a clean transition that hides the raw edge of the tile without extra trim. This technique is best for budget-conscious projects or minimalist designs. You apply a neat bead of caulk along the side of the tile where it meets the wall. You then tool it with a soapy finger or a specialized tool to create a smooth ramp. This protects the edge from impact and provides a water-resistant seal. For more complex designs, such as those found in showers with a style trendy ideas for small bathrooms, the caulk color should match the grout color exactly to avoid a cluttered look. If the grout is white and the wall is blue, use white caulk to make the tile pop. If you ever need to update the look, knowing how to refresh grout without replacing it can save you a lot of effort when the caulk eventually wears out. Every edge finish has a lifespan, and maintenance is part of the architectural cycle.