
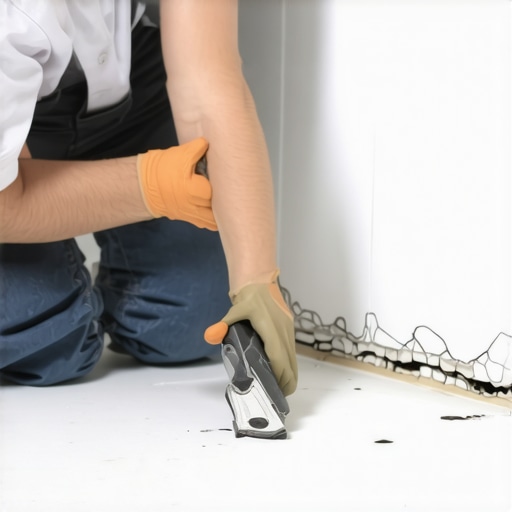
The physics of structural movement and how to stop grout from cracking forever
Most guys skip the leveling compound. They think the underlayment will hide the dip. It won’t. I spent three days grinding concrete on a job last month just so the floor wouldn’t click like a castanet. That same job had cracked grout in every single shower corner because the previous sub didn’t understand that a house is a living, breathing organism that shifts with the seasons. When you see a crack in the corner of a shower or where the floor meets the wall, you are looking at a fundamental failure of material selection. You cannot fight physics with a bag of rigid cement. Grout is designed to fill static gaps between tiles, but corners are rarely static. They are the front lines of structural movement, where walls meet floors and where different planes of the house twist against each other during temperature swings and humidity changes.
The structural lie of rigid grout
Rigid grout fails in high-stress corners because it lacks the elasticity required to handle structural movement, deflection, and thermal expansion. Unlike flexible sealants, traditional cementitious grout is a brittle material that cracks when the change of plane between two surfaces experiences even minor shifting or settling. Most people see a crack and think they just need more grout. This is a mistake. Adding more rigid material to a joint that is moving is like trying to fix a broken spring with a rock. You need a material that can stretch and compress. This is why the industry standards call for a movement joint at every change of plane. If you do not respect the movement of the building, the building will make its own movement joints by cracking your expensive tile work.
“A floor is only as good as the subfloor beneath it; deflection is the enemy of every joint.” – Master Flooring Axiom
When you are dealing with showers or large floor installations, you have to account for the way the framing moves. Wood studs expand and contract. Concrete slabs curl. In a corner, these forces converge. If you have filled that corner with standard sand and portland cement, it has nowhere to go. It will crumble into dust or pull away from the tile edge. This is not just an aesthetic issue. In a wet environment, those cracks are a highway for water to reach your substrate, leading to rot, mold, and eventual structural failure. Understanding grout restoration secrets for long-lasting results starts with knowing when to put the grout bag away and pick up the caulking gun.
Why physics wins against your cement
Physics dictates that every building undergoes differential settlement and hygroscopic expansion, which places immense shear stress on tile joints. When cement grout is used in a corner joint, it cannot accommodate the tensile forces and compressive forces applied by the subfloor or wall studs, leading to catastrophic failures. The technical term for this is the coefficient of thermal expansion. Everything in your house, from the porcelain tile to the 2×4 studs behind the wall, expands at a different rate when the weather changes. If your bathroom gets hot and steamy, the materials grow. When it cools down, they shrink. If your joints are rigid, something has to give. Usually, it is the bond between the grout and the tile. This is particularly problematic in showers that wow modern designs for 2025 where large format tiles are popular. Larger tiles mean fewer joints, which means the joints you do have must absorb much more stress per linear inch.
Materials comparison for movement joints
| Material Type | Movement Capability | Primary Use Case | Durability |
|---|---|---|---|
| Cementitious Grout | Less than 1% | Flat surface joints | High (Brittle) |
| Acrylic Caulk | 5 to 10% | Baseboards and trim | Moderate |
| Siliconized Acrylic | 12 to 20% | General tile corners | High |
| 100% RTV Silicone | 25 to 50% | Wet areas and high stress | Extreme |
To win this battle, you have to choose a sealant that matches the movement of your home. For a bathroom corner, nothing beats 100% RTV (Room Temperature Vulcanizing) silicone. It remains flexible for decades. It is waterproof. It resists mold. Most importantly, it can stretch to nearly double its width without losing its bond to the tile. If you are looking at how to refresh grout without replacing it, the first step in any corner is removing the old, hard stuff and replacing it with a high quality color matched silicone.
The specific chemistry of high performance sealants
High performance sealants like 100% silicone or polyurethane are engineered with molecular chains that allow for significant elongation and recovery after stress. These materials create a chemical bond with the tile edge, ensuring that the expansion joint remains watertight even as the subfloor deflects. I have seen guys try to use cheap painter’s caulk in a shower corner. It lasts about a month before it turns into a gummy mess and peels off. You need a neutral-cure silicone that won’t react with the minerals in your natural stone or the glaze on your ceramic. When you apply a bead of silicone to a corner, you are creating a gasket. That gasket must be thick enough to have enough material to stretch. A paper-thin bead of silicone will snap just as fast as grout. You need a joint that is at least 1/8 inch wide and deep to provide the necessary volume of sealant for long term flexibility.
“Movement joints are not optional in ceramic tile installations; they are a requirement for structural integrity.” – TCNA Handbook for Ceramic, Glass, and Stone Tile Installation
Inside the chemistry of these sealants, there are cross-linking agents that activate upon exposure to moisture in the air. This is why you cannot rush the curing process. In high-humidity areas like the Gulf Coast or the Pacific Northwest, the sealant might skin over quickly but take days to fully cure through the center. If you use the shower too soon, you will break the bond before it has even formed. This leads to the sealant pulling away from one side of the tile, which is the most common reason for failure I see in the field. Professional results require patience and the right environmental conditions. You should also be aware of tile cleaning tips for a sparkling bathroom in 2025 because some harsh chemicals can actually degrade the silicone bond over time if they are left to sit in the corners.
The 1/8 inch that ruins everything
The 1/8 inch gap is the gold standard for expansion joints in residential tile installations because it provides the optimal aspect ratio for sealant performance. If a joint is too narrow, the sealant cannot stretch sufficiently, leading to adhesive failure where the material pulls away from the tile substrate. I often find that installers have jammed the tiles together in the corner with zero gap. They think it looks cleaner. In reality, they have built a ticking time bomb. When those two tiles expand, they will press against each other with enough force to chip the edges or pop the tile right off the wall. You must leave a clean, clear gap. If you are retrofitting an old job, you need to use a diamond-tipped grout saw or a multi-tool with a grout removal blade to carve out that space. You need a void that goes all the way back to the substrate. If you just put a thin layer of silicone over old grout, it will fail. Silicone does not stick well to old grout or soap scum. It needs a clean, virgin tile edge to grab onto.
Step by step corner repair checklist
- Remove all existing rigid grout from the corner using a manual or oscillating grout saw.
- Clean the joint thoroughly using denatured alcohol to remove oils, soap scum, and dust.
- Ensure the joint is completely dry, using a heat gun if necessary in damp shower environments.
- Apply a backer rod if the joint is deeper than 1/4 inch to prevent three-sided adhesion.
- Apply a steady bead of 100% silicone sealant, ensuring full contact with both tile edges.
- Tool the joint with a smoothing tool or a gloved finger dipped in a mild soapy water solution.
- Allow at least 24 hours of cure time before exposing the area to water or foot traffic.
The installation sequence for a permanent fix
Installation of a movement joint requires meticulous preparation, including mechanical removal of old debris and chemical cleaning with denatured alcohol. For a permanent fix, the sealant must achieve two-sided adhesion, meaning it sticks to the tile edges but not the back of the joint, which is why backer rods are essential. If the silicone sticks to the back of the joint and the two sides, it creates a three-sided bond. This is a disaster. When the joint tries to move, the silicone is pulled in three different directions at once, and it will tear down the middle. This is the contrarian data point that most DIYers miss. They think more glue is better. It isn’t. You want the silicone to act like a rubber band stretching between two points. By using a foam backer rod or a piece of bond-breaker tape in the back of the deep corner, you ensure the silicone is free to move. This is how you build a floor that lasts thirty years instead of three. You have to think like an engineer, not just a guy with a tube of caulk.
When you are finishing the job, the way you tool the joint matters. You want a concave profile. This keeps the edges of the silicone thin and the center thick enough to absorb movement. Do not use your bare finger. The oils on your skin can interfere with the bond and introduce bacteria that will grow mold later. Use a specialized caulking tool or a clean, gloved finger. If you are working on baseboards makeover ideas to elevate your space, the same rules apply. The joint between the baseboard and the tile should always be a flexible sealant, never grout. Baseboards move with the humidity in the wood, and if you grout that joint, it will crack and look terrible within a single season. High-stress corners aren’t just in the shower. They are everywhere materials change. Respect the physics, use the right chemistry, and you will never have to fix that crack again.