
I spent three days grinding concrete on a job last month just so the floor wouldn’t click like a castanet. People think the finish layer is where the magic happens, but they are wrong. Most guys skip the leveling compound and they think the underlayment will hide the dip. It won’t. I have seen the same laziness in bathroom tile work. I once walked into a project where the homeowner wanted to rip out fifty square feet of perfectly good subway tile because it looked dingy. The grout was stained, the corners were gray, and they were ready to drop three thousand dollars on a demo. I told them to put the sledgehammer down. I smelled the damp oak of the subfloor and knew the tile was solid. It just needed a chemical refresh. That is where the grout pen comes in, but most people use it like a child with a crayon and then wonder why it peels in a week. Success is about the bond, not the pigment.
The reality of the quick bathroom refresh
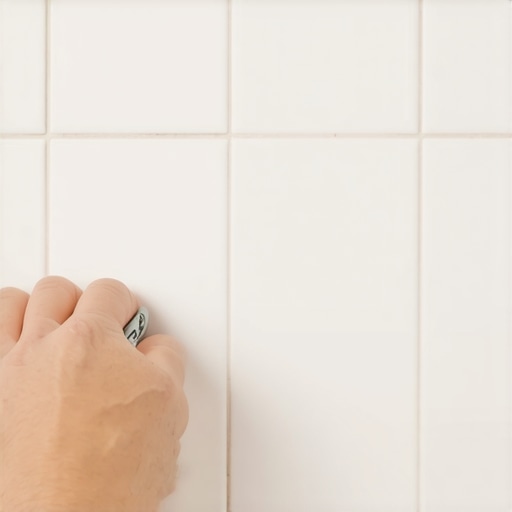
A grout pen is a specialized applicator designed to deposit a thin layer of water-based acrylic ink or epoxy-based paint directly into the porous surface of existing cementitious grout joints. This tool effectively masks deep-seated stains and restores the uniform color of the bathroom floor or wall. It is not a structural repair, but when applied to a clean, dry substrate, it provides a moisture-resistant barrier that significantly improves the aesthetic quality of the tile installation. If your grout is crumbling or missing, a pen will do nothing for you. You need a structural fix first.
You have to understand the molecular nature of what you are working with. Grout is basically a microscopic sponge. It is made of Portland cement and sand. When it cures, it leaves behind a network of tiny capillaries. Over years of showers, those capillaries fill up with soap scum, skin cells, and hard water minerals. If you try to paint over that with a grout pen, you are painting over a layer of grease. It will not stick. You might as well be trying to paint a stick of butter. The physics of adhesion require a clean surface with enough tooth for the acrylic to grab onto. This is why most DIY jobs look like garbage after a month. They don’t respect the prep.
The science of the acrylic binder
The effectiveness of a grout pen relies on high-quality titanium dioxide pigments and durable acrylic resins that can penetrate the top micron of the grout joint. These pens are formulated to be water-resistant once cured, creating a seal that prevents new contaminants from entering the pores of the cement. Choosing the right pen involves matching the width of the nib to the width of your grout lines to ensure full coverage without excessive overlap onto the tile surface. I always tell my clients to go a shade darker than they think they need. Light colors in a high-moisture environment are a constant battle against physics.
“A floor is only as good as the subfloor beneath it; deflection is the enemy of every joint.” – Master Flooring Axiom
When you are looking at the chemistry, you have to consider the VOC levels and the drying time. A good pen uses a fast-evaporating carrier liquid. This allows the pigment to settle into the pores before it can be wiped away. If you use a cheap, watery pen from a big-box discount bin, you are just staining the surface. You want something with a high solids content. I have seen guys try to use regular permanent markers or paint pens. That is a recipe for disaster. Those inks contain dyes that will bleed when they get hit with bathroom cleaners. You need a dedicated grout formula that is designed to live in a wet environment.
Cleaning rituals that define success
Cleaning the grout joints before application is the most vital step in the entire refresh process because any residual oils or soaps will act as a bond-breaker. Use a stiff-bristled brush and an alkaline cleaner to strip away organic buildup, followed by a thorough rinse with clean water to neutralize the pH of the surface. The grout must be completely dry for at least twenty-four hours to ensure that the moisture content within the cement does not push the new pigment back out of the pores. If you rush this, you are wasting your time.
I have a specific method for this. I use a phosphoric acid solution if the stains are mineral-based, but for most bathrooms, a heavy-duty degreaser is better. You have to scrub until the water stops beading on the grout. If you see water beading, there is still sealer or grease present. The pen needs to see open pores. This is the part where people get lazy. They want the quick fix. But if you don’t do the mechanical cleaning, the chemical bond fails. It is the same reason I spend so much time on subfloors. The surface is a liar. The foundation is the truth. For more advanced cleaning techniques, you can check out tile cleaning tips for a sparkling bathroom in 2025 to get that base layer perfect.
| Material Type | Porosity Level | Pen Suitability | Expected Durability |
|---|---|---|---|
| Sanded Grout | High | Excellent | 2-3 Years |
| Un-sanded Grout | Medium | Good | 1-2 Years |
| Epoxy Grout | Low | Poor | Not Recommended |
| Cementitious Thin-set | High | Moderate | 6-12 Months |
Application technique for a lasting bond
Applying the grout pen requires a steady hand and a process of depressing the nib to prime the flow of ink before following the grout lines in long, continuous strokes. You should work in small sections, roughly two feet by two feet, and keep a damp microfiber cloth nearby to immediately wipe away any excess ink that gets onto the tile face. Precision during this stage prevents the need for heavy scraping later, which could damage the tile glaze or the newly applied color. If the nib gets frayed from the rough sand in the grout, flip it over or replace it immediately.
The pressure you apply matters. If you press too hard, you flood the joint. If you press too light, you only coat the high spots. You want to see the ink being sucked into the grout. That is the sound of success. It is like watching wood soak up stain. If the ink sits on top like a bead, your grout is still sealed or it is too wet. Stop immediately if that happens. Go back to the prep. I have seen people try to do an entire bathroom in twenty minutes. It should take you hours if you are doing it right. You are painting miles of tiny canyons. Treat it with that level of respect.
The baseboard connection
Integrating the grout refresh with a check of your baseboards and transitions ensures that the perimeter of the floor is as clean and sealed as the center. Bathrooms often suffer from moisture wicking into the bottom of baseboards, causing paint to peel or wood to rot, which can eventually lead to subfloor failure if left unaddressed. While you are on your knees working on the grout, inspect the caulk line between the floor and the wall to ensure it is intact and flexible. This is a great time to look into chic baseboard designs that transform rooms in 2025 if your current trim is looking dated.
Most people ignore the edges. They focus on the middle of the room. But the edges are where the water goes to hide. If your baseboards are bloated, you have a bigger problem than ugly grout. I always tell people to check the expansion gap. Even in a tiled room, there should be a small gap at the perimeter covered by the trim. If the tile is tight against the wall, the grout will crack as the house shifts. A grout pen won’t fix a structural crack. It only fixes a color problem. If you need to refresh without a full replacement, consider how to refresh grout without replacing it for a more comprehensive approach.
“Grout is not just a filler; it is the shock absorber of the tile system.” – TCNA Technical Manual
The checklist for a professional finish
- Deep clean the joints with an alkaline degreaser and a stiff brush.
- Rinse the area twice with distilled water to remove all chemical residue.
- Allow the bathroom to dry for a full twenty-four hours with a fan running.
- Test the grout pen in an inconspicuous corner or inside a closet.
- Apply the pen in slow, controlled movements to ensure deep penetration.
- Wipe excess from tiles within sixty seconds of application.
- Let the pen cure for forty-eight hours before exposing it to direct water.
- Seal the entire floor with a high-quality penetrating sealer after the pen is cured.
When a pen is not enough
There are specific conditions where a grout pen will fail, such as when the grout is crumbling, the tiles are loose, or there is evidence of mold growth beneath the surface. If the grout is soft enough to be scraped out with a fingernail, the Portland cement has reached its end of life and no amount of pigment will save it. In these cases, you must remove the old grout and install new material, potentially exploring grout restoration secrets for long-lasting results to avoid a repeat of the failure. Don’t put lipstick on a pig. If the subfloor is flexing, your grout will always fail.
I have seen homeowners try to use grout pens to cover up black mold. That is a dangerous game. Mold is a living organism. If you paint over it, it will just eat the acrylic binder and come back stronger. You have to kill the mold first with a specialized fungicide. If the mold is deep in the thin-set, you have to pull the tile. There is no shortcut for safety. I once worked a job where the subfloor was so rotted from a slow leak that the tiles were floating on a layer of mush. The owner had been using a grout pen every month to hide the cracks. By the time I got there, the joists were compromised. Know when to quit the cosmetic stuff and call a pro.
Maintenance and long-term structural integrity
Maintaining your newly refreshed grout involves avoiding harsh acidic cleaners that can strip the acrylic pigment and instead using pH-neutral solutions for weekly mopping. High-pressure steam cleaners should also be used with caution, as the intense heat can sometimes soften the binders in the grout pen ink and cause it to lift. If you want the refresh to last for years rather than months, you must manage the humidity in the bathroom by using a high-CFM exhaust fan during and after every shower. This prevents the standing moisture that leads to pigment degradation.
Think about the environment of a bathroom. It is a tropical rainforest inside a box. The expansion and contraction of materials is constant. If you have a small space, you might look for showers with a style trendy ideas for small bathrooms to see how modern designs handle moisture differently. Newer installations often use epoxy grouts or large-format tiles to minimize grout lines. But if you are stuck with old-school four-inch squares, the pen is your best friend. Just don’t expect it to be a permanent shield. It is a maintenance item, like changing the oil in your truck. Do it right, do it often, and your floor will outlive you. If you ever get in over your head, don’t hesitate to contact us for professional advice on your flooring architecture. We have seen it all, from the best showers that wow modern designs for 2025 to the worst subfloor disasters imaginable.