
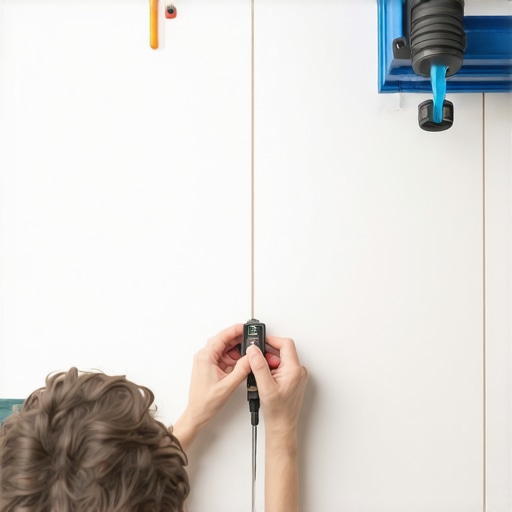
The myth of the level subfloor
Scribing baseboards to a tiled floor requires a compass to transfer the unique undulating profile of the floor onto the trim material. This process eliminates gaps caused by tile lippage or subfloor deflection. Without a proper scribe, the baseboard sits on high points, leaving unsightly shadows in the valleys. Most guys skip the leveling compound. They think the underlayment will hide the dip. It won’t. I spent three days grinding concrete on a job last month just so the floor wouldn’t click like a castanet. When you are dealing with baseboards and tile, you are dealing with two different worlds of tolerance. Tile is rigid. Wood is moody. When you combine them, you need a compass. The floor is never flat. Even a high end porcelain installation with a perfect layout will have microscopic variations in grout height and tile thickness. If you slap a straight piece of MDF or pine against that surface, you are going to see gaps. Those gaps are where dust, moisture, and insects live. A professional does not rely on caulk to hide a quarter inch gap. We use the laws of geometry to make the wood mimic the stone. This is the difference between a builder grade hack job and a master installation. When I walk into a room, the first thing I look at is the connection between the base and the floor. If I see a thick bead of acrylic caulk, I know the installer was lazy. If I see a tight wood to tile fit, I know I am looking at the work of a craftsman who knows how to use a compass. You can find more [chic baseboard designs that transform rooms in 2025](https://elegantfloorz.com/chic-baseboard-designs-that-transform-rooms-in-2025) but none of them look good if they are not scribed properly.
The tool selection mistake most rookies make
A high quality mechanical compass provides the most accurate transfer of height variations from tile to baseboard. The tool must be locked at a fixed width to ensure the profile remains consistent across the entire length of the board. Accuracy within one thirty second of an inch is the professional benchmark. You cannot use a cheap plastic school compass for this. You need something with a locking nut. The vibration of dragging a metal point across a textured tile or a sanded grout line will cause a cheap tool to wander. Once that happens, your line is garbage. You might as well be guessing. I prefer a solid brass or steel divider with a replaceable graphite lead. The lead needs to be sharp. A blunt point creates a thick line, and a thick line leads to a loose fit. I have seen guys try to use a block of wood and a pencil. That works for rough framing, but not for finish carpentry. We are talking about the intersection of your expensive floor and your wall. It deserves precision. Before you even touch the compass, you need to ensure the tile is clean. Any grit or dried mortar will throw off your measurement. If you need help with the prep, see these [tile cleaning tips for a sparkling bathroom in 2025](https://elegantfloorz.com/tile-cleaning-tips-for-a-sparkling-bathroom-in-2025). The goal is a smooth glide for the compass point.
“A floor is only as good as the subfloor beneath it; deflection is the enemy of every joint.” – Master Flooring Axiom
The physics of the scribe line
Transferring the profile of a floor involves maintaining a perfectly vertical orientation of the compass throughout the entire length of the board. Any tilt in the tool will introduce a cosine error, resulting in a line that does not accurately reflect the floor heights. This geometric precision ensures a tight fit against tile. When you set your compass, you are measuring the largest gap between the bottom of the baseboard and the floor. You find the highest point on the tile, set the board level, and then open the compass to that maximum distance. As you drag the point along the tile, the lead marks the wood. It seems simple, but the chemistry of the wood grain makes it tricky. If you are using a soft wood like pine, the lead can catch on the latewood rings. If you are using MDF, the dust can clog the line. You have to understand how the light hits that line when you are at the saw. You are not just cutting a line. You are removing material to accommodate the physical reality of the floor. This is where the 1/8 inch that ruins everything comes into play. If your compass is off by even a few degrees, the cut will be too short or too long. You need to be aware of the moisture content in the air too. In high humidity areas like Houston, the wood will expand before you even get it nailed. In a dry climate like Phoenix, it will shrink. You have to acclimate your material or all that scribing is for nothing. For more on how to handle different styles, look at these [baseboards makeover ideas to elevate your space](https://elegantfloorz.com/baseboards-makeover-ideas-to-elevate-your-space).
The 1/8 inch that ruins everything
Lippage occurs when the edge of one tile is higher than the adjacent tile, creating a vertical offset that the baseboard must navigate. Professional standards from the TCNA suggest that lippage should not exceed 1/32 of an inch for most installations. Scribing accounts for these inevitable variations. If you ignore lippage, your baseboard will teeter. It will be like a seesaw. You nail one end and the other end pops up. Then you try to nail the middle and you split the wood. This is why I spend so much time on the subfloor. If the subfloor is moving, the tile is moving. If the tile is moving, your scribe line is a moving target. I always check for deflection before I start. I use a ten foot straight edge. If I see more than 3/16 of an inch of variation over ten feet, I know I have work to do. Scribing is the final step in a long chain of quality control. It is the visible proof that you did the work. If you are working in a bathroom, you also have to worry about the grout. Grout lines are canyons for a compass point. You have to bridge those gaps smoothly. If your grout is looking rough, you might want to look into [grout restoration secrets for long lasting results](https://elegantfloorz.com/grout-restoration-secrets-for-long-lasting-results) before you install the new baseboards. Clean grout makes for a cleaner scribe line.
| Material Type | Expansion Coefficient | Recommended Gap | Scribe Difficulty |
|---|---|---|---|
| Solid Oak | High | 1/2 Inch | Moderate |
| MDF Trim | Medium | 1/4 Inch | Easy |
| PVC Trim | Low | 1/8 Inch | Easy |
| Porcelain Tile | Negligible | N/A | N/A |
The geometry of the cut and back beveling
Cutting a scribed line requires a jigsaw or a table saw with a tilting arbor to create a back bevel. This back bevel ensures that only the front visible edge of the baseboard touches the tile, allowing for a tighter fit and easier adjustments during the final installation phase. When you follow the line with your jigsaw, you do not cut straight up and down. You angle the blade. You want the back of the board to be shorter than the front. This is a secret that many new guys miss. By removing more material from the back, you create a sharp edge on the front. This edge can be slightly crushed or sanded to fit perfectly against the tile. It is about managing the contact points. If you have a full three quarters of an inch of wood trying to sit on a textured tile, it will never be perfect. But if only the front 1/16 of an inch is making contact, it will look like the wood grew right out of the floor. This is where you need a steady hand. I use a fine tooth blade. A rough blade will tear the fibers and ruin the line. If you are working with pre-painted trim, you have to be even more careful. One slip and you are starting over. It is a slow process. It is tedious. But the result is a floor that looks like a million bucks. For those interested in the environmental side, consider [eco-friendly tile solutions for sustainable homes in 2025](https://elegantfloorz.com/eco-friendly-tile-solutions-for-sustainable-homes-in-2025) as your base layer.
- Ensure baseboard is level before starting the scribe.
- Lock the compass nut tightly to prevent width changes.
- Keep the compass point perpendicular to the wall surface.
- Use a sharp 2H lead for a fine, visible line.
- Back bevel the cut at a 15 to 30 degree angle.
- Test fit the board before applying any adhesive or nails.
- Sand the scribe line lightly for a perfectly smooth finish.
Why your subfloor is lying to you
Subfloors often appear flat to the naked eye but contain subtle slopes and dips that become apparent only when a straight baseboard is placed against them. These imperfections are magnified by tile installations that do not use self-leveling underlayment. Scribing is the only manual correction for these structural flaws. Every house settles. Joists dry out and shrink. Plywood delaminates. When you lay tile over a problematic subfloor, the tile follows the curve. Then you come in with a rigid piece of baseboard and wonder why it looks like a roller coaster. I have seen houses where the floor dropped an inch over six feet. You cannot fix that with caulk. You have to scribe. But you also have to understand why the floor is dropping. Is it a foundation issue? Is it moisture in the crawlspace? I always carry a moisture meter. If that subfloor is over 12 percent moisture, I am not installing anything. Wood and water do not mix. If the subfloor is wet, the baseboard will suck up that moisture and swell. Then your perfect scribe line turns into a buckled mess. It is all connected. The physics of the house affects the chemistry of the wood which affects the geometry of your cut. If you want to see how this fits into a larger design, check out [showers that wow modern designs for 2025](https://elegantfloorz.com/showers-that-wow-modern-designs-for-2025). The same principles of precision apply there too.
“A floor is only as good as the subfloor beneath it; deflection is the enemy of every joint.” – Master Flooring Axiom
The ghost in the expansion gap
Expansion gaps are essential at the perimeter of every tile and wood floor to allow for seasonal movement caused by temperature and humidity changes. A scribed baseboard must cover this gap without being pinned so tightly that it restricts the natural movement of the flooring material. People think that once the tile is down, it is static. It is not. It expands and contracts. Not as much as wood, but it moves. If you nail your baseboard down too hard against the tile, you are locking the floor in place. Something has to give. Usually, it is the grout. Or the tile will tent and crack. You have to find the balance. You want the baseboard to touch the floor, but not crush it. This is why the back bevel is so helpful. It gives the floor a little room to breathe underneath the trim. It is a structural engineering challenge disguised as a trim job. If you are dealing with a bathroom, you also have to worry about the waterproof membrane. Don’t go driving nails through your waterproofing. Use a high quality adhesive if you have to. If you are looking to refresh things without a full tear out, see [how to refresh grout without replacing it](https://elegantfloorz.com/how-to-refresh-grout-without-replacing-it). It makes the final scribing process much more rewarding when the background looks new. You can also [contact us](https://elegantfloorz.com/contact-us) for specific advice on tricky layouts. Scribing is an art, but it is an art built on a foundation of cold, hard physics. Get your compass, sharpen your lead, and stop trusting your eyes. Trust the tool. The tool does not lie. The floor does. “