
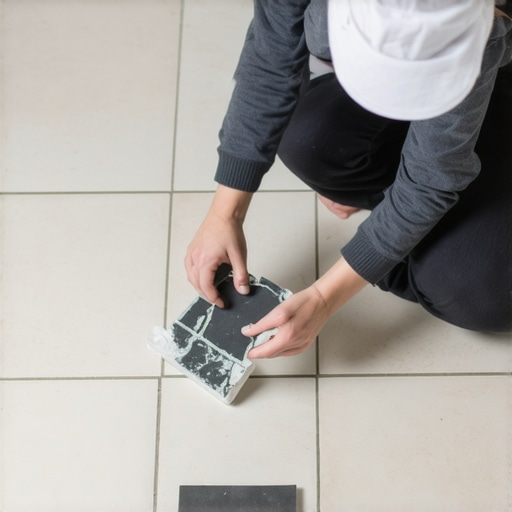
You think you can just grab a hammer and go to town on a single cracked tile. That is how you end up replacing half a bathroom. Most guys skip the leveling compound. They think the underlayment will hide the dip. It won’t. I spent three days grinding concrete on a job last month just so the floor wouldn’t click like a castanet. If you want to swap out one piece of ceramic or porcelain without ruining the surrounding field, you have to treat it like a bomb disposal. One wrong move and the vibration travels through the grout line, chipping the adjacent glaze, and then you are looking at a three-day job instead of a three-hour one. It requires a cold, calculated approach to physics and chemistry. You need to understand how that thin-set has crystallized over the years and how to break its bond without shaking the house apart. It is not about strength, it is about surgical precision and knowing exactly when to stop. Smelling that dust, feeling the vibration in your palm, and hearing the hollow ring of a failing bond, that is the life of a real installer. We do not do pretty. We do permanent.
The surgery of the ceramic surface
To swap out a single broken tile you must first isolate the unit by removing the surrounding grout entirely with a carbide-tipped tool. This prevents kinetic energy from a hammer strike from vibrating through the floor and cracking adjacent tiles. Once the grout is gone, drill relief holes in the center to weaken the structural integrity of the damaged piece before careful extraction. Every tile installation is a tensioned system. When you have a floor where the grout is still intact, that floor acts as a single, monolithic sheet. If you hit one tile, the energy waves move through the grout joints like ripples in a pond. You have to cut those ripples off. Use a manual grout saw or an oscillating tool with a diamond blade. Go deep. You want to see the subfloor or the backer board in that gap. Only then is the tile truly an island. If you leave even a tiny bridge of grout, you will chip the neighbor. I have seen it a thousand times. People get lazy. They think a little bit of sand won’t hurt. Then they swing the hammer and suddenly they have two broken tiles. It is a domino effect that ruins the profit on a job or the weekend for a DIYer. Take your time. Clear the perimeter. Use a vacuum to keep the channel clean so you can see your progress.
The brutal truth of the hammer and chisel
Removal of the center mass requires a center-out approach using a masonry bit to create a starting point for the chisel. Start by drilling several holes in a star pattern at the center of the tile, which creates weak points where the ceramic can fracture inward. This ensures that the force of your strikes moves away from the edges of the surrounding good tiles. Most people make the mistake of trying to pry from the edge. That is a death sentence for your floor. If you stick a chisel under the edge of a tile and pry, you are using the neighbor tile as a fulcrum. You will crush the edge of the good tile every single time. Instead, you work from the center. Strike the center where you drilled your holes. The tile will break into smaller, manageable chunks. Use a small, one-inch masonry chisel. Hold it at a forty-five-degree angle. You are not trying to penetrate the subfloor. You are trying to shear the tile away from the adhesive. Listen to the sound. A high-pitched ‘tink’ means the bond is still holding. A dull ‘thud’ means you have successfully separated the ceramic from the thin-set. It is a slow, methodical process that requires patience. If you rush, you will gouge the backer board, and then you have a whole new set of problems involving moisture barriers and structural integrity.
“A floor is only as good as the subfloor beneath it; deflection is the enemy of every joint.” – Master Flooring Axiom
The chemical war against old thinset
Clearing the old adhesive is the most dangerous part of the job because you are working directly against the subfloor. You must remove enough thinset to allow the new tile to sit flush with the existing ones, requiring a depth of at least an eighth of an inch of clear space. Use a wide, flat chisel to scrape the surface until it is clinical and smooth. Thinset is not just glue. It is a cementitious product that forms a mechanical bond. It grows crystals into the pores of the tile and the pores of the concrete or backer board. When you remove a tile, you usually leave a mountain range of dried mortar behind. You cannot just put new thinset over old thinset. It will sit too high. You will have a lip. Lippage is the mark of an amateur. You need to get back down to the original substrate. If you are working on a concrete slab, you can be aggressive. If you are on a wood subfloor with a cement board, be careful. You do not want to tear the fiberglass mesh of the backer board. If you do, you lose the strength of the system. I have seen guys use grinders indoors for this. Do not be that guy. The dust will permeate every inch of the house. Use a sharp hand scraper and a vacuum. It is about sweat, not speed. You need that surface to be as flat as a pool table before the new piece goes in. Check out grout restoration secrets for long-lasting results to understand how the bond works with the surrounding material.
Why your subfloor is lying to you
Subfloors often hide structural issues like rot or deflection that caused the tile to crack in the first place. If you find the wood beneath the tile is soft or the concrete is cracked, simply replacing the tile is a temporary fix that will fail within months. You must address the movement in the substrate before the new tile is bonded. Sometimes a tile breaks because someone dropped a cast-iron skillet. But usually, it breaks because the house moved. If you pull up a tile and the thinset is cracked in a straight line, you have a moving crack in your slab. If you just glue a new tile over that, the new tile will crack in the exact same spot. You need a crack isolation membrane. This is a thin, rubbery layer that allows the slab to move without telegraphing that movement to the tile. It is the difference between a repair that lasts a year and one that lasts twenty. People think they can save five dollars by skipping the membrane. They can’t. The physics of the house don’t care about your budget. The floor is constantly expanding and contracting. If you do not account for that, the floor will win every time. It is a structural engineering challenge, not a craft project. We are managing forces of thousands of pounds of pressure. Respect the slab.
| Material Type | Removal Difficulty | Risk Factor | Adhesive Choice |
|---|---|---|---|
| Ceramic | Moderate | High | Modified Thinset |
| Porcelain | High | Low | Polymer-Modified |
| Natural Stone | High | Extreme | White Thinset |
The anatomy of a perfect bond
A perfect bond requires one hundred percent mortar coverage on the back of the tile to prevent hollow spots. Use a notched trowel to create ridges, then ‘back-butter’ the tile by spreading a thin layer of mortar on the tile itself before pressing it into the floor. This creates a vacuum-like seal that prevents future cracking. When you press the tile down, you should move it slightly back and forth to collapse the ridges. This ensures there are no air pockets. An air pocket is a weak point. If a woman in high heels steps on a hollow spot, the tile will snap. You can hear a hollow spot by tapping the floor with a screwdriver handle. It sounds like a drum. A solid tile sounds like a rock. In showers that wow modern designs for 2025, this bond is even more vital because water will find any void you leave behind. If water gets behind the tile, it will rot the thinset and the whole wall will eventually fail. You have to be meticulous. Use a level to make sure the new tile is perfectly flush with the neighbors. Use spacers to keep the lines straight. Do not trust your eyes. Trust the tool. The chemistry of the thinset needs time to work. Do not walk on it. Do not touch it. Let those crystals grow and lock that tile into place.
“Proper coverage means no voids; a hollow tile is a ticking time bomb.” – Master Flooring Axiom
The grout color match nightmare
Matching old grout is nearly impossible because of oxidation, dirt, and UV fading over time. To get a close match, you must scrape out a sample of the old grout and compare it to a wet color chart, or use a grout stain to blend the new repair into the rest of the floor. Always mix your grout with less water than you think you need to ensure maximum strength. Grout is porous. It absorbs everything. If the floor is five years old, the ‘Alabaster’ grout you buy today will not match the ‘Alabaster’ grout in the floor. It is just a fact of life. You can try to clean the existing grout first with tile cleaning tips for a sparkling bathroom in 2025 to see the true color. If it still doesn’t match, you might have to use a colorant on the whole floor to make it uniform. When you apply the grout, pack it into the joint. Do not just smear it over the top. Use a rubber float at a forty-five-degree angle. This pushes the grout deep into the channel. Wipe it down with a damp sponge, not a wet one. Too much water will wash out the pigment and weaken the cement. You want a smooth, sandy finish that sits just below the edge of the tile. It should look like it was always there.
The final polish and baseboard integration
After the grout has cured for twenty-four hours, you must remove the haze and check the perimeter joints. If the broken tile was near a wall, you may need to adjust your baseboards to ensure the expansion gap is covered without putting pressure on the new tile. Proper spacing at the wall is what allows the entire floor to breathe. Never grout the tile directly against a wall or a baseboard. That should be a caulk joint. Walls move differently than floors. If you put hard grout in that corner, it will crack and crumble within a month. Check out baseboards makeover ideas to elevate your space to see how to finish those edges correctly. A professional finish is what separates a repair from a renovation. Use a microfiber cloth to buff the tile once the grout is dry. This removes the portland cement film that makes the tile look dull. If you did it right, nobody will ever know you were there. You have restored the structural integrity of the surface. You have defeated the crack. You have maintained the performance of the floor. That is the goal.
- Clear the grout perimeter entirely with a diamond blade.
- Drill relief holes in the center to fracture the tile inward.
- Chisel from the center outward at a low angle.
- Vacuum the subfloor till it is clinically clean.
- Butter the back of the new tile for total coverage.
- Match the grout by testing a small patch first.