
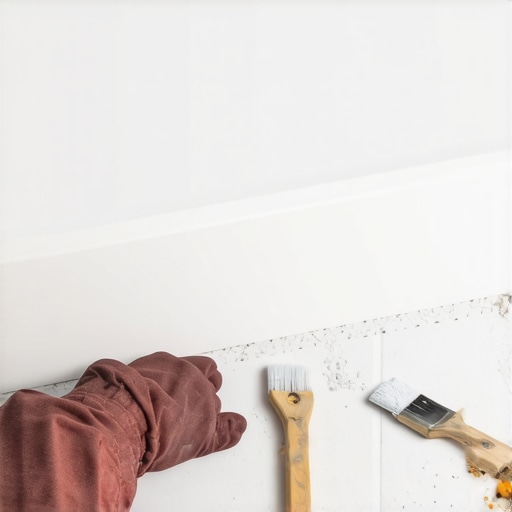
The smell of sawdust and WD-40 is my constant companion. I have spent more than twenty-five years on my knees, crawling across concrete slabs and checking moisture levels in crawlspaces. Most people look at a bathroom and see a place to brush their teeth. I see a high-stakes engineering environment where moisture, heat, and structural movement collide. I once spent three days grinding concrete on a job last month just so the floor would not click like a castanet because the subfloor was a mess. Most guys skip the leveling compound. They think the underlayment will hide the dip. It won’t. The same logic applies to your trim. If your baseboard has a gouge, it is not just an eyesore. It is a breach in the perimeter defense of your bathroom walls. Fixing a gouge in a bathroom requires more than just a bit of putty and a prayer. It requires an understanding of how wood fibers react to humidity and how chemical bonds hold up against the steam of a morning shower. When you see a deep scar in your molding, you are looking at crushed cellulose. Repairing it requires a professional approach to grit progression and resin selection.
The anatomy of wood fiber damage
Baseboard gouges represent mechanical failures where the cellular structure of the wood or MDF has been compressed or removed. In a bathroom setting, exposed wood fibers will rapidly absorb ambient moisture, leading to swelling, rot, and paint failure. You must seal the internal grain before applying any topcoat finish to ensure structural longevity.
Wood is not a static material. It is a bundle of straws. In a bathroom, those straws are constantly trying to drink the humidity from your shower. When you gouge a baseboard, you open up those straws. If you just paint over a gouge without a proper fill, you are trapping moisture inside the wood. This leads to the paint peeling off in six months. I have seen it a thousand times. Homeowners think they can just slap some spackle on it. Spackle is for drywall. It has no structural integrity and it shrinks. In a bathroom, shrinkage is your enemy. You need a filler that handles the expansion and contraction cycle of the room. The physics of the bathroom perimeter are unforgiving. Every time the temperature shifts, the baseboard moves. If your filler is brittle, it will pop right out of the hole like a bad tooth. You need something with a high resin content that can bite into the remaining wood fibers and stay there through a thousand steam cycles. This is why professionals often look toward baseboards makeover ideas to elevate your space that include moisture-resistant materials from the start.
“A floor is only as good as the subfloor beneath it; deflection is the enemy of every joint.” – Master Flooring Axiom
Why your subfloor is lying to you
Subfloor levelness directly impacts how your baseboards sit against the wall and the floor. If your subfloor has a dip, the baseboard will be under tension, making gouges and cracks more likely to occur at stress points. Proper floor leveling is the first step to protecting your trim and preventing joint separation in high-moisture areas.
I have walked onto jobs where the homeowner complained about the baseboards pulling away from the wall. They thought the carpenter was lazy. The truth was the concrete slab was as wavy as the Atlantic Ocean. When the subfloor is not level, the baseboard is forced into a shape it doesn’t want to be in. This creates internal tension. Then, you accidentally hit it with a vacuum cleaner or a heavy laundry basket, and instead of a small dent, the wood splinters or gouges deeply. The tension makes the wood more brittle. If you are dealing with tile, the situation is even more complex. The transition between the tile and the baseboard is a prime spot for water intrusion. If the floor is uneven, the grout line at the bottom will crack. This is why I always tell people to look at grout restoration secrets for long-lasting results because a solid floor foundation protects everything above it, including your molding. If you don’t fix the floor, you will be repairing the baseboards every year.
The chemical bond of wood fillers
Two-part wood fillers and epoxy resins create the strongest bond for bathroom baseboard repairs. These materials undergo a chemical reaction that results in minimal shrinkage and maximum water resistance. Water-based fillers are easier to clean but often fail in high-humidity environments where moisture vapor transmission is high.
When you are picking a filler, look at the label. If it says it cleans up with water, it might be okay for a bedroom, but it is risky for a bathroom. I prefer a two-part polyester filler. It smells like a body shop, but it works. You mix a small amount of hardener with the resin, and you have about ten minutes to work. This stuff doesn’t just sit in the hole. It cross-links with the wood. Once it cures, it is actually harder than the wood itself. This is vital because bathrooms are high-traffic, high-abuse zones. You want a repair that can handle being hit by a mop or a sliding bathroom door. When you apply the filler, don’t just smooth it flat. Leave it a little proud, meaning it should stick out slightly past the surface. All fillers shrink a tiny bit as the solvent evaporates or the chemical reaction completes. If you finish it flush while wet, you will have a ghost of a dent when it dries. You want to sand it back down to the level of the wood once it is fully cured. This ensures a perfectly flat plane that will disappear under a coat of paint. For those looking for how to refresh grout without replacing it, the same principle of choosing the right chemical compound applies to your floor joints.
| Filler Type | Shrinkage Rate | Moisture Resistance | Best Use Case |
|---|---|---|---|
| Spackle | High | Very Low | Drywall holes only |
| Water-based Wood Filler | Moderate | Medium | Low-traffic dry areas |
| Two-Part Polyester Resin | Minimal | High | Bathrooms and exteriors |
| Epoxy Putty | Zero | Excellent | Structural wood repair |
The 1/8 inch that ruins everything
Precision in sanding determines whether a baseboard repair is invisible or a glaring mistake. Using a sanding block is mandatory to maintain a flat surface across the repair site. Grit progression starting from 80 grit and ending at 220 grit ensures the wood grain is closed and ready for primer adhesion.
If you sand with your bare fingers, you will create a dip. Your fingers are soft and will press harder into the filler than the surrounding wood. You need a hard block. This is basic physics. A block spans the gap and only cuts the high spots. I start with 80 grit to knock down the bulk of the filler. Then I move to 120 grit to remove the scratches from the 80. Finally, I hit it with 220. If you go higher than 220, you risk polishing the wood so much that the paint won’t stick. If you stay lower than 220, you will see sanding marks through the paint. It is a delicate balance. In a bathroom, the lighting is often harsh and overhead. This highlights every imperfection. If you don’t get that 1/8 inch of repair perfectly flat, it will cast a shadow every time you turn on the vanity light. It will look like a scar. While you are down there, check the transition to your showers that wow modern designs for 2025 to ensure no moisture is leaking from the stall into the baseboard area. A repair is useless if a leak is happening three feet away.
The ghost in the expansion gap
Expansion gaps are required for all flooring types to prevent buckling and baseboard damage. Without a proper gap, the floor will press against the baseboard, causing gouges, cracks, and warped molding. Siliconized acrylic caulk should be used to seal the bottom of the baseboard while allowing for micro-movements.
Floors move. They breathe. If you have tile, it expands and contracts with the house. If you have LVP or hardwood, the movement is even more pronounced. If the installer didn’t leave a gap between the floor and the wall, the floor will eventually hit the baseboard. When that happens, something has to give. Usually, the baseboard gets pushed up, or the nails start to pull through the wood. This creates cracks and gouges that seem to appear out of nowhere. I always check the gap before I start a repair. If the floor is tight against the trim, I might have to undercut the baseboard or pull it off and trim the floor. You cannot fight the physics of expansion. In the humid environment of a bathroom, wood can expand significantly. This is why eco-friendly tile solutions for sustainable homes in 2025 are becoming popular, as they often offer better dimensional stability. But regardless of the material, you must respect the gap. When you caulk the bottom of your baseboard, use a high-quality product that remains flexible. Don’t use standard bathroom silicone for the top of the baseboard where it meets the wall, as paint won’t stick to it. Use a paintable siliconized acrylic.
- Remove loose wood fibers from the gouge with a sharp utility knife.
- Clean the area with denatured alcohol to remove soap scum and oils.
- Mix the two-part filler according to the manufacturer’s exact ratios.
- Apply the filler using a flexible steel putty knife held at a 45-degree angle.
- Sand the repair using a sanding block once the filler is no longer tacky.
- Apply a high-quality oil-based or specialized wood primer.
- Finish with two coats of semi-gloss bathroom-grade paint.
The humidity factor in bathroom repairs
Regional climate conditions like the high humidity in coastal areas or the dry heat of the desert affect repair cure times. In damp environments, wood fillers may take twice as long to cure, and moisture trapped in the wood can cause filler rejection. Dehumidifiers should be used in the bathroom for twenty-four hours before and after the repair process.
If you live in a place like Houston or Miami, the air is thick enough to drink. In those climates, a baseboard is never truly dry unless you control the environment. I always tell people to run the AC or a dehumidifier before they try to fix their trim. If the wood is holding 15 percent moisture, your filler is going to struggle to bond. Ideally, you want that wood at 6 to 9 percent moisture. I use a pin-type moisture meter to check. It might seem like overkill for a gouge, but I don’t like doing things twice. If you are in a dry place like Phoenix, the wood might be so dry it’s brittle. In that case, you have to be careful not to split the baseboard when you are sanding or nailing. The regional building codes often have specific requirements for moisture barriers, especially near showers with a style trendy ideas for small bathrooms. Always ensure your repair doesn’t compromise these barriers. If you find your baseboards are constantly rotting or gouging, it might be time to look at chic baseboard designs that transform rooms in 2025 which utilize PVC or other moisture-proof composites.
“A floor is only as good as the subfloor beneath it; deflection is the enemy of every joint.” – Master Flooring Axiom
The optical illusion of a perfect finish
Light refraction and paint sheen play a major role in hiding or revealing baseboard repairs. Semi-gloss and high-gloss paints are standard for bathrooms but telegraph every imperfection in the underlying surface. Primer is mandatory to seal the porous filler and ensure uniform paint absorption.
The biggest mistake people make is skipping the primer. Wood filler is incredibly thirsty. If you put paint directly over it, the filler will suck the resin out of the paint, leaving a dull spot. This is called flashing. You will see exactly where the repair was because the sheen won’t match the rest of the board. You need a primer that is designed to seal. I prefer a shellac-based primer for small repairs. It dries in fifteen minutes and blocks everything. Once the primer is on, you can see if you missed any small scratches. If you did, this is the time to hit it with a tiny bit of glazing putty. Then you paint. Two thin coats are always better than one thick coat. In a bathroom, you want a paint that has antimicrobial properties to prevent mold growth in the areas where the baseboard meets the tile cleaning tips for a sparkling bathroom in 2025. If you take the time to do the prep work, the repair will be invisible. If you rush it, you will see that gouge every time you sit down. It will haunt you. Do it right the first time. If you have questions about specific materials or need a professional eye, feel free to contact us. We have seen every type of flooring disaster and know how to fix them correctly.