
The brutal reality of the slab
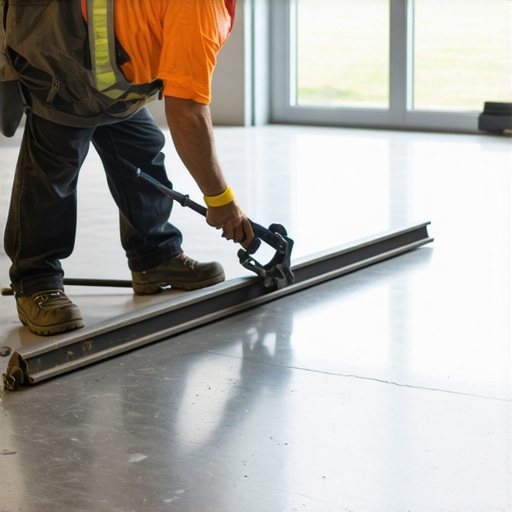
To level an uneven concrete floor for tiling, you must identify high spots using a straightedge, grind them down with a diamond cup wheel, and fill low spots using a high-strength self-leveling underlayment after applying a dedicated substrate primer to ensure a chemical bond. This process requires precision measurements with a laser level to ensure the surface meets the industry standard of 1/8 inch variation over 10 feet. Most guys skip the leveling compound. They think the underlayment will hide the dip. It won’t. I spent three days grinding concrete on a job last month just so the floor wouldn’t click like a castanet. That job was a wake-up call for the homeowner. They had purchased expensive large-format tile, but their slab looked like the rolling hills of Kentucky. If we had laid those tiles without addressing the substrate, the lippage would have been a tripping hazard, and the grout would have cracked within weeks. Concrete is a living, breathing material. It shifts, it holds moisture, and it rarely stays flat after the initial pour. Most residential slabs are finished with a power trowel that leaves a surface too smooth for chemical adhesion but too wavy for modern flooring. You have to approach this as a structural engineering problem. If the foundation is a lie, the finish will be a disaster.
[IMAGE_PLACEHOLDER_1]
The physics of a flat plane
Flatness and levelness are two different animals in the flooring world. A floor can be perfectly flat but sit at a three-degree angle, or it can be level on average but full of pits and birdbaths. For a successful tile installation, flatness is the priority. When you are working with showers or large open areas, the substrate must be within a very tight tolerance. Large format tiles are particularly unforgiving. Because they do not bend, any dip in the concrete creates a hollow spot. When someone steps on that spot, the tile flexes, the bond fails, and the grout joints begin to crumble. This is why the TCNA is so strict about substrate preparation. I have seen beautiful showers that wow residents initially but fail within a year because the installer did not check the floor for deflection or levelness before the pan was set. It is a matter of long-term durability. You are fighting against gravity and the brittle nature of ceramic and stone.
“A floor is only as good as the subfloor beneath it; deflection is the enemy of every joint.” – Master Flooring Axiom
The science of self leveling underlayment
Self-leveling underlayment, or SLU, is a high-tech cementitious product modified with polymers. It is not just wet concrete. It is a chemical solution designed to flow and seek its own level. However, it is not a magic wand. You cannot just dump it on the floor and walk away. The chemistry depends on the water-to-powder ratio. If you add too much water, you weaken the crystalline structure of the cement, leading to a dusty, soft surface that will not hold a bond. If you add too little, the product will not flow, leaving you with ridges that are harder than the original slab. You must also consider the Concrete Surface Profile or CSP. For most underlayments, you need a CSP of 2 or 3, which feels like fine-grit sandpaper. This is achieved through grinding or shot-blasting. Once the surface is prepped, the primer is the most essential step. The primer prevents the dry concrete from sucking the moisture out of the SLU too fast. If the moisture leaves the mix before the chemical hydration is complete, the underlayment will shrink and pull away from the edges. It is a delicate balance of timing and atmospheric conditions.
Preparation for showers and wet areas
When you are dealing with moisture, the stakes are higher. In a bathroom, you are often looking for showers with a style that fits modern minimalist trends, which often include curbless entries. Achieving a curbless entry requires the concrete to be recessed and then leveled perfectly to meet the surrounding floor. You have to calculate the slope toward the drain while ensuring the perimeter is high enough to contain the water. This is where a high-quality grout system comes into play later, but the foundation is the leveled slab. I always tell apprentices that the tile is just the skin. The concrete is the bone. If the bone is broken, the skin will bruise. This is especially true for eco-friendly tile solutions that might be thinner or made from recycled glass, as these materials have even less tolerance for subfloor movement. You must use a waterproof membrane over your leveled concrete in these zones to ensure that any minor cracks in the slab do not telegraph through to the surface.
“Surfaces must be structurally sound, clean, and free of any contaminants that may prevent a good bond.” – TCNA Installation Handbook
Subfloor prep methods comparison
| Method | Ideal Usage | Cost Factor | Drying Time |
|---|---|---|---|
| Diamond Grinding | High spots and humps | Moderate | Immediate |
| Self-Leveling Underlayment | Large dips and deep birdbaths | High | 12-24 hours |
| Feather Finishing | Minor imperfections and scratches | Low | 30-60 minutes |
| Patching Compounds | Isolating small holes or cracks | Low | 2-4 hours |
Each method has its place on the job site. Most professionals use a combination of grinding and pouring. You grind the peaks and fill the valleys. This saves money on expensive bagged goods while providing the flattest possible result. If you ignore the high spots and just try to bury them in underlayment, you end up raising the entire floor height, which creates problems at the doors and transitions. You also have to think about the baseboards. If the floor is wavy, the baseboards will show ugly gaps at the bottom. You can try to hide it with shoe molding, but a pro knows that the real fix happened before the first thin-set bag was opened. Proper leveling makes the installation of baseboards a simple task rather than a carpentry nightmare.
Step by step concrete leveling checklist
- Inspect the slab for cracks and old adhesive residue.
- Check the moisture emission rate with a calcium chloride test.
- Identify high spots with a 10-foot straightedge or laser level.
- Grind down high spots using a dust-shrouded angle grinder.
- Vacuum the floor until no dust remains to ensure primer adhesion.
- Apply the manufacturer-recommended primer with a soft-push broom.
- Mix the self-leveling underlayment to the exact water specification.
- Pour and spread the mix using a gauge rake and a spike roller to release air.
- Allow the floor to cure fully before checking for any remaining deviations.
The relationship between level floors and grout longevity
A wavy floor is the primary cause of grout failure. When tile is installed over a dip, the adhesive beneath it varies in thickness. As the thin-set cures, it shrinks. Different thicknesses shrink at different rates, pulling the tile unevenly. Furthermore, as people walk across the floor, the tiles over hollow spots experience micro-movements. This movement shears the grout away from the edge of the tile. You end up with a floor that looks old within six months. If you are already dealing with this issue, you might need grout restoration secrets to patch the damage, but the root cause remains the subfloor. For those looking to maintain their surfaces, following tile cleaning tips will not help if the grout is physically falling out. You must address the leveling during the initial build or a total tear-out is inevitable. Even if you try to refresh grout without replacing it, the fix is temporary if the tiles are still moving. Do it right the first time.
The finish with baseboards and transitions
The final touch of any flooring job is the trim. When the floor is truly level, you can install chic baseboard designs that sit flush against the tile. There is nothing worse than seeing a high-end tile job ruined by a 1/4 inch gap under the baseboard because the floor drops off at the wall. Proper subfloor prep ensures that your baseboards look intentional and integrated. It also makes for easier cleaning, as dirt won’t collect in the voids under the trim. If you have done the hard work of grinding and pouring, the finish work becomes the easiest part of the day. You won’t be fighting the material; you will be working with it. Every hour spent with the grinder saves two hours during the tile set and another two hours during the trim phase. It is about efficiency and professional pride.
Final inspection protocols
Before you move to the thin-set and spacers, do one final sweep with your laser. Look for any shadows that indicate a low spot. If you find one, use a feather-finish compound to smooth it out. Check the transitions to other rooms. Are you creating a trip hazard? Will the new tile height allow doors to swing freely? These are the questions that separate the masters from the amateurs. Flooring is not just about what you see on the surface. It is about the chemistry and the structural integrity of what lies beneath. If you treat the concrete with respect, the tile will reward you with a lifetime of service. If you rush the prep, the floor will haunt you until the day it is ripped up and replaced. Take the time. Buy the primer. Rent the grinder. Your knees and your reputation will thank you later.