
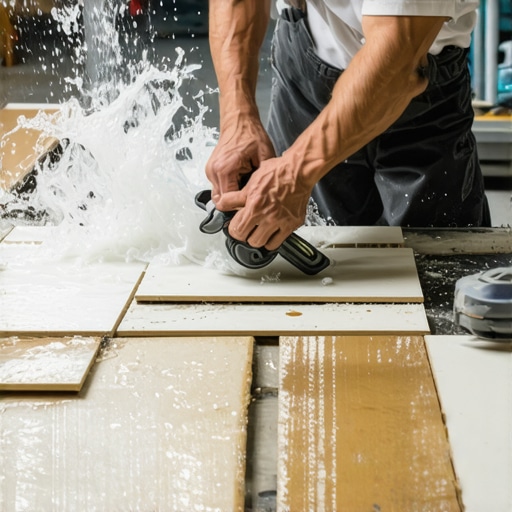
Professional techniques for finishing tile edges with a wet saw
Most guys skip the leveling compound. They think the underlayment will hide the dip. It won’t. I spent three days grinding concrete on a job last month just so the floor wouldn’t click like a castanet. When you are dealing with porcelain or high-end ceramic, every micro-dip in the subfloor is a leverage point that will eventually snap your tile or cause the grout to crumble. I have seen fifteen thousand dollar projects go to waste because the installer was too lazy to use a straightedge. You cannot hide bad prep work with a pretty tile, and you certainly cannot hide a bad cut with extra grout. Finishing an edge with a wet saw is about the intersection of physics and patience. It requires a deep understanding of how the diamond blade interacts with the mineral structure of the tile. If you rush the saw, the saw will ruin your day. My hands are permanently stained with the grey slurry of ground porcelain, and my ears still ring with the hum of a three-horsepower induction motor, but that is the price of a perfect edge.
The anatomy of a clean cut
Finishing tile edges with a wet saw requires a continuous rim diamond blade, a constant flow of clean water, and a slow, steady feed rate to prevent chipping the glaze. The process involves supporting the tile fully on the saw table, using a high-quality guide, and often performing a secondary polishing step with diamond pads to achieve a factory-grade finish. Most installers fail because they use a dull blade or do not manage the vibration of the tile as it exits the cut. [IMAGE_PLACEHOLDER]
A wet saw is essentially a grinding machine. Unlike a wood saw that uses teeth to rip through fibers, a diamond blade uses industrial-grade diamond grit embedded in a metal matrix to grind away the tile material. This grinding creates an immense amount of friction and heat. Without the water cooling the blade and the tile, the glaze on the surface of the ceramic would shatter from thermal shock. This is why the water pump is the most important part of the machine. If the water flow flickers for even three seconds, your blade will heat up, expand, and start wobbling. That wobble is what causes the jagged edges that look like they were chewed by a dog. You need a steady stream that hits both sides of the blade at the point of contact. This clears the slurry, which is the thick paste of water and ground-up tile. If that slurry stays in the cut, it acts like an abrasive that wears down your blade faster and creates more heat.
The physics of the blade and the water
The relationship between the RPM of the saw and the density of the tile determines the quality of the edge finish. Higher density materials like porcelain require a slower feed rate than softer ceramics or natural stone. The diamond blade must be dressed regularly using a dressing stone to expose new, sharp diamond particles for a clean finish. I have spent decades watching guys try to force a tile through a saw. They push and push until the motor slows down. That is a recipe for a broken tile. You should let the saw pull the tile in. Your job is just to guide it. The pressure should be no more than the weight of your hand. If you feel resistance, your blade is either dull or you are going too fast. I always check the blade tension before I start. A loose blade will vibrate, and vibration is the enemy of a clean edge. You want that blade to spin as true as a gyroscope. Even a millimeter of deflection will result in a edge that looks amateur.
“A floor is only as good as the subfloor beneath it; deflection is the enemy of every joint.” – Master Flooring Axiom
When you are cutting for showers that wow, the edges are often exposed. You cannot just hide them behind a piece of plastic trim. You need a mitered edge or a polished bullnose. To get a perfect 45-degree miter, you have to tilt the saw head or use a miter block. But here is the secret that most guys miss: don’t cut all the way to the edge of the glaze. Leave a hair of the factory edge. This prevents the sharp point of the miter from being too fragile. Once the cut is made, you come back with a hand-polishing pad. This removes the micro-chips and smooths the transition. It is the difference between a job that looks like it was done by a pro and one that looks like a DIY disaster. I have fixed too many grout lines where the installer tried to fill a huge gap caused by a bad miter. It never works.
The 1/8 inch that ruins everything
Proper edge finishing depends on maintaining a consistent 1/8 inch expansion gap around the perimeter of the room to prevent tiles from buckling or tenting. This gap is hidden by the baseboards but is essential for the structural integrity of the installation as the subfloor expands and contracts with seasonal humidity changes. I have seen beautiful floors tent up like a mountain range because the installer butt the tile tight against the drywall. There is no room for the house to breathe. You need to calculate the thermal expansion coefficient of your material. Porcelain expands very little, but the wooden subfloor beneath it is a living thing. It grows in the summer and shrinks in the winter. If your tile has no place to go, the bond will break. This is why I always check the moisture content of the subfloor before I even open a box of tile. If the plywood is at 12 percent and the room is going to drop to 6 percent in the winter, that floor is going to move.
| Blade Type | Rim Style | Best Application | Finish Quality |
|---|---|---|---|
| Continuous Rim | Smooth | Porcelain, Glass, Marble | Highest |
| Turbo Rim | Serrated | Granite, Hard Stone | Medium |
| Segmented Rim | Gapped | Concrete, Brick, Pavers | Low |
When you are working near baseboards, your edge finishing becomes even more visible. If the cut isn’t straight, you will have a massive gap that the baseboard won’t cover. Most people think they can just slap some caulk in there. Caulk is for plumbers. I want a cut that is so clean it could stand on its own. I always use a wax pencil to mark my lines. Ink from a sharpie can bleed into the pores of some stones and stay there forever. A wax pencil stays on the surface and is lubricated by the water from the saw. It gives you a clear target to follow. If you are struggling with the cut, check your saw fence. Many of the cheaper saws have fences that aren’t actually square. I use a machinist’s square to check my saw every single morning. If you are off by even a fraction of a degree, a four-foot run will be off by half an inch by the time you reach the wall.
The ghost in the expansion gap
A hidden failure point in tile installation is the accumulation of thin-set or debris within the expansion gap, which locks the floor into place and leads to cracking. Ensuring that the edges finished by the wet saw are clean of all mortar residue allows the floor to float or move as intended by the engineering specs of the adhesive and substrate. This is where the chemistry of the bond comes in. Modern thin-sets are not just mud. They are highly engineered polymers. They have a specific open time and a specific shear strength. If you leave a layer of wet saw slurry on the back of your tile, that polymer cannot bond to the ceramic. It bonds to the dust. Then, six months later, you walk across the floor and hear a hollow ‘thump.’ That is the sound of a failed bond. I always keep a bucket of clean water and a sponge next to the saw. Every tile gets wiped down the second it comes off the tray. If you let that slurry dry, it is like trying to glue something to a pile of flour.
- Inspect the diamond blade for missing segments or warping before every shift.
- Clean the water reservoir to ensure the pump is not sucking up abrasive grit.
- Verify the subfloor deflection meets L/360 standards for ceramic or L/720 for stone.
- Wipe each tile edge immediately after cutting to remove bond-breaking slurry.
- Use a 200-grit diamond hand pad to soften the sharp edge of every cut.
- Check the squareness of the saw fence using a precision machinist square.
For those looking for eco-friendly tile solutions, the precision of your wet saw cuts is even more vital. Sustainable materials like recycled glass or thin-profile porcelain are much more brittle than traditional tile. They require a specialized glass blade with a much finer diamond grit. If you use a standard porcelain blade on glass, it will shatter the back of the tile, creating a jagged edge that reflects light poorly. It looks like broken ice. You have to slow your feed rate down by half. It takes longer, but the result is a edge that looks like it was melted into place. I have spent hours on a single bathroom wall just making sure the corners lined up perfectly. It is a slow process, but that is how you build a reputation.
Why your subfloor is lying to you
Subfloors often appear level to the naked eye while hiding significant undulations that will cause lippage and edge chipping during tile installation. Using a ten-foot straightedge is the only way to verify the substrate is within the required tolerance of 1/8 inch over ten feet. I have walked onto jobs where the previous guy told the homeowner the floor was ‘good enough.’ It never is. If the floor has a hump, the tile will rock. If the floor has a dip, the tile will bridge the gap and snap when someone walks on it. You have to address these issues with a self-leveling underlayment or a grinding stone before you even think about the wet saw. If your substrate is wrong, your cuts will never look right because the tiles won’t sit on the same plane. You will have lippage, where one edge is higher than the one next to it. Lippage is the hallmark of a hack job.
When you are finishing edges for showers with a style that uses large format tiles, this becomes even more critical. Large tiles have less flexibility. They are like sheets of glass. If the wall is bowed, the edges won’t meet in the corner. You will end up with a grout joint that is 1/8 inch at the bottom and 1/2 inch at the top. It looks terrible. I use a laser level to map out the entire room before I start. I want to know exactly where the problems are. If I have to shim a wall or grind a floor, I do it. I don’t care if it takes an extra day. I would rather spend time on the prep than spend my time explaining to a customer why their new shower looks like a funhouse mirror. Once the prep is done, then the wet saw becomes a tool of precision rather than a tool of frustration.
The chemistry of the bond and the grout line
The finish of a tile edge directly impacts the longevity of the grout, as a clean and perpendicular cut provides the maximum surface area for the grout to adhere to. Jagged or undercut edges create weak points where the grout can flake away over time, especially in high-moisture environments like bathrooms. If you are dealing with old grout issues, you might want to look at how to refresh grout without replacing it, but the best way to avoid that is to do it right the first time. The grout needs to be packed into the joint. If the cut edge is smooth and clean, the grout can form a mechanical bond with the side of the tile. If the edge is covered in slurry or has been over-cut, the grout will eventually pull away. This is why I always use a diamond hand stone to slightly ‘ease’ the edge of every cut tile. It removes the razor-sharpness and creates a tiny bevel that holds the grout better. It is a small detail, but it is one that ensures the floor lasts for thirty years instead of three.
You also have to consider the type of grout you are using. High-performance epoxy grouts are much harder to work with but offer incredible durability. They are also less forgiving of bad cuts. If you have a chipped edge, the epoxy will highlight it rather than hide it. If you are using a standard cementitious grout, you have a bit more leeway, but it is still no excuse for poor craftsmanship. I treat every cut like it is going to be inspected by a diamond-cutter. If it isn’t perfect, it goes in the trash. I tell my apprentices that the trash pile is the price of education. I would rather see a hundred dollars worth of ruined tile in the dumpster than a single bad tile on the floor. That is the mindset of a master. You don’t settle for ‘okay.’ You strive for perfection in every pass of the blade. It is about the pride of the trade. It is about knowing that when you walk away from a job, that floor is solid, straight, and finished to the highest possible standard.