
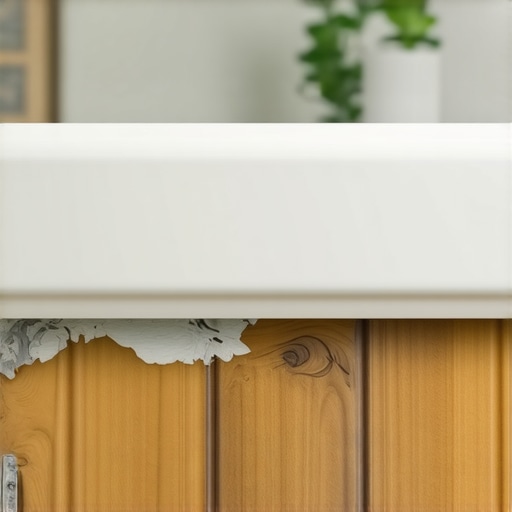
You can smell a bad job before you even see it. It is the scent of damp MDF and the faint, chemical tang of wood filler that has started to powderize and separate from the grain. I have spent over twenty-five years on my knees, crawling across every imaginable surface from white oak to porcelain tile, and if there is one thing that makes me want to throw my level through a window, it is seeing a contractor treat a bathroom baseboard like a bedroom crown molding. Wood filler is a rigid, brittle substance designed for static environments. A bathroom is anything but static. It is a high-pressure moisture chamber where humidity swings twenty percent in the time it takes you to wash your hair. Using wood filler in this environment is not just a mistake, it is a structural failure waiting to happen.
The physics of the bathroom microclimate
Bathroom baseboards fail because they are subjected to extreme hygroscopic expansion and contraction cycles that rigid wood filler cannot accommodate. The baseboard absorbs ambient moisture from the air, causing the wood fibers to swell at a microscopic level, while the filler remains inflexible. This mismatch in elastic modulus leads to the filler cracking, popping out, or trapping water behind the paint. In a high-humidity zone, your trim is essentially a living organism that breathes, and you cannot seal a breathing joint with a stone-hard product. Most installers forget that baseboards, tile, grout, and showers all interact with the same air mass. If you are not using a flexible sealant, you are building a shelf-life into your renovation that will expire before the first year is out.
Most guys skip the leveling compound. They think the underlayment will hide the dip. It won’t. I spent three days grinding concrete on a job last month just so the floor wouldn’t click like a castanet. That same mindset applies to trim. People think wood filler hides a bad cut. It hides nothing. In a bathroom, it just highlights your mistakes within six months. When I was grinding that slab, I kept thinking about the baseboards the previous guy had installed. He had packed every miter joint with stainable wood filler. By the time I arrived, the moisture from the subfloor had migrated up, the filler had turned into a gritty sand, and the corners had opened up like a hungry mouth. It looked pathetic. It was a $40,000 bathroom ruined by a $5 tube of the wrong stuff.
“A floor is only as good as the subfloor beneath it; deflection is the enemy of every joint.” – Master Flooring Axiom
Why cellulose fails where polymers thrive
Wood filler is typically a mixture of wood flour and a binder, sometimes solvent-based, sometimes water-based. It is designed to be sanded flat. However, the moment it dries, it loses its ability to move. In a bathroom, your baseboards are constantly fighting against the moisture generated by showers. When the wood swells, it puts immense pressure on that plug of filler. Since the filler cannot compress, it either crushes the surrounding wood fibers or it delaminates from the edge of the joint. Once that bond is broken, you have a direct path for liquid water to enter the end grain of your baseboard. This is how rot starts. You see it as a small crack in the paint, but underneath, the wood is drinking up every drop of floor water from the mop or the splash from the tub.
If you are looking at chic baseboard designs, you have to realize that the aesthetic is secondary to the engineering. A beautiful profile means nothing if the joints are gaping. You need a polymer-based solution, specifically a high-quality acrylic caulk with silicone additives. This material has “memory.” When the wood expands, the caulk compresses. When the wood shrinks in the dry winter months, the caulk stretches to maintain the seal. Wood filler has zero memory. It just breaks. It is a one-way ticket to a call-back, and in my business, call-backs are the death of profit. You should be focusing on baseboards makeover ideas that incorporate proper expansion gaps and flexible sealants rather than rigid patches.
The moisture cycle and the brittle bond
Let us talk about the chemistry of the wood itself. Wood is a bundle of tubes. These tubes, the xylem, are designed to move water. Even after the tree is cut, milled, and painted, those tubes want to work. In a bathroom, the moisture content of the wood can fluctuate between 6 percent and 14 percent depending on the ventilation. Wood filler is essentially a dead weight in that system. It does not absorb moisture at the same rate, and it certainly does not expand. This creates a shear force at the interface between the filler and the wood. The filler loses the battle every time. It is a mechanical certainty. If you are worried about the longevity of your space, you should also be looking at grout restoration secrets because the same principles of movement apply to your tile transitions.
| Material Property | Standard Wood Filler | Siliconized Acrylic Caulk | Two-Part Epoxy Filler |
|---|---|---|---|
| Elasticity | 0% (Brittle) | 25-35% (Flexible) | 5-10% (Semi-rigid) |
| Moisture Resistance | Low to Moderate | High | Very High |
| Sandability | Excellent | Non-sandable | Moderate |
| Shrinkage | High | Moderate | Negligible |
| Best Use | Dry area nail holes | Bathroom perimeters | Structural repairs |
The ghost in the expansion gap
Every floor needs to move. If you have installed a floating floor or even a glue-down engineered plank, the baseboard is the primary tool for hiding the mandatory expansion gap at the perimeter. When you fill the gap between the baseboard and the floor with wood filler, or even worse, fill the mitered corners with it, you are creating a rigid cage. I have seen floors buckle in the center of the room because the installer pinned the edges with heavy trim and rigid filler. The floor had nowhere to go when the humidity hit 80 percent in July. It literally lifted off the subfloor. It is a basic engineering failure. You must maintain the integrity of that gap. This is why we use base shoes or quarter rounds, but even those should be nailed to the baseboard, never the floor, and never sealed with rigid filler.
If you are dealing with tile, the stakes are even higher. Tile does not move, but the wood house frame does. The joint where the baseboard meets the tile is a transition between two completely different materials with different thermal expansion rates. If you use wood filler there, it will turn to dust in weeks. You need a color-matched caulk that matches your grout. This allows the wall to move independently of the floor. For those working on showers that wow, the transition from the wet area to the dry area trim is the most common point of failure. I always tell my clients to invest in eco-friendly tile solutions that allow for better moisture management, but the trim work is where the water eventually wins if you are lazy.
“Water is a persistent thief; it will find every rigid crack you leave behind.” – Master Flooring Axiom
The professional checklist for bathroom trim
If you want a bathroom that does not rot from the bottom up, follow these steps. Do not listen to the guy at the big-box store who says wood filler is fine because it says “interior/exterior” on the tin. He is not the one who has to replace your baseboards in three years. I am.
- Seal the back and bottom edges of your baseboards with a clear sealer before installation.
- Use a 100% silicone or a high-performance hybrid sealant for the bottom gap where trim meets tile.
- Glue your miter joints with a high-quality wood glue rather than relying on filler to bridge gaps.
- Ensure your bathroom fan is rated for the square footage to minimize the duration of high-humidity spikes.
- Always maintain a 1/8 inch gap between the baseboard and the floor to prevent capillary action.
The 1/8 inch that ruins everything
Capillary action is a silent killer in bathrooms. If your baseboard is sitting tight against a wet floor, it will suck water up behind the wood. This is why I always leave a tiny gap and fill it with a flexible, waterproof bead. If you use wood filler in this space, you are essentially providing a straw for the water. The porous nature of the wood flour in the filler acts as a wick. It pulls the water into the heart of the trim. I have torn out baseboards that looked fine on the outside, but the back was covered in black mold because the wood filler had been feeding it moisture for years. It is a disgusting, preventable mess. If you are struggling with your current setup, learning how to refresh grout might help the floor side, but the trim needs a total rethink.
When you are designing showers with a style, you are often working in tight quarters. In small bathrooms, the concentration of steam is much higher. The “zooming” effect of this moisture on your materials is magnified. Wood filler in a small powder room might survive, but in a small full bath with a shower, it is a death sentence. The saturation level of the air reached during a ten-minute shower is enough to penetrate any standard paint film. Once it hits the filler, the chemical bond begins to degrade. It is not just about aesthetics; it is about the structural integrity of your wall assembly. Keep the filler for the bedroom. Use the right polymers in the bath.
Why your subfloor is lying to you
Often, a contractor will use wood filler to hide the fact that the baseboards do not sit flush against the floor because the subfloor is wavy. This is a hack move. If your subfloor is uneven, you do not fill the gap with wood filler. You scribe the baseboard to the floor. It takes longer. It requires a compass and a jigsaw. It requires actual skill. But it means the wood follows the contour of the floor perfectly. When you scribe and leave that tiny 1/8 inch expansion gap for a flexible bead, you are doing it the right way. Wood filler is the mark of a man who is in a hurry and does not care about the house. I care about the house. I care about the fact that your tile cleaning routine should not involve scrubbing mold off your trim because you used the wrong products. Refer to tile cleaning tips to see how moisture management is part of a larger system. If you have questions about specific installations, you can always contact us for a deeper dive into the physics of your specific home.