
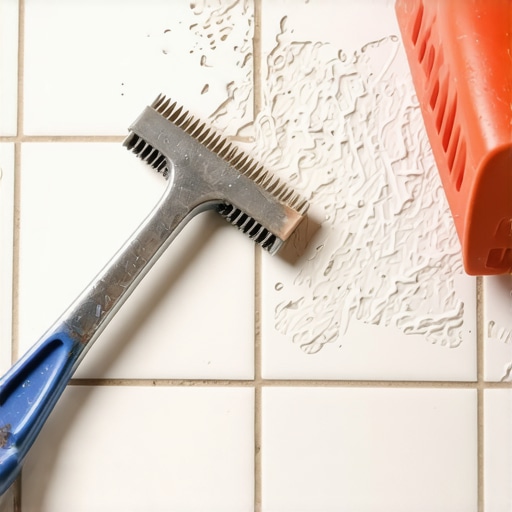
I spent three days grinding concrete on a job last month just so the floor wouldn’t click like a castanet. That is the level of obsession required for a floor to actually last. Most guys skip the leveling compound. They think the underlayment will hide the dip. It won’t. When it comes to grout removal, that same laziness leads to chipped edges and ruined porcelain. I once walked into a house where a homeowner tried to save money by using a flathead screwdriver to pry out old grout from a bathroom floor. By the time I arrived, every second tile had a chunk missing from the shoulder. Grout is not just a filler. It is a structural component of your tile assembly that manages stress and moisture. Removing it is a surgical procedure, not a demolition job. If you want to keep your tiles intact, you need to understand the mechanical bond between the cementitious slurry and the fired clay or stone.
The mechanical violence of the oscillating blade
Oscillating multi tools are the most efficient power tools for grout removal because they utilize high frequency vibration to pulverize the grout bond without the aggressive rotational torque that leads to tile chipping. These machines operate at speeds often exceeding 20,000 oscillations per minute. This vibration is just enough to break the hydraulic bond of the portland cement in the grout. Unlike a rotary tool that can catch and skip across the face of the tile, an oscillating blade stays in the channel if you have a steady hand. You need a diamond-grit segment blade. Avoid the cheap carbide blades found in the bargain bins. Diamond grit is harder than the silica sand in the grout, allowing it to cut through the material like a hot wire through wax. I always tell my apprentices to let the tool do the work. If you are pushing hard, you are doing it wrong. Pressure leads to heat. Heat leads to expansion. Expansion leads to cracks. This is essential for grout restoration secrets that actually work. You want the tool to vibrate the grout into dust while the blade remains perpendicular to the tile edge.
“A floor is only as good as the subfloor beneath it; deflection is the enemy of every joint.” – Master Flooring Axiom
The carbide edge and the human hand
Manual carbide grout rakes offer the highest level of tactile feedback for narrow joints where power tools risk damaging delicate natural stone or handmade ceramic edges. When I am working on 1/16 inch joints in modern showers, I put the power tools away. A hand rake uses a tungsten carbide tip shaped like a triangle. You are essentially using localized pressure to scrape the grout out in layers. It is slow. It is exhausting. It is the only way to ensure 100 percent safety for the tile. The physics here is simple. You are applying force across a very small surface area. This exceeds the internal cohesive strength of the grout but remains below the Mohs hardness of the tile glaze. If you feel the tool catch, you stop. You do not get that feedback with a motor. In the humid air of Florida, old grout can sometimes become gummy if it has been saturated for years. A manual rake allows you to pull that wet material out without creating a slurry that stains the surrounding stone. This level of precision is why pros charge more. We are not just scraping; we are protecting the integrity of the installation.
The silica dust ghost in your lungs
Dust management is not a courtesy; it is a technical requirement for grout removal because silica dust is a hazardous byproduct that can settle into the microscopic pores of your tile. When you start grinding away at cementitious grout, you are releasing billions of tiny glass-like particles into the air. If you do not use a HEPA-rated vacuum system attached directly to your tool, you are coating the entire room in a fine abrasive. This dust can get under your baseboards and stay there for a decade. It also acts as a lubricant under the feet of your tools, making them more likely to slide and gouge the tile. I use a shroud that fits over the oscillating blade. It sucks the dust out the moment it is created. This keeps the work area visible. If you cannot see the line between the grout and the tile, you will fail. It is that simple. This is especially true when preparing for tile cleaning tips because no amount of washing can fix dust that has been ground into the surface of a porous stone.
The 1/8 inch that ruins everything
Blade thickness selection is the most common point of failure for beginners who choose a tool that is too wide for the existing joint. If your grout line is 1/8 inch, your blade should be no wider than 1/16 inch. You need a buffer zone. The moment that blade touches both tiles at the same time, the vibration will shatter the edges. This is called the shoulder of the tile. It is the most vulnerable part. Once you chip the glaze, the tile is done. I have seen guys try to use a standard wood-cutting blade or a thick grinding wheel. It is a disaster. You want a thin diamond blade that allows you to work one side of the joint and then the other. This creates a clean channel. You must also consider the depth. Do not just scrape the surface. You need to remove at least two-thirds of the grout depth to ensure the new material has enough surface area to bond. If you only take off the top layer, the new grout will pop out like a loose tooth within a month. This structural depth is why you should look at how to refresh grout without replacing it before you start grinding.
| Tool Type | Best For | Risk Level | Speed |
|---|---|---|---|
| Carbide Hand Rake | Delicate Stone | Low | Very Slow |
| Oscillating Multi-Tool | General Floor Grout | Moderate | Fast |
| Rotary Dremel | Wide Joints | High | Moderate |
| Electric Grout Saw | Long Straight Lines | Moderate | Fast |
Why your subfloor is lying to you
Substrate deflection is often the underlying cause of grout failure, meaning that even the best tools will not fix a floor that is structurally unsound. If your grout is cracking and falling out, it is likely because the floor is bouncing. If I see a house with 2×8 joists spanning 14 feet, I know the grout is going to fail. You can pull the old stuff out with the best diamond blades in the world, but if you don’t stiffen that floor, the new grout will crack too. I always check the L/360 deflection rating before I even touch a grout rake. Sometimes the best tool for the job isn’t a scraper; it is a sistered joist or a new layer of 1/2 inch plywood. People want a quick fix. They want to talk about baseboard makeover ideas while their floor is literally moving beneath them. You have to address the bones of the house. A floor is a performance surface. If the surface is moving, the grout is the first thing to tell you. It is the canary in the coal mine.
“Movement in the substrate will manifest as cracks in the grout line regardless of material quality.” – TCNA Handbook Standard
The physics of the bond break
Removing epoxy grout requires heat induction or specialized chemicals because the polymer bond is significantly stronger than traditional portland cement mixtures. If you encounter epoxy grout, your standard carbide rake will do nothing but bounce off the surface. Epoxy is essentially a plastic resin. To remove it, you often need to use a heat gun to soften the resin before scraping. But you have to be careful. Too much heat will crack the tile or melt the waterproofing membrane behind it in a shower. This is the heavy lifting of the flooring world. I usually charge double for epoxy removal. It is a battle of chemistry. You are fighting a covalent bond that has fused with the edge of the tile. In these cases, the best tool is often a high-end oscillating tool with a constant-speed electronic control that won’t bog down under the friction of the resin. This is why I advocate for eco-friendly tile solutions that prioritize longevity over temporary aesthetics.
- Inspect every tile for loose bonds before starting mechanical removal.
- Vacuum the joints every three minutes to prevent debris buildup.
- Use blue painter’s tape to protect the vertical surfaces of baseboards.
- Always wear eye protection to guard against flying ceramic shards.
- Test the tool speed on a hidden area like a closet floor first.
The hidden danger of the tile shoulder
The edge of a tile is its weakest point, and any tool that exerts lateral pressure against this shoulder will cause micro-fractures that eventually lead to full-scale tile failure. Most people focus on the middle of the grout line. They should be focusing on the edge. When you are using a reciprocating motion, the blade wants to wander. I use my off-hand as a guide, bracing it against the floor to create a pivot point. This prevents the tool from jumping. If you are working on a vertical surface like a shower wall, the gravity works against you. You have to work from the top down. This prevents the dust from clogging the joints you haven’t reached yet. It also keeps the weight of the tool from pulling the blade into the lower tile. Finally, once the grout is out, I use a stiff nylon brush to scrub the tile edges. If there is even a film of old grout left on the shoulder, the new grout will not bond. It will peel off. You need a clean, virgin edge for the new polymer-modified grout to grab onto. That is the difference between a job that looks good for a week and a job that lasts for twenty years.