
I have spent twenty five years with my knees on the ground and a level in my hand. Most guys skip the leveling compound and think the underlayment will hide the dip, but it won’t. I spent three days grinding concrete on a job last month just so the floor would not click like a castanet. That same laziness is why your shower is currently rotting your wall studs. A leak behind the tile is not just a plumbing annoyance, it is a structural threat that attacks the very integrity of your home framing and subfloors. When water migrates behind a shower flange, it finds the path of least resistance through the porous cement board or the gaps in the waterproofing membrane. From there, it saturates the wood, breeds mold, and eventually ruins the baseboards in the adjacent room. You have to treat this like a surgical operation. If you do not understand the physics of a drop-ear elbow or the chemistry of anaerobic thread sealants, you are just guessing. I have seen beautiful showers that wow become mold factories because someone did not spend five minutes properly sealing a 1/2 inch NPT connection. This is the reality of the trade, and we are going to fix it right.
The phantom drip that destroys your framing
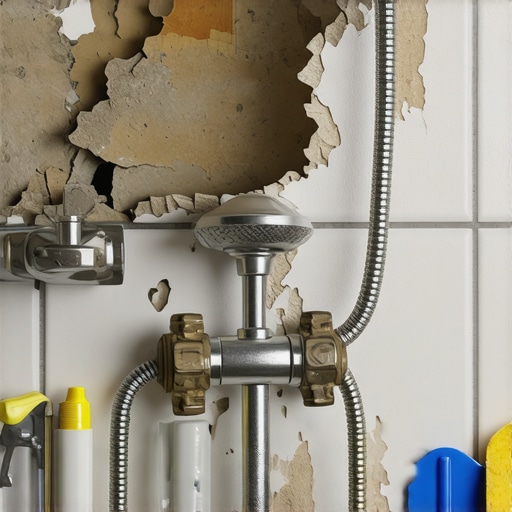
To fix a leaking shower head behind the tile, you must first identify if the leak occurs at the shower arm connection or the valve body. By removing the escutcheon plate and inspecting the drop-ear elbow with a flashlight, you can apply new PTFE tape and pipe dope to the threads to stop the moisture migration immediately. Most people assume the shower head itself is the problem when they see water dripping down the tile. In reality, the culprit is often the connection where the shower arm enters the wall. Water travels back along the arm, hits the back of the tile, and disappears into the wall cavity. You might notice the paint bubbling on the other side of the wall or the chic baseboard designs in the hallway starting to warp. That is the water telling you that the subfloor is already drinking. We do not ignore these signs. We do not wait for the ceiling below to collapse. We address the 1/8 inch gap that is ruining everything.
The chemistry of a catastrophic leak
The interaction between water pressure and metal threads creates a constant stress point that requires a mechanical and chemical seal to prevent failure. Using a combination of high-density PTFE tape and a non-hardening pipe joint compound ensures that the threads are lubricated for a tight fit while filling the microscopic voids in the metal. Pipe threads are tapered. This means the further you screw them in, the tighter they get. However, metal on metal is never perfectly flat at a molecular level. There are ridges and valleys that water molecules, under forty to sixty pounds of pressure, will eventually find. While most people want the thickest underlayment or the thickest tape, too much cushion actually causes the locking mechanisms to fail or the threads to bottom out before a seal is formed. You want three to four wraps of tape, applied clockwise as you look at the end of the pipe, followed by a thin smear of pipe dope. This dual layer approach is the gold standard in the trade. It accounts for the thermal expansion of the pipe as hot water flows through it. Without this, the metal expands and contracts, eventually loosening the bond and starting the slow drip that rots your house from the inside out.
“A floor is only as good as the subfloor beneath it; deflection is the enemy of every joint.” – Master Flooring Axiom
Why your grout is not a waterproof barrier
Grout is a cementitious product that is naturally porous, meaning it will absorb and transmit water if a leak exists behind the wall surface. You must never rely on grout or tile to keep water out of your wall cavity, as their primary function is aesthetic and sacrificial rather than structural waterproofing. If you find that your grout is constantly damp or discolored, you might need to look at how to refresh grout without replacing it, but that is only after the leak is stopped. Water behind the tile can lead to efflorescence, where salts are pulled from the mortar and deposited on the surface. This creates a white, crusty film that ruins the look of your showers with a style. If the leak is significant, the water will saturate the thin-set. Once the thin-set is wet, it loses its bond. You will start to hear a hollow sound when you tap the tiles. That is the sound of a failing installation. Professional installers use a dedicated waterproofing membrane like Kerdi or a liquid-applied guard, but even those cannot save you if the plumbing leak is constant and high-pressure. You have to stop the source.
| Material Type | Expected Lifespan | Failure Mode | Repair Difficulty |
|---|---|---|---|
| Copper Drop-Ear | 50 Years | Pinhole Corrosion | High |
| Brass Adapter | 40 Years | Thread Stripping | Medium |
| Stainless Steel | 60 Years | Crevice Corrosion | Medium |
| PEX Connection | 25 Years | O-ring Degradation | Low |
Investigating the shower arm geometry
The shower arm is a simple chrome or brass tube that serves as the bridge between your internal plumbing and the shower head fixture. When this arm is not perfectly perpendicular to the drop-ear elbow inside the wall, it creates an uneven load on the threads which leads to slow, persistent weeping. I have seen installers force a shower arm into an elbow that was mounted crookedly. They think they can just crank it down. They are wrong. This creates a hairline fracture in the brass. You need to remove the arm and look inside the wall. Is the drop-ear elbow securely fastened to a 2×4 block? If it moves when you touch it, every time you adjust your shower head, you are vibrating those threads. Eventually, they will fail. Use a borescope if you have one. If the wood is black or soft, you have dry rot. This is why I tell people to check their tile cleaning tips regularly, because if you are cleaning and you notice the arm has a bit of play, you have a problem. The geometry of the installation is just as important as the materials used.
The precision of the pipe wrench
Using the correct tool for tightening plumbing connections prevents the distortion of the pipe and ensures that the torque applied is translated into a secure, leak-proof seal. A strap wrench is preferred for finished chrome arms to prevent scratching, while a small pipe wrench is used for the internal connections where grip is paramount. Do not over-tighten. This is a common mistake. People think that if tight is good, tighter must be better. In the world of NPT threads, over-tightening can crack the female fitting inside the wall. Then you are looking at a full tile tear-out to replace a five dollar part. Tighten the arm until it is snug and pointing down. If it feels too loose at that point, do not just give it another full rotation. Take it out, add more tape, and try again. This is about feel. It is about the resistance of the threads. If you are struggling with old residue, read up on grout restoration secrets because often the same minerals that clog your grout also calcify your pipe threads. Clean those threads with a wire brush until they shine before you even think about putting new tape on them.
Restoring the structural integrity
Once the leak is fixed, the focus must shift to drying the wall cavity and ensuring the subfloor and baseboards have not sustained permanent moisture damage. Use a high-volume fan or a dehumidifier to pull moisture out of the wall through the hole for the shower arm before resealing the escutcheon plate. If the water has reached your baseboards makeover ideas, you might need to pull the wood off and check the drywall behind it. Mold loves the paper backing on drywall. If you see black spots, it has to go. There is no shortcut here. You cannot just paint over it. The same goes for your subfloor. If you are a fan of eco-friendly tile solutions, you know that sustainability starts with a house that does not rot. A dry wall is a healthy wall. Let that cavity breathe for forty eight hours. Only then do you apply a bead of 100 percent silicone around the shower arm hole and push the escutcheon plate back into place. This prevents future surface water from getting back into the hole you just fixed.
- Shut off the main water supply to the bathroom.
- Remove the shower head and the decorative escutcheon plate.
- Unscrew the shower arm counter-clockwise using a strap wrench.
- Clean the internal threads of the drop-ear elbow with a small wire brush.
- Inspect the wall cavity for signs of mold or structural rot.
- Wrap the shower arm threads with four layers of PTFE tape.
- Apply a thin layer of pipe joint compound over the tape.
- Hand-thread the arm into the wall to avoid cross-threading.
- Tighten with the wrench until the arm is oriented correctly.
- Test for leaks by turning on the water before replacing the plate.
“The Tile Council of North America states that waterproofing membranes must be continuous and integrated with the plumbing fixtures to prevent substrate failure.” – TCNA Handbook Summary
The ghost in the expansion gap
The movement of your house is a constant force. As the seasons change, your studs swell and shrink. If your plumbing is rigid and your tile is rigid, something has to give. This is why we use silicone at the change of plane and around the shower arm. Silicone is flexible. Grout is not. If you use grout to seal the hole where the pipe comes through the tile, the vibration of the water and the movement of the house will crack that grout in a month. Then you have a path for water to enter. I always tell my clients that the small details, like the type of sealant used at the plumbing penetration, are what separate a ten year bathroom from a fifty year bathroom. Do not be the person who spends thousands on tile only to let a ten cent gap ruin the subfloor. Take the time to do the molecular work. Check your moisture levels. Ensure your threads are clean. Your house will thank you for it. If you need more help with the finishing touches, you can always contact us for expert advice on keeping your surfaces pristine.