
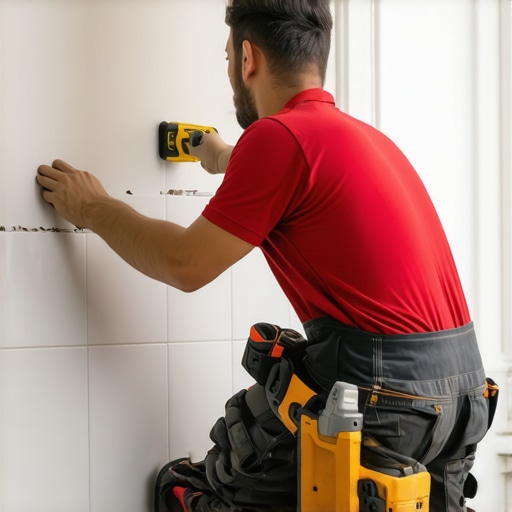
The myth of the universal wall stud
To install baseboards on a tiled wall with no studs you must use a high-strength polyurethane construction adhesive combined with temporary bracing or masonry fasteners. This method relies on a chemical bond rather than mechanical wood screws because porcelain and ceramic lack the internal structure to hold traditional finish nails. Most guys skip the leveling compound. They think the underlayment will hide the dip. It won’t. I spent three days grinding concrete on a job last month just so the floor wouldn’t click like a castanet. That job taught me that if the foundation is off, every piece of trim you touch will fight you. When you are dealing with a tiled wall, especially in showers or wet rooms, you often find that the studs are obscured by thick mud beds, foam backer boards, or are simply non-existent due to plumbing configurations. You cannot just fire a 16-gauge nail and hope for the best. You will shatter the tile. You will break the waterproofing membrane. You will end up with a mess that costs more to fix than the original install. You need to understand the physics of the bond. We are moving from a mechanical connection to a structural adhesive connection. This requires clean surfaces, the right chemical profile, and a lot of patience.
Chemical bonds versus mechanical fasteners
The secret to a permanent trim installation on tile lies in the shear strength of the adhesive and the surface tension of the tile glaze. Polyurethane adhesives offer a flexible yet incredibly strong grip that accommodates the different expansion rates of wood and ceramic. When you don’t have a stud, the adhesive becomes your primary structural element. I prefer a fast-grab polymer. These products are engineered to have a high initial tack. This means the baseboard won’t slide down the wall while the glue cures. However, you still have to prep the tile. If there is soap scum or grout haze on that surface, your glue is sticking to the dirt, not the wall. I always wipe the bottom six inches of the tile with denatured alcohol. It evaporates fast and leaves zero residue. You can see more about prep in our tile cleaning tips for a sparkling bathroom guide. The chemistry here is simple. The adhesive must bridge the microscopic gaps between the flat back of the baseboard and the slightly textured or smooth surface of the tile. If you are using PVC baseboards, the bond is even more sensitive. Wood moves. Tile doesn’t. That friction is what causes failures.
“A floor is only as good as the subfloor beneath it; deflection is the enemy of every joint.” – Master Flooring Axiom
The physics of porcelain and masonry bits
Drilling into tile requires diamond-tipped spear bits and constant water cooling to prevent thermal shock and cracking. If you must use a mechanical anchor because the baseboard is warped, you must bypass the tile layer entirely and reach the substrate. Most people burn through three carbide bits before they realize porcelain is harder than steel. You need a slow speed. You need a steady hand. If you hit a void in the thin-set behind the tile, the pressure of the drill will snap the piece like a cracker. I use a spray bottle to keep the bit cool. Heat is the killer of tools and tile alike. Once the hole is through, you can insert a plastic wall anchor. This gives the screw something to bite into. But let’s be honest. Drilling forty holes in a bathroom is a nightmare. It risks the waterproofing. This is why pros lean on adhesives. We only drill when we have to pull a bow out of a long piece of finger-jointed pine. If the wall is straight, the glue is your best friend. For those looking for design inspiration before they commit to the drill, check out baseboards makeover ideas to see what styles work best for these difficult transitions.
Adhesive selection for non-porous surfaces
Selecting an adhesive for studless baseboard installation requires a product with a high Mohs scale compatibility and moisture resistance. Look for MS Polymers or high-solids polyurethanes that do not shrink as they cure to ensure the baseboard remains flush against the wall. Cheap liquid nails won’t cut it here. Those are solvent-based and they shrink. When they shrink, they pull away. You want something that stays bulky. I look for a product that can handle at least 300 PSI of shear strength. This ensures that even if someone kicks the baseboard, it isn’t going anywhere. You also have to consider the environment. In trendy small bathrooms, the humidity is a constant factor. The adhesive must be rated for wet environments. If water gets behind the baseboard, a standard wood glue or low-grade construction adhesive will emulsify. It turns back into a liquid. Then your trim falls off. It is a pathetic sight. I’ve seen it a hundred times.
| Material Type | Recommended Adhesive | Cure Time | Drilling Required |
|---|---|---|---|
| Solid Wood | Polyurethane | 24 Hours | Only for bowing |
| PVC/Composite | MS Polymer | 12 Hours | No |
| MDF | High-Tack Hybrid | 24 Hours | Not recommended |
The 1/8 inch that ruins everything
Precision scribing is the only way to hide the gap between a perfectly straight baseboard and a wavy tile floor. If your subfloor isn’t level, the baseboard will hover, creating a shadow line that makes the entire job look amateur. I use a compass to scribe the contour of the floor onto the wood. Then I take it to the saw. You have to back-cut the bottom of the baseboard. This creates a sharp edge that sits tight against the tile. If you don’t do this, you’ll be relying on a massive bead of caulk. Caulk is not a structural member. It is a cosmetic filler. Over time, that caulk will shrink and crack. You will be left with a black line of filth. I hate seeing a guy try to hide a half-inch gap with grout. Grout doesn’t belong on baseboards. It isn’t flexible enough. If the floor moves a millimeter, the grout snaps. You can read more about keeping things clean in our grout restoration secrets. The goal is a tight wood-to-tile fit that requires only a hairline of silicone.
- Clean the tile surface with denatured alcohol or acetone.
- Apply a heavy bead of polyurethane adhesive in a serpentine pattern.
- Use blue painter’s tape or heavy weights to brace the board against the wall.
- Ensure the bottom edge is scribed to the floor’s specific slope.
- Seal the top edge with a color-matched 100% silicone sealant.
Managing the expansion gap at the wet line
A proper baseboard installation on tile must allow for the natural expansion and contraction of the flooring material while maintaining a watertight seal. This is achieved by leaving a 1/16 inch gap between the board and the floor, which is then filled with flexible sealant. Many installers make the mistake of jamming the baseboard hard against the tile. When the house settles or the temperature changes, something has to give. Usually, it is the adhesive bond on the wall. By leaving a tiny gap, you allow the materials to breathe. I use plastic spacers, the same ones you use for setting modern shower designs, to keep the height consistent. Once the adhesive is dry, I pull the spacers and run a bead of silicone. This prevents water from wicking up into the back of the baseboard. If you are using MDF, this is life or death. MDF is basically a sponge made of sawdust. If it touches a drop of water, it swells up like a marshmallow. Always go with PVC or solid wood in wet areas. It is the only way to ensure longevity. Check out chic baseboard designs for more moisture-resistant options.
“Water follows the path of least resistance; your job is to make sure that path doesn’t lead behind your trim.” – Master Flooring Axiom
The ghost in the expansion gap
Airflow behind baseboards is often overlooked but it is essential for preventing mold growth in studless installations on tile. Using a dabbing technique for adhesive rather than a solid bead allows for vertical air channels that help the wall breathe. If you seal the top and bottom of the baseboard completely with a solid wall of glue, you trap moisture. That moisture has nowhere to go. It sits against the drywall or the backer board and starts to rot. I apply the glue in vertical strips. This creates small chimneys. Any vapor that gets back there can move. It sounds like overkill, but I’ve pulled off enough moldy baseboards to know better. This is especially important if you are trying to be eco-friendly with your tile solutions, as sustainable materials often require better moisture management to last. Don’t let your trim become a science experiment. Keep the air moving and the water out. It’s a simple rule that separates the pros from the guys who just want to get paid and leave.
Why your subfloor is lying to you
Subfloor deflection can cause baseboards to pull away from tile walls even if the adhesive bond is perfect. You must verify that the floor meets L/360 standards for ceramic tile to ensure the wall-to-floor transition remains stable. If the floor bounces when you walk on it, the baseboard will eventually pop off the tile. There is no glue on earth that can withstand constant vibration and movement. I always check the joist spacing before I start a trim job on tile. If the floor is too bouncy, I tell the homeowner. It isn’t my fault the floor moves, but it will be my fault when the baseboard falls off. You have to be honest. Sometimes you need to stiffen the floor from below before you ever touch a piece of trim. If you need help figuring out the right approach, you can always contact us for a consultation. It is better to do it right once than to do it wrong twice. That is the creed I live by. No shortcuts. No excuses. Just solid, structural work that stands the test of time.