
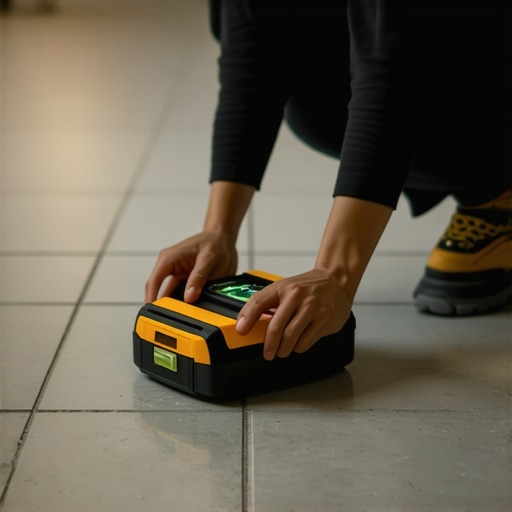
I spent three days grinding concrete on a job last month just so the floor wouldn’t click like a castanet. Most guys skip the leveling compound. They think the underlayment will hide the dip. It won’t. I was in a high-rise downtown where the slab was off by nearly an inch over a ten-foot span. The homeowner wanted large-format porcelain. If I had just slapped thin-set down, those tiles would have cracked within six months under the pressure of foot traffic. Instead, I lived with a diamond-blade grinder and a HEPA vacuum until the surface was a flat plane. That is the reality of professional flooring. It is not about the tile you see; it is about the structural integrity of the substrate you hide. People think tile is a cosmetic layer. It is actually a rigid cladding system that requires a zero-deflection environment to survive the physics of expansion and contraction. When a floor fails, it is almost always a failure of the installer to respect the math of the subfloor. I have seen fifteen thousand dollar installations ruined because someone didn’t want to wait for the self-leveling compound to cure properly. I have seen grout lines turn into dust because the moisture vapor transmission through the slab was too high. If you want a floor that lasts decades, you stop looking at the patterns and start looking at the moisture meter and the straightedge. This is the only way to achieve a result that holds up under the scrutiny of a level and the weight of a lifetime.
The geometry of a failed installation
A perfectly level tile floor requires a substrate that deviates no more than one eighth of an inch over a ten foot radius. Achieving this standard involves rigorous mechanical grinding of high spots and the application of high-flow self-leveling underlayment to fill low spots before any adhesive touches the surface. Tile is a brittle material. It has incredible compressive strength but almost no flexural strength. When you place a rigid tile over a hollow spot in the subfloor, you create a bridge. Every time someone walks over that bridge, the tile bends. Since ceramic and porcelain cannot bend, they snap. This is called lippage or structural cracking. The National Wood Flooring Association and the Tile Council of North America have established strict guidelines for this. You cannot ignore the physics of the plane. Subfloor preparation is eighty percent of the work. The actual setting of the tile is just the victory lap. You must check the flatness with a ten-foot magnesium straightedge. Do not trust your eyes. The human eye is easily fooled by light and shadow. The straightedge never lies. If you find a dip, you must prime the area with a high-solids acrylic primer before pouring your leveler. If you skip the primer, the dry concrete will suck the moisture out of the leveler too fast. This causes the leveler to pinhole and lose its structural bond. It will eventually delaminate and your expensive tile will sound like a drum when you walk on it.
“A floor is only as good as the subfloor beneath it; deflection is the enemy of every joint.” – Master Flooring Axiom
Why concrete moisture ruins your bond
Concrete slabs act like a sponge that constantly breathes moisture vapor which can destabilize adhesives and cause tile grout to discolor or fail via efflorescence. Measuring the Relative Humidity of the slab using in-situ probes is the only professional method to ensure the installation will not delaminate over time. You need to understand the chemistry of the slab. Even if a floor looks dry, it might be pushing out pounds of water vapor every thousand square feet. This vapor carries minerals to the surface. When those minerals hit the grout, they leave a white crusty residue. This is not a cleaning issue; it is a hydrostatic pressure issue. If the moisture is too high, you must use a specialized moisture vapor barrier. This is a two-component epoxy coating that seals the slab. It is expensive, but it is cheaper than ripping up a whole floor. I always tell clients that if they want eco-friendly tile solutions for sustainable homes in 2025, they have to start with a dry foundation. High moisture also affects the pH of the concrete. Most thin-set mortars are designed to work within a specific pH range. If the slab is too alkaline due to moisture, the chemical bond of the mortar is compromised. The tile might stay down for a year, but eventually, the bond will turn to a chalky powder and the floor will fail. You must use an ASTM F2170 test to be sure. Anything else is just a guess, and guesses are for amateurs who do not mind getting sued for floor failure.
The truth about self leveling compounds
Self leveling underlayments are polymer-modified cementitious products designed to create a flat and smooth surface with high compressive strength. These products require precise water-to-powder ratios and mechanical agitation to ensure the polymers distribute evenly and the material reaches its intended flow rate. People think you just pour it and it levels itself like water. It does not. It is more like thick syrup. You have to help it. You need a spiked roller to release the air bubbles and a gauge rake to set the depth. If you add too much water, you weaken the crystalline structure of the cement. The top layer will be soft and dusty. If you add too little, it will not flow and you will end up with ridges that are harder than rock once they dry. I have spent hours grinding down bad leveling jobs because some guy thought he could mix it by hand in a five-gallon bucket. You need a high-torque drill and a specific mixing paddle. The chemistry of these products is fascinating. They contain superplasticizers that allow the mix to stay fluid with very little water. This ensures that when it dries, the shrinkage is minimal. If a leveler shrinks too much, it will pull away from the edges or crack. This is why perimeter expansion strips are vital. The leveler needs a tiny bit of room to move, or it will exert pressure on your walls. It is a game of millimeters and chemistry.
| Product Type | Max Thickness | Drying Time | Compensates For |
|---|---|---|---|
| Self-Leveling Underlayment | 5 inches | 4-24 hours | Major floor deviations |
| Patching Compound | 1/2 inch | 30-90 minutes | Minor divots and cracks |
| Feather Finish | 1/8 inch | 15-20 minutes | Trowel marks and seams |
Managing lippage with mechanical leveling systems
Lippage control systems use plastic clips and wedges to mechanically align the edges of adjacent tiles during the thin-set curing process. This technology ensures that the finished surface is perfectly flat even when working with large-format tiles that often have a natural bow or warp. Large tiles are the trend, but they are a nightmare to install flat. Because of the way they are fired in a kiln, almost all large porcelain tiles have a slight crown in the middle. If you offset them in a running bond pattern, the high middle of one tile sits next to the low corner of the next. Without a leveling system, you will have edges that catch your toes. I use a system that pulls the tiles into a single plane. You slide a clip under the edge, put a wedge through the top, and click it tight. It locks the tiles together while the mortar sets. This prevents “slump,” which is when the weight of the tile causes it to sink into the mortar overnight. It is a physical lock. Once the thin-set is dry, you kick the clips off. It leaves a clean grout joint. If you want to know about how to refresh grout without replacing it, you first need to make sure the grout was installed at a consistent depth, which these clips help achieve. A level floor is not just about the subfloor; it is about the mechanical alignment of every single piece of clay on that floor.
Integrating baseboards for a professional finish
Baseboards serve as the functional bridge between the vertical wall and the horizontal floor, hiding the necessary expansion gaps required for tile and subfloor movement. A professional installation requires scribing the baseboards to the floor profile to eliminate gaps without the use of excessive caulk. If your floor is perfectly level, your baseboards will sit tight against the tile. If you have any waves, you will see daylight under the wood. This is where most DIY jobs look terrible. They try to fill a quarter-inch gap with caulk. It looks like a mess after a year. For those looking for baseboards makeover ideas to elevate your space, remember that the prep work on the floor dictates the quality of the trim. I prefer to install the tile first, then sit the baseboard on top. This allows the tile to expand and contract under the wall. It is a floating system in a way. You also have to consider the transition to other rooms. If you are interested in chic baseboard designs that transform rooms in 2025, you should look at taller profiles that provide a more substantial visual anchor. But no matter how expensive the trim is, it will look cheap if it is sitting on a wavy floor. The baseboard is the frame of the picture. If the picture is crooked, the frame will show it.
- Check subfloor for deflection and joist spacing.
- Vacuum all dust and debris to ensure a clean bond.
- Apply the correct primer for the specific substrate.
- Mix self-leveling compound with a high-torque drill.
- Use a gauge rake and spiked roller for even distribution.
- Allow full cure time before walking or setting tile.
- Select the appropriate notched trowel for tile size.
- Utilize a mechanical lippage control system.
Solving shower drainage and slope mechanics
Shower floors require a precise slope of one quarter inch per foot toward the drain to ensure proper water evacuation and prevent mold growth. This geometric requirement complicates the leveling process, as the floor must be perfectly flat in its plane while maintaining a consistent incline. Showers are the most technical part of any tile job. You are dealing with water management and gravity. If the slope is wrong, you get puddles. Puddles lead to bacteria and failing grout. I have seen many showers that wow modern designs for 2025 that were built with zero regard for drainage. They look great for a month, then they start to smell. You must use a pre-pitched mortar bed or a sloped foam tray. If you are working on showers with a style trendy ideas for small bathrooms, you often have to use smaller tiles on the floor to accommodate the slope. Large tiles do not like to bend toward a center drain. You have to cut them into a diagonal envelope pattern, which is a high-skill maneuver. The waterproofing membrane must be continuous and tested with a twenty-four-hour flood test. If it leaks, you rip it all out. There are no shortcuts in a wet area. You follow the TCNA handbook or you fail. It is that simple.
“Deflection in the subfloor is the primary cause of grout failure and tile delamination in residential structures.” – TCNA Installation Manual
The long term maintenance of grout and sealers
Grout is a porous cementitious material that requires sealing or the use of high-performance epoxy resins to remain stain resistant and structurally sound. Regular maintenance involves pH-neutral cleaners that do not break down the chemical sealers over time. Once the floor is level and the tile is set, the grout is the final touch. But it is also the weakest link. Cement grout is essentially a hard sponge. It will soak up dirty mop water, coffee, and wine. If you want tile cleaning tips for a sparkling bathroom in 2025, the best tip is to use an epoxy grout from the start. Epoxy doesn’t need a sealer and it is waterproof. It is harder to install, but it lasts forever. If you already have cement grout, you need to look into grout restoration secrets for long lasting results. This usually involves deep cleaning with an alkaline cleaner and then resealing with a penetrating sealer. Never use bleach or vinegar. Bleach kills the color and vinegar is an acid that eats the cement. You are basically dissolving your floor every time you clean it with those. Use the right chemistry for the job. If you have questions about specific materials, you can always contact us for a technical consultation. A floor is a long-term investment. It requires an engineering mindset from the first bag of leveler to the last coat of sealer. If you treat it like a structural project instead of a weekend hobby, it will serve you for a lifetime. If you cut corners, the floor will eventually find them and show them to you in the form of a crack.