
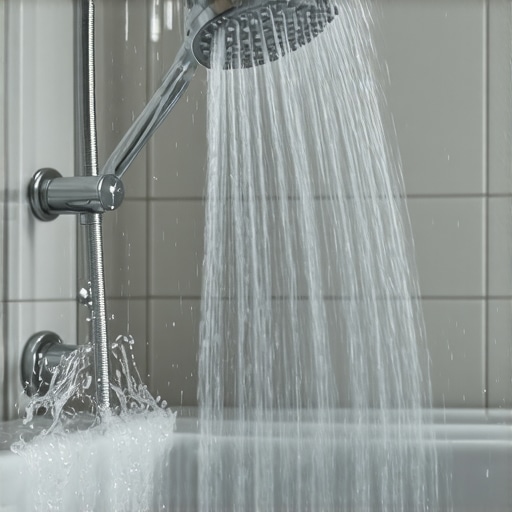
I spent three days grinding concrete on a job last month just so the floor wouldn’t click like a castanet. Most guys skip the leveling compound because it is a messy job that eats up their margins. They think the underlayment will hide the dip. It won’t. I have seen it a thousand times where a guy walks across a newly tiled bathroom and the grout lines snap like dry twigs because the subfloor had a 1/8 inch deflection. When your shower head starts spraying water in every direction except the drain, you are not just looking at a plumbing nuisance. You are looking at a targeted assault on your flooring system. Water is a patient predator. It finds the path of least resistance through your grout, under your baseboards, and straight into the structural plywood or concrete slab. I have spent 25 years pulling up rotted subfloors that smelled like a swamp because a homeowner ignored a stray spray pattern. Flooring is not a decoration. It is a performance surface that relies on the physics of water management and the chemistry of bonding agents.
The physics of water migration in a wet room
Water migration occurs when shower spray hits vertical surfaces outside the intended drainage zone, leading to saturation of grout joints and capillary action behind the tile substrate. This moisture travels through porous materials, often bypassing topical sealants if they are not applied with industrial precision. I have seen showers that look like masterpieces on the surface but are rotting from the inside out because the installer did not understand hydrostatic pressure. When water leaves that shower head and hits the wall, it is not just sitting there. It is looking for a way in. Modern showers that wow modern designs for 2025 focus on aesthetics, but if you do not have a waterproofing membrane that meets ANSI A118.10 standards, you are just building a very expensive sponge. The water moves through the grout through a process called wicking. If the grout was not mixed to the exact manufacturer specifications, the pore structure is too open. This allows liquid water to move deep into the thinset. Once that thinset is saturated, the bond to the tile weakens. You might notice a hollow sound when you tap the tile. That is the sound of a failure in progress. You need to understand that the shower head is the catalyst for a systemic failure if your tile envelope is not hermetically sealed.
“A floor is only as good as the subfloor beneath it; deflection is the enemy of every joint.” – Master Flooring Axiom
Why your shower pan is a ticking time bomb
A shower pan fails when the pre-slope is incorrect or the waterproof liner is punctured, allowing water to pool on the subfloor instead of exiting through the weep holes. Most people think the tile and grout are the waterproof layer. They are wrong. Tile and grout are the wear layer. The real work happens beneath the surface. If you have a shower head spraying everywhere, you are testing the limits of your curb and your transitions. If that water reaches the baseboards makeover ideas to elevate your space you might be excited about won’t matter because the MDF will swell like a piece of bread in a bowl of milk. I once saw a job where the installer used a nails-through-the-liner method for the curb. Every time the shower head sprayed toward that door, water wicked down the nails and rotted the floor joists under the bathroom. We had to replace three structural beams. That is the reality of poor water management. You have to ensure that your shower pan has a 1/4 inch per foot slope. If it is flat, water sits. If water sits, bacteria grows. If bacteria grows, your grout turns black and no amount of scrubbing will fix it.
The microscopic betrayal of porous grout
Porous grout acts as a bridge for moisture to reach the wall cavity, where it can cause mold growth and structural decay long before it becomes visible. Standard cementitious grout is essentially a hardened paste of sand and portland cement. At a microscopic level, it is full of voids. When your shower head is spraying the walls, those voids fill up. This is why grout restoration secrets for long lasting results always involve a high quality sealer. If you want a floor that lasts, you should be looking at epoxy grout or high performance calcium aluminate cements. These materials have a much tighter molecular structure. They do not allow the same level of water penetration. I always tell my clients that if they are going for showers with a style trendy ideas for small bathrooms, they cannot afford to cheap out on the grout. It is the only thing standing between your shower water and your home’s framing. If the spray pattern is hitting the corners of the shower, that is where you will see the first signs of failure. The change of plane in a shower should never be filled with grout. It should be a high grade silicone caulk. Grout will crack at the corners because houses move. When those cracks open up, the stray spray from your shower head goes directly into the wall studs.
How baseboards reveal the hidden rot
Baseboards serve as the early warning system for bathroom flooding, often showing signs of swelling, peeling paint, or mold before the tile floor itself shows damage. If your shower head is spraying water outside the enclosure, it usually ends up on the floor right against the wall. This is where chic baseboard designs that transform rooms in 2025 can actually hide a disaster. If you have wood or MDF baseboards, they will suck up that water. You will see the paint start to bubble. You might see a black stain at the bottom. By the time you see that, the subfloor is already wet. I have pulled up baseboards in bathrooms where the drywall behind them had turned to mush. This is why I advocate for a waterproof perimeter. You can use a PVC baseboard or even better, a tile base. If you use tile for your baseboards, you create a continuous waterproof basin. This prevents the spray from the shower head from reaching the vulnerable wall materials. If you are struggling with old grout lines near the floor, look into how to refresh grout without replacing it to at least buy yourself some time, but if the water has already hit the subfloor, you are in for a teardown.
The technical comparison of waterproofing membranes
Choosing the right membrane depends on the substrate type, the expected moisture load, and the structural movement of the building. Not all waterproofing is created equal. Some guys still use old school hot mop or PVC liners. Those are fine if you know what you are doing, but they are prone to human error. Modern professionals use liquid applied membranes or bonded sheet membranes. These are applied directly under the tile. This means the mortar bed never gets wet. If the mortar bed stays dry, you don’t get that musty smell in your bathroom. It is a much cleaner system.
| Membrane Type | Thickness (mils) | Permeability Rating | Vapor Barrier |
|---|---|---|---|
| Sheet Membrane | 8 to 12 | < 0.5 perm | Yes |
| Liquid Applied | 20 to 30 | 0.7 to 1.5 perm | Partial |
| Traditional PVC | 40 | 0.1 perm | No |
As you can see, the sheet membrane provides the best vapor protection. This is vital if you have a steam shower or if your shower head is constantly soaking the walls. The thinner profile of the sheet membrane also means you don’t have to deal with bulky corners that make your tile look crooked. I always prefer a bonded system because it eliminates the reservoir effect where water sits in the mud bed for weeks. If your shower head is spraying everywhere, you want that water to hit the tile, run to the drain, and be gone. You don’t want it soaking into a sand bed like a beach at high tide.
A checklist for a floodproof bathroom
- Check for 1/4 inch per foot slope to the drain using a digital level.
- Verify that the shower head spray pattern is not hitting the door or transitions directly.
- Inspect grout lines for hairline fractures every six months.
- Measure humidity levels at the floor to wall transition to detect hidden leaks.
- Ensure that all changes of plane are sealed with 100 percent silicone caulk.
- Clean the shower head to prevent erratic spray patterns that bypass the curtain or glass.
The structural cost of a 1/8 inch dip
Structural deflection in a subfloor causes the tile to de-bond from the thinset, creating channels for water to travel under the flooring surface. When I say a floor needs to be flat, I am not being picky. I am being an engineer. The TCNA states that for large format tile, the floor cannot vary by more than 1/8 inch over 10 feet. If you have a dip, the tile will bridge that gap. Every time you step on it, the tile flexes. Ceramic and stone do not like to flex. They want to be rigid. Eventually, the bond fails. Now you have a pocket under your tile. If your shower head is spraying water that makes its way under the tile, it will sit in that pocket. It won’t evaporate. It will just sit there and rot your floor. I have seen subfloors that were so soft I could poke a screwdriver through them because a small leak from a shower spray sat in a low spot for three years. You have to grind the high spots and fill the low spots. There are no shortcuts in flooring. If you skip the prep, the finish will fail. It is a mathematical certainty. You should always use a moisture meter on your subfloor before you even think about laying tile. If the moisture content is over 12 percent on a wood subfloor, you have a problem that needs to be solved before the tile goes down.
“Water is the only element that can destroy a building from the inside out without anyone noticing until it is too late.” – Master Flooring Axiom
The chemical bond of modified thinset
Modified thinset contains polymers that increase the shear strength and flexibility of the bond, which is essential for wet environments subject to temperature changes. When you are dealing with a shower that gets hot and cold, the materials are expanding and contracting. If you use a cheap, unmodified thinset, it is brittle. It won’t hold up to the thermal shock. You need those polymers to create a bridge between the substrate and the tile. This is especially true if you are using eco friendly tile solutions for sustainable homes in 2025 because many of these new materials have different absorption rates. You need a mortar that can grab onto the tile at a molecular level. I always mix my thinset with a margin trowel first to check the consistency. It should look like creamy peanut butter. If it is too wet, it will shrink and pull the tile down. If it is too dry, it won’t hydrate the back of the tile. You want 100 percent coverage in a wet area. That means you trowel in one direction and collapse the ridges. If you leave air pockets, you are leaving a home for water. When that shower head sprays the wall, the air pockets in your thinset will eventually fill with moisture. This leads to efflorescence, which is that white crusty stuff you see on grout lines. It is basically the minerals from the concrete being washed out by the water. It is a sign that your shower is taking on water behind the scenes.
The ghost in the expansion gap
Expansion gaps at the perimeter of a room are required to allow the floor to breathe, but they must be protected from direct water contact to prevent subfloor damage. Every floor needs to move. If you push the tile tight against the wall, it will tent and pop when the house settles or the humidity changes. You need a 1/4 inch gap around the edge. But in a bathroom, that gap is a gateway for water. This is where the integration of your tile cleaning tips for a sparkling bathroom in 2025 becomes important. If you are using too much water to clean, or if your shower head is spraying the floor, that perimeter gap is where the water goes. You have to seal that gap with a flexible sealant that can handle the movement while remaining waterproof. If you just cover it with a baseboard, you are asking for trouble. The water will go under the baseboard and into the expansion gap. From there, it hits the edge of the plywood subfloor. Plywood is most vulnerable at its edges. It will swell and delaminate, causing the tile at the edge of the room to lift. I always tell people that the most important part of the floor is the part you can’t see. The prep work and the perimeter details are what determine if a floor lasts five years or fifty years.