
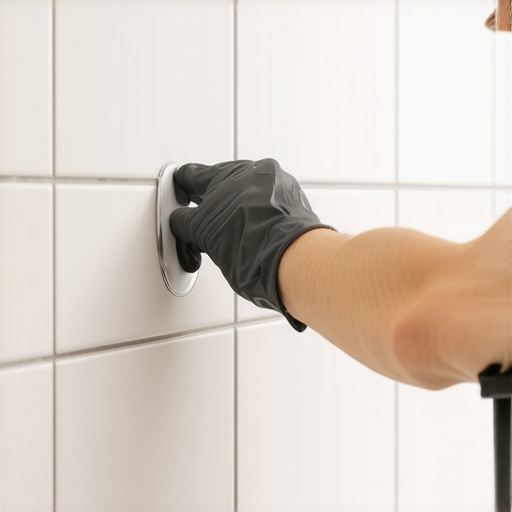
Most guys skip the prep. They think the mirror will just pop off with a quick tug and a prayer. It won’t. I spent three days scraping stubborn epoxy off a floor-to-ceiling marble wall last month just so the new owner could install a simple vanity. The previous installer had used a high-strength construction adhesive instead of mirror mastic. The result was a bond so tight it was trying to pull the face right off the stone. I smell like WD-40 and oak dust most days, but that job smelled like burnt rubber and frustration. If you do not respect the chemistry of the bond, you will end up with a face full of glass shards and a destroyed wall. A floor or a wall is only as good as the substrate beneath it. If you rip the ceramic glaze off while pulling that mirror, you are looking at a full replacement of the tile or at least a very expensive repair. To remove a mirror safely, you must understand the physics of tension and the chemical breakdown of the adhesive holding it in place. You have to work slow. Speed is the enemy of every professional installer.
The chemical reality of mirror mastic and tile bonds
To remove a mirror glued to a tiled bathroom wall, you must break the chemical bond of the mastic without applying enough leverage to crack the tile or shatter the glass. This is achieved by using a combination of heat to soften the adhesive and a thin wire to physically cut through the glue beads. Most installers use a specialized mirror mastic which stays slightly flexible, but older homes often hide brittle construction adhesives that require more aggressive thermal intervention. The molecular structure of these adhesives changes when exposed to temperatures above 150 degrees Fahrenheit. This temperature range is the sweet spot where the polymer chains start to slide past one another. However, you have to be careful about the tile. Most ceramic and porcelain tiles can handle the heat, but the grout can become brittle if you stay in one spot too long. If you are worried about the state of your joints, you might need to look into grout restoration secrets for long lasting results after the mirror is gone.
“A floor is only as good as the subfloor beneath it; deflection is the enemy of every joint.” – Master Flooring Axiom
The toolkit for a safe glass extraction
A successful mirror removal requires a heavy duty heat gun, high tensile strength piano wire or braided picture wire, a set of plastic shims, and heavy duty suction cups for glass handling. Safety gear like Kevlar sleeves and a full face shield are mandatory because glass under tension behaves unpredictably. You cannot just use a crowbar. A crowbar creates a point of concentrated pressure. On a tiled bathroom wall, that point of pressure will almost certainly crack a tile or pop it right off the wall. We use plastic shims because they distribute the load across a wider surface area of the tile. Metal tools will scratch the glaze or the grout. You need to create a small gap at the top corner to feed your wire through. This is where the patience comes in. If the mirror was installed correctly, there should be a 1/8 inch gap between the glass and the tile to allow for air circulation. If there is no gap, the adhesive has likely localized moisture and begun to degrade the silvering on the back of the mirror.
| Adhesive Type | Removal Difficulty | Heat Required | Solvent Recommendation |
|---|---|---|---|
| Mirror Mastic | Moderate | 140F – 160F | Mineral Spirits |
| Silicone Sealant | Low | 120F | Isopropyl Alcohol |
| Construction Adhesive | High | 200F+ | Citrus-based Adhesive Remover |
| Epoxy Resin | Extreme | Chemical Strip | Mechanical Grinding |
The physics of the wire saw technique
The wire saw technique involves feeding a thin braided wire behind the glass and using a sawing motion to cut through the vertical beads of adhesive. This method avoids the prying forces that cause glass to shatter and tiles to delaminate from the substrate. I have seen guys try to use a long-handled scraper. All they do is gouge the tile or break the mirror into a thousand pieces. When you use the wire, you are dealing with friction. Friction creates heat, which further helps soften the glue. You want two people for this. One person holds the wire handles on either side of the mirror, and the other person manages the suction cups to ensure the mirror doesn’t fall forward once the last bead is cut. The showers in these modern bathrooms often have very narrow clearances, so you have to be mindful of your elbows. If you hit a baseboard or a glass shower door while you are pulling, you are going to have a very bad day. Check your surroundings and maybe look at baseboards makeover ideas to elevate your space if you manage to nick the trim during the process.
Thermal shock and the risk to ceramic surfaces
Thermal shock occurs when you apply intense heat to a localized area of tile or glass, causing rapid expansion that leads to cracking. To prevent this, you must keep the heat gun moving constantly and pre-warm the entire surface of the mirror before focusing on the adhesive points. Glass has a very low rate of thermal conductivity. This means the heat stays where you put it. If you heat one corner to 200 degrees while the rest of the mirror is at 70 degrees, the internal stress will cause a fracture. The same goes for the tile. Porcelain is denser than ceramic and handles heat better, but it can still spider-crack if you aren’t careful. Once the mirror is off, you will be left with a wall full of ugly glue bumps. Don’t go at them with a hammer. Use the heat gun again and a plastic scraper. If the residue is particularly stubborn, you might need some technical tile cleaning tips to get that wall back to its original shine. You can find more on that at tile cleaning tips for a sparkling bathroom in 2025.
- Tape the entire surface of the mirror with duct tape in a grid pattern to contain shards.
- Wear long sleeves and heavy gloves to protect against the sharp silvering.
- Place a thick moving blanket or a piece of plywood over the vanity and sink.
- Have a helper ready to catch the mirror as the last bond fails.
- Use a vacuum with a HEPA filter to catch any glass dust during the process.
Restoring the tile substrate after adhesive removal
Restoring the tile substrate involves a meticulous process of chemical softening, mechanical scraping with non-marring tools, and localized grout repair to fix any areas where the wire saw may have grazed the joints. Often, the removal of a mirror reveals that the tile behind it was never grouted or was poorly finished. This is common in “builder-grade” homes where the mirror was installed before the final punch list. If you find gaps in your grout, you don’t necessarily have to redo the whole wall. You can learn how to refresh grout without replacing it to save time. The goal is to get the surface perfectly flat again. If you are planning on installing a new, smaller mirror or a medicine cabinet, any leftover adhesive will create an uneven surface that will cause the new fixture to wobble or sit crooked. In the world of high-end flooring and tile, 1/8 of an inch is the difference between a professional finish and a DIY disaster.
Designing the new vanity space
Modern bathroom designs are moving away from massive glued-on mirrors in favor of framed, backlit, or recessed options that allow the tile work to be seen. This shift emphasizes the importance of a clean removal process to preserve the aesthetic value of the underlying material. If you have just cleared a large space on your wall, you might be considering a complete upgrade to the room. Maybe you want to match the new look with some showers that wow modern designs for 2025. The trend now is to treat the wall as a feature. Instead of hiding it behind a giant sheet of glass, we use the mirror as an accent. This allows the texture of the tile and the precision of the baseboards to stand out. If your bathroom feels cramped after removing the mirror, look for showers with a style trendy ideas for small bathrooms to maximize the footprint. A well-executed removal opens up a world of design possibilities that were previously blocked by a dated slab of glass.
“Deflection is the enemy of every joint, but a poor bond is the death of the finish.” – Master Flooring Axiom