
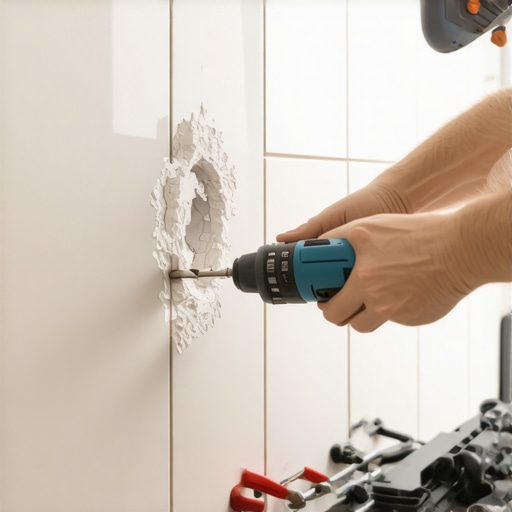
The exact science of cutting holes in tile for plumbing fixtures
I once saw a plumber try to punch a hole through a three thousand dollar slab of vein cut travertine using a hammer and a screwdriver. He thought he could just tap it gently enough to create a pilot hole. The entire slab shattered into six pieces before the first crack even reached the pipe location. That is the reality of working with high end materials. If you do not respect the physics of the tile, the tile will break your budget and your schedule. Mastering the art of the circular cut is what separates a handyman from a true floor architect. It is about heat management, rotational speed, and the molecular density of the material you are trying to penetrate. Whether you are dealing with showers or installing baseboards around complex radiator pipes, the method remains the same. You need the right diamond grit and a steady hand.
The physics of the perfect circle in dense materials
A perfect hole in tile requires a diamond hole saw used at a forty five degree angle to start the cut before leveling out for the full penetration. The process depends on the friction of industrial diamonds grinding away the silica and clay rather than a sharp edge slicing through it. This is why standard masonry bits fail. They rely on impact or shearing, which porcelain resists. When you are prepping showers for a high end build, you are usually working with porcelain that has a water absorption rate of less than zero point five percent. This density makes it incredibly brittle. If you apply too much pressure, you create a stress fracture. If you use too little water, the heat will glaze the diamonds on your bit, rendering it useless in seconds.
“A floor is only as good as the subfloor beneath it; deflection is the enemy of every joint.” – Master Flooring Axiom
Why a standard drill bit is a trap for installers
Standard carbide masonry bits are designed for soft stone or concrete and will quickly overheat and dull when used on modern porcelain tile. Most installers try to use these because they are cheap and available at any hardware store. However, the heat generation is immense. As the metal heats up, it expands at a different rate than the tile, leading to immediate cracking. If you are working on showers that wow modern designs for 2025, you cannot afford to have a visible crack radiating from your mixing valve. Use a vacuum brazed diamond bit instead. These bits have diamonds bonded to the steel in a way that allows for better heat dissipation and a much longer lifespan even when cutting dry, though wet cutting is always preferred.
The diamond hole saw method for professional results
Using a diamond hole saw involves creating a crescent shaped guide notch in the tile surface before completing the full circular revolution. This prevents the bit from walking across the polished surface of the tile and scratching it. I always use a template made of scrap plywood or a specialized suction cup guide. If you do not have a guide, you must start the drill at a steep angle. Once the bit bites into the glaze, you slowly tilt the drill upright while maintaining a consistent RPM. For a one inch pipe, I usually run my drill at about six hundred to eight hundred RPM. Anything faster generates too much heat. Anything slower causes the drill to chatter and chip the edges of the hole. This precision is vital when you are fitting tile around baseboards or plumbing lines that will be visible to the homeowner.
The angle grinder technique for larger diameters
Large diameter holes for shower drains or toilet flanges are best achieved using a four inch angle grinder equipped with a thin rim diamond blade. This is often called the ring of fire method. You mark your circle on both the front and the back of the tile. You then make a series of tangent cuts on the backside, followed by a light score on the front. This prevents the glaze from chipping on the visible side. For those looking for showers with a style trendy ideas for small bathrooms, fitting a drain perfectly into a large format tile is a sign of true craftsmanship. It requires a steady hand and a high quality mask because the dust generated by an angle grinder is extremely hazardous to your lungs.
Mastering the wet cut technique for heat management
Water acts as both a lubricant and a coolant during the tile drilling process to prevent thermal shock and bit failure. You do not need a professional pump system for a single hole. A simple sponge soaked in water and pressed against the bit will suffice. Alternatively, you can build a small dam out of plumbers putty around the cut site and fill it with water. This creates a miniature pool that keeps the diamonds cool as they work through the material. This is especially important when you are worried about grout integrity later on. Overheated tile can develop micro cracks that expand once the grout is applied, leading to moisture intrusion behind the wall. Keeping the material cool ensures the structural integrity of the installation.
| Tile Type | Hardness (Mohs) | Recommended Bit | Cooling Method |
|---|---|---|---|
| Ceramic | 5 to 6 | Carbide or Diamond | Dry or Wet |
| Porcelain | 7 to 8 | Diamond Hole Saw | Wet Required |
| Granite | 6 to 7 | Vacuum Brazed Diamond | Wet Preferred |
| Glass | 6 | Electroplated Diamond | Constant Water |
Troubleshooting the common blowout on the exit stroke
The most common mistake in hole cutting is applying excessive pressure as the bit nears the back of the tile, causing a blowout. As you reach the last millimeter of the cut, you must reduce your downward force significantly. If the tile is already installed, the thin set will support the back. If it is a loose piece, place it on a scrap piece of cement board or wood. This provides a sacrificial surface for the bit to enter, which prevents the back of the tile from exploding. If you do get a small chip, it can often be hidden by the escutcheon plate or baseboards, but a true professional aims for a clean exit every time. If you need help with chic baseboard designs that transform rooms in 2025, remember that the transition between the floor and the wall is where most moisture problems start.
Essential checklist for successful tile penetration
- Verify the exact location of the pipe and mark it with a wax pencil.
- Select a diamond hole saw that is one eighth of an inch larger than the pipe diameter.
- Create a guide or template to prevent the drill bit from wandering.
- Apply water constantly to the cutting surface to manage heat.
- Start the drill at a forty five degree angle to establish a notch.
- Reduce pressure as you feel the bit breaking through the back of the material.
- Clean the edges of the hole with a diamond hand pad to remove sharp burrs.
Integration with surrounding elements and finishes
Once the hole is cut and the tile is set, the transition to other elements like grout and baseboards must be handled with care. Do not just jam grout into the gap between the pipe and the tile. This area needs to accommodate the expansion and contraction of the plumbing. Use a high quality silicone sealant that matches your grout color. This ensures a waterproof seal while allowing for movement. If you are struggling with old installations, you might want to look into grout restoration secrets for long lasting results to ensure the rest of the bathroom looks as good as your new tile work. A clean hole is a small detail, but in the world of high end flooring, details are everything. It is the difference between a floor that lasts thirty years and one that fails in three. When you are looking for eco friendly tile solutions for sustainable homes in 2025, remember that the most sustainable floor is the one you only have to install once.
“Precision in the rough-in phase prevents disasters in the finish phase.” – Tile Council of North America Guidelines