
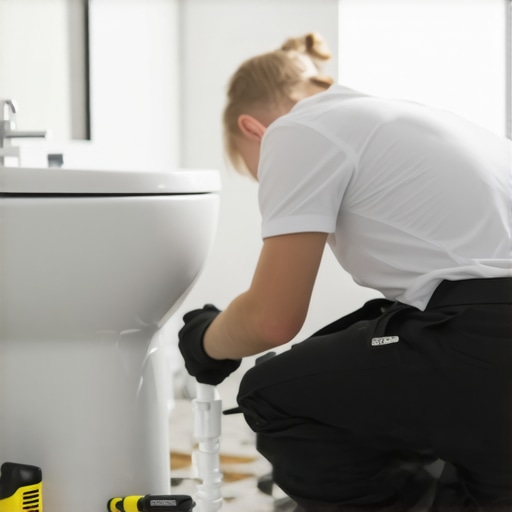
Homeowners always ask why their waterproof vinyl is buckling after a minor bathroom upgrade. Usually, it is because they locked it under a heavy toilet base or ignored a pinhole leak from a new bidet. I once walked into a house where a $15,000 floor was cupping because the installer did not check the moisture levels after a bidet T-valve failed. The water traveled under the baseboards and into the subfloor before anyone noticed a single drop on the tile surface. This is why a simple plumbing upgrade must be treated as a structural engineering task.
The ghost in the plumbing line
Bidet attachment leaks typically originate at the T-valve connection where the supply line meets the toilet tank fill valve. A watertight seal requires the perfect alignment of threads and the precise compression of rubber washers to prevent hydrostatic pressure from forcing water into your bathroom subfloor and ruining the grout restoration efforts.
The mechanics of a leak are often invisible to the naked eye. When you introduce a T-valve into a pressurized system, you are creating two new potential failure points. Most bidet kits come with cheap plastic T-valves that are prone to cross-threading. If you force the nut onto the fill valve, you destroy the plastic threads of the toilet tank. This creates a slow, rhythmic drip. That drip follows the path of least resistance. It travels down the supply line, pools at the base of the toilet, and immediately seeks out the expansion gap hidden by your baseboards. Once the water hits the subfloor, the damage is often irreversible. I have seen OSB subfloors swell by 30 percent in less than 48 hours. It will buckle. The floor will fail. You must respect the pressure.
The chemical bond of pipe sealant
Polytetrafluoroethylene tape and pipe dope serve as the primary defenses against moisture migration in threaded plumbing connections. Applying teflon tape in the correct direction ensures that the rotation of the metal nut tightens the seal rather than unraveling the protective barrier. This prevents water from escaping into the tile and grout matrix.
The physics of the thread are unforgiving. You must wrap the tape clockwise. This ensures that as you tighten the T-valve, the tape is drawn deeper into the threads. If you wrap it counter-clockwise, the act of tightening will bunch the tape up and push it out of the joint. This creates a microscopic channel. Water under 60 PSI of pressure will find that channel. It will seep through. It will soak into your grout restoration secrets for long-lasting results and begin the process of delamination. For plastic-to-plastic connections, I often advise against tape and suggest relying on the rubber washer. For metal-to-plastic, the tape is your only friend.
“A floor is only as good as the subfloor beneath it; deflection is the enemy of every joint.” – Master Flooring Axiom
Why your grout is a sponge
Cementitious grout is inherently porous and acts as a capillary wick for any liquid that reaches the bathroom floor. Without a high-quality grout sealer, a bidet leak will saturate the mortar bed and lead to mold growth and structural rot within the joist system.
Grout is essentially a mixture of sand and cement. On a molecular level, it is full of tiny voids. When water from a bidet leak sits on the floor, gravity and capillary action pull that liquid deep into the grout. It does not just stay on the surface. It travels down until it hits the waterproofing membrane or the subfloor itself. If you have not invested in tile cleaning tips for a sparkling bathroom in 2025, your grout is likely already compromised. The presence of moisture triggers the growth of fungal spores. You will smell the must before you see the rot. The structural integrity of the tile depends on a dry environment. Once that grout becomes a reservoir for water, the bond between the tile and the thin-set begins to fail. The floor will click. The tiles will crack. It is a slow-motion disaster.
| Material Type | Moisture Absorption Rate | Failure Timeframe |
|---|---|---|
| Porcelain Tile | < 0.5% | Indefinite |
| Cement Grout (Unsealed) | 10% – 15% | 48 Hours |
| Plywood Subfloor | Variable | 72 Hours |
| MDF Baseboards | High | 24 Hours |
The baseboard as a moisture wick
MDF baseboards and wood trim act as a silent alarm for plumbing failures by swelling and warping when exposed to standing water. Protecting the perimeter expansion gap is essential for preventing a leaking toilet from destroying the wall assembly and the flooring transition.
Most modern homes use MDF for trim. This material is basically compressed sawdust and glue. It loves water. If your bidet leaks, the water will run across the tile and hit the baseboard. The bottom edge of the baseboard is rarely painted or sealed. It will suck up the water like a straw. You will see the paint start to bubble and the wood start to distort. This is actually a blessing in disguise because it tells you there is a problem. If you had plastic baseboards, the water would just slide behind them and rot the wall studs in secret. Check your baseboards makeover ideas to elevate your space to see if your current setup is helping or hiding your problems. I always recommend a bead of silicone at the bottom of the baseboard in a bathroom. It creates a dam. It buys you time.
The 1/8 inch gap that saves the drywall
Drywall wicking occurs when moisture from a bidet leak travels upward from the floor through the gypsum core. Maintaining a gap between the floor and drywall prevents water from climbing the walls and causing black mold behind the bathroom vanities.
When we install floors, we leave a gap. Not just for expansion, but for safety. If your drywall touches the subfloor, it will pull any moisture upward through the paper backing. This is how you get mold three feet up a wall from a leak that happened on the floor. When installing your bidet, place a moisture sensor behind the toilet. These tiny devices cost twenty dollars. They save twenty thousand dollars. They detect the first sign of tile and grout saturation. Most people skip this. They think they are better than the physics of water. They are wrong. Water always wins if you do not give it a path out or a way to be detected.
- Inspect the bidet T-valve for cracks before installation.
- Hand-tighten all plastic nuts to avoid thread stripping.
- Use a wrench only for the final quarter turn on metal fittings.
- Place a paper towel under the joint for 24 hours to check for slow drips.
- Ensure your bathroom has adequate ventilation to dry surface moisture.
“Proper moisture management is the difference between a floor that lasts a century and one that lasts a season.” – NWFA Technical Guidelines
The selection of floor materials
Non-porous flooring options like luxury vinyl plank and porcelain tile offer the best resistance to the inevitable spills and leaks associated with bidet use. However, even the most waterproof floor cannot protect a subfloor if the caulk joints around the toilet base are not maintained.
People get overconfident with LVP. They hear the word waterproof and they think they are invincible. The planks are waterproof. The joints are not. If water sits on an LVP floor from a bidet leak, it will eventually seep through the locking mechanism. Once it is under the planks, it is trapped. It cannot evaporate. It just sits there and cooks your subfloor. This is why I prefer porcelain tile in bathrooms. With a proper topical waterproofing membrane like Schluter-Kerdi, you can actually create a waterproof tub out of your whole bathroom. That is how you handle a bidet. You build for the flood. You do not just hope it does not happen. Use eco-friendly tile solutions for sustainable homes in 2025 to ensure your materials are as durable as they are responsible.