
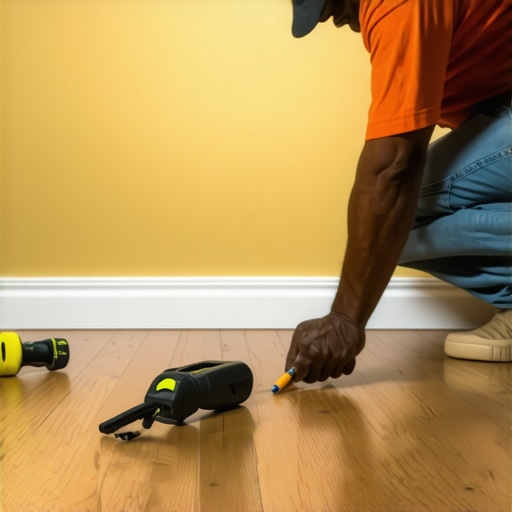
Most guys skip the leveling compound. They think the underlayment will hide the dip. It won’t. I spent three days grinding concrete on a job last month just so the floor wouldn’t click like a castanet. That job was a nightmare because the previous crew thought they could just slap down LVP over a slab that looked like the rolling hills of Kentucky. When you try to put a straight baseboard against a floor that moves more than a politician’s promise, you end up with gaps you could lose a cat in. This is why scribing is the only way to save a job from looking like a DIY disaster. I have spent twenty five years with my knees on the concrete and sawdust in my lungs. I know that a floor is a performance surface. If the foundation is sloped, the trim must be modified to match the reality of the structure. We are not just decorating. We are engineering a visual transition that hides the failure of the subfloor while allowing for the natural expansion and contraction of the materials.
The brutal reality of the unlevel subfloor
Scribing a baseboard to a sloped floor requires a divider tool, a jigsaw, and back-beveling techniques to eliminate the visual gap between the wood trim and the flooring surface. This process creates a custom fit that mirrors the undulations of the substrate or subfloor. Most modern homes suffer from settlement. Whether you are dealing with a slab on grade or plywood joist system, the floor is rarely dead level. When the baseboard sits on a high point, it leaves a hollow space over the low spots. This is unacceptable for high end work. You cannot fill a half inch gap with caulk and expect it to hold. The chemical bond of the caulk will fail as the house breathes. You must remove material from the bottom of the board so that the top remains perfectly level while the bottom hugs the curve of the floor. This is a matter of geometry and physics. You are essentially mapping the topographical profile of the floor onto the vertical plane of the molding. When you get it right, the floor looks like it was built around the trim. When you get it wrong, it looks like a cheap rental property.
Why your level never lies to you
Subfloor levelness is the metric of structural integrity and the foundation for all baseboard installations. If you ignore the bubble in your spirit level, you are gambling with the longevity of your molding joints and caulk lines. I always start by finding the highest point in the room. You take your six foot level and you walk the perimeter. You mark the high spots on the wall with a pencil. A level is not just a tool, it is the only honest thing on a job site. If the floor drops three quarters of an inch over an eight foot span, your baseboard cannot simply follow that slope. If it does, the miter joints in the corners will never close. They will be out of alignment because the vertical axes are not perpendicular. You have to keep the baseboard level and scribe the bottom. This ensures that your coping and miters remain true. I have seen guys try to force the trim down to the floor with a pneumatic nailer. All that does is create tension in the wood fibers. Eventually, those nails will pull out or the wood will split. You are fighting the tensile strength of the material. Stop fighting and start scribing.
“A floor is only as good as the subfloor beneath it; deflection is the enemy of every joint.” – Master Flooring Axiom
The exact geometry of a perfect scribe
Scribing accuracy depends on the compass setting which must match the widest gap between the baseboard and the flooring material. You must lock the wing nut on your dividers to maintain a consistent measurement across the entire length of the trim board. First, you set your baseboard against the wall. You level it using shims until the top edge is perfectly horizontal. Look for the biggest gap between the floor and the bottom of the wood. Set your compass or divider tool to that exact distance. Now, you run the metal point of the compass along the floor while the pencil lead marks the wood. This transfers every dip and hump directly onto the baseboard face. You are recording the seismic history of the house on a piece of pine or MDF. This requires a steady hand and a keen eye. If the floor is tile, the compass point will bump over every grout line. You have to be careful. If you are working with chic baseboard designs that transform rooms in 2025, you need to ensure the profile is not so complex that it loses its structural weight once you cut the bottom off. Scribing is about compromise. You are trading a bit of the height of the board for a gapless fit.
| Material Type | Janka Hardness | Scribe Difficulty | Recommended Tool |
|---|---|---|---|
| Solid Oak | 1290 | High | Jigsaw with 20 TPI Blade |
| Primed MDF | Variable | Low | Power Planer or Sanding Block |
| Pine Trim | 380 to 420 | Medium | Sharp Block Plane |
| Vinyl Trim | Low | Low | Utility Knife or Shears |
Tools that make a carpenter a surgeon
Professional scribing requires specialized equipment including profile gauges, parallel dividers, and high-RPM oscillating saws to achieve microscopic precision. You cannot do this with a miter saw. You need something that can follow a curved line. I prefer a jigsaw with a down-cut blade. A down-cut blade pushes the wood fibers downward which prevents splintering on the finished face of the molding. This is essential when you are working with expensive pre-finished hardwoods. If you are using MDF, you can often get away with a power planer for long, gentle slopes. But for the heavy lifting, the jigsaw is king. You also need to back-bevel your cut. This means you cut at a slight angle, perhaps five degrees, so that the very front edge of the baseboard is the only thing touching the floor. This hollows out the back of the board. Why do we do this. Because it makes the final fit much easier. If there is a tiny pebble or a high spot in the thin-set under the tile, the back-bevel allows the front edge to clear it and sit flush. If you are preparing for baseboards makeover ideas to elevate your space, mastering the back-bevel is what separates the pros from the hacks.
The physics of expansion and environmental moisture
Wood movement is a thermodynamic reality driven by relative humidity and ambient temperature within the residential envelope. A baseboard that is scribed too tightly against a hardwood floor without a proper expansion gap will buckle or cup during the humid months. I have seen this in Houston where the humidity is so thick you can chew it. If you scribe that board down to the floor and nail it tight, and then the floor expands, something has to give. The wood cells will absorb moisture and grow. If they have nowhere to go, they will lift the baseboard or cup the floor planks. This is why the NWFA has strict standards for perimeter expansion. Often, we scribe the baseboard but leave a hairline gap or use a shoe molding to cover a larger expansion space. In Phoenix, the opposite happens. The dry heat sucks the moisture out of the wood. A board that was perfectly scribed in January might show a gap by August because the wood has shrunk. You have to know the equilibrium moisture content of your region. If you are installing in bathrooms near showers that wow modern designs for 2025, you must seal the bottom edge of your scribe with silicone or wax to prevent wicking.
“Precision in the scribe compensates for the sins of the foundation.” – NWFA Field Manual
The master scribe workflow
- Check the floor for high spots using a six foot spirit level across the entire perimeter.
- Identify the widest gap and set your divider tool to that specific measurement.
- Place the baseboard against the wall and level the top edge using plastic shims.
- Drag the divider along the floor to transfer the contour to the baseboard face.
- Use a jigsaw with a fine tooth blade to cut just below the pencil line.
- Back-bevel the cut at a five degree angle to ensure a tight front-edge fit.
- Use an 80-grit sanding block to fine-tune the high spots on the cut line.
- Test the fit and check for any light passing through the bottom seam.
- Seal the bottom edge of the board with a moisture resistant primer or sealer.
- Nail the board into the wall studs, avoiding the floor to allow for movement.
Managing the transition to wet areas
Moisture resistance is the primary concern when scribing baseboards in wet environments such as laundry rooms or bathrooms with curbless showers. In these areas, the floor slope is often intentional for drainage. You are not just dealing with a house settling, you are dealing with a designed pitch. This is where scribing becomes critical. If you are using tile, the floor will be impermeable, but the wood baseboard is a sponge. You should look into eco-friendly tile solutions for sustainable homes in 2025 to find materials that match your aesthetic while providing a stable substrate. When you scribe to tile, you have to account for the grout lines. If you don’t, the baseboard will look like it has teeth. I often recommend using a PVC baseboard or a highly resinous wood like teak or cedar in these spots. If you must use MDF, you are asking for trouble. One overflowing shower and that baseboard will swell like a marshmallow. I always tell my clients that a beautiful bathroom starts with the grout. If the grout is failing, the moisture will get under your scribed trim and rot the wall plate. Check out grout restoration secrets for long-lasting results to keep the entire system waterproof.
The final seal and the deception of caulk
Acrylic latex caulk with silicone additives is used to conceal microscopic imperfections in the scribe line, but it should never be a substitute for mechanical precision. Many installers use caulk to hide a quarter inch gap. That is garbage work. Over time, that caulk will shrink, crack, and collect dust. It becomes a gray line of failure. A master scribe should be so tight that you could almost forego caulk entirely. However, a thin bead is still recommended to seal the joint from atmospheric moisture. You want a high-stretch caulk that can handle movement. When you apply it, use a damp finger or a caulk tool to compress the material into the crevice. This creates a hermetic seal. If you are finishing a bathroom renovation, you might also be looking at showers with a style trendy ideas for small bathrooms. The same scribing principles apply to the tile work around the shower pan. Everything must be tight. Everything must be calculated. The chemistry of the adhesives and sealants you use will determine if the job lasts five years or fifty. Don’t be the guy who relies on the caulk gun to fix lazy carpentry. Be the guy who uses the compass and the plane.
Why a level is your only friend in a crooked house
Structural settling causes joists to deflect and load-bearing walls to shift, creating compound slopes that challenge the spatial reasoning of even the most experienced installers. When you enter a room that is out of square and out of level, your senses will deceive you. You might think the floor is straight because the eye follows the line of the wall. But your laser level or your spirit level will show you the truth. I always set up a laser line around the perimeter of the room at exactly four inches from the floor. This gives me a datum point. I can measure down from the laser line to the floor every twelve inches. If the measurement changes from 4 inches to 4.5 inches, I know I have a half inch drop. This data allows me to visualize the scribe before I even touch the wood. It is mathematical. It is objective. In this industry, objectivity is what builds a reputation. If you want to keep your floors pristine, you also need to know how to clean them properly after the construction dust settles. See tile cleaning tips for a sparkling bathroom in 2025 for the best practices in post-installation maintenance. Remember, the baseboard is the frame of the floor. If the frame is crooked, the picture looks wrong. Spend the time on the scribe. It is the difference between a house and a home built with integrity.