
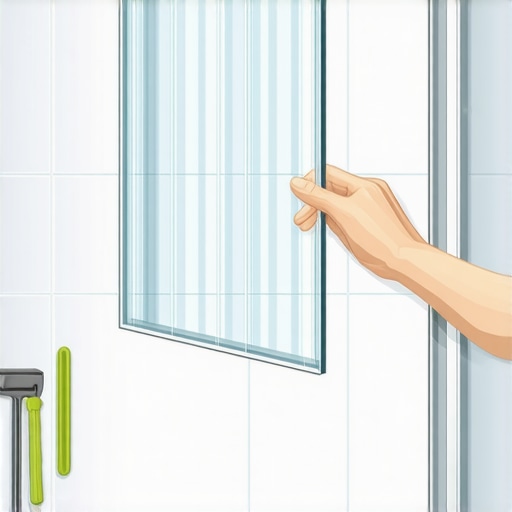
I spent three days grinding concrete on a job last month just so the floor wouldn’t click like a castanet. That same homeowner wanted a glass block window in the shower. Most guys skip the leveling compound and the proper flashing. They think the silicone will hide the gap. It won’t. I have seen fifteen thousand dollar walnut floors cupping because of moisture, but a poorly installed shower window is worse. It is a slow motion flood inside your walls. If you do not respect the physics of water management, your framing will rot before the grout even cures. I approach a window the same way I approach a subfloor. It must be level, it must be square, and it must be able to handle the expansion and contraction of the building envelope without cracking.
The physics of a waterproof aperture
The easiest way to install a glass block window involves using a prefabricated vinyl spacer system and high grade silicone sealant rather than traditional mortar. This method provides a flexible bond that accommodates the thermal expansion of the glass blocks. It eliminates the heavy labor of mixing mortar and ensures a more consistent finish for those working in tight bathroom spaces. Most failures occur because installers treat glass like brick. It is not. Glass has a different expansion coefficient than the wood studs surrounding it. When the steam hits that glass, it grows. If it has nowhere to go, it pushes against the frame and creates micro cracks in your waterproofing.
“A floor is only as good as the subfloor beneath it; deflection is the enemy of every joint.” – Master Flooring Axiom
The same rule applies to windows. You need a solid, plumb rough opening. I have seen hacks try to shim a window into a hole that looked like a trapezoid. You cannot fix that with caulk. You start by lining the rough opening with a liquid applied waterproofing membrane. I prefer a product that dries to a thick, rubbery consistency. You paint it on the studs. You let it dry. You apply another coat. This creates a bathtub inside your wall. If water gets past the glass, it hits the membrane and drains back into the shower pan rather than into your insulation. This is the difference between a job that lasts five years and one that lasts fifty.
Why your mortar mix is failing
Traditional mortar fails in glass block windows because it lacks the lateral strength to resist the vibration of a slamming bathroom door. Glass blocks are non porous, meaning they do not suck the moisture out of the mortar like a ceramic tile or a brick does. This leads to a weak mechanical bond if the mix is not perfect. I always recommend a glass block specific mortar or a silicone based system. The chemistry of glass block mortar includes additives that increase suction. Without these, the blocks will slide around like ice on a hot griddle. You have to wait for the initial set before you even think about cleaning the joints. If you move them too early, the seal is broken forever.
| Material Property | Glass Block Mortar | Standard Thin-set | Silicone Sealant |
|---|---|---|---|
| Adhesion to Glass | High | Low | Excellent |
| Flexibility | Low | Medium | High |
| Water Resistance | High | High | Maximum |
| Cure Time | 24 Hours | 12 Hours | 4 Hours |
When you are stacking the blocks, use reinforcement rods every two courses. These are stainless steel or galvanized ladders that sit in the mortar. They act like rebar in a concrete slab. Without them, the window is just a stack of heavy paperweights. The rods tie the glass into the surrounding wood frame. I anchor them into the studs with stainless screws. Do not use zinc screws. They will corrode in the humid environment of a shower. I have seen zinc screws turn to powder in less than a decade. That leads to the window bowing outward, which is a nightmare to repair once the tile is in place.
The invisible barrier beneath the tile
Proper waterproofing for a shower window requires a continuous integration of the window frame with the wall membrane. You cannot simply butt the tile up to the glass and hope for the best. You need a dedicated transition. I use a bead of high quality urethane sealant at the junction. This remains flexible. The tile around the window should be installed with a slight pitch. Just a sixteenth of an inch is enough to make water run away from the window and toward the drain. If you level it perfectly flat, water will sit. Standing water is the enemy of grout. Even the best grout restoration secrets cannot save a joint that is constantly submerged.
The subfloor under your shower is also part of this equation. If the floor has too much deflection, the walls will move. If the walls move, the window joints will pop. I check the joists before I even touch a glass block. I want to see a L/360 rating at minimum for ceramic and L/720 for natural stone. If the floor is bouncy, your window is going to leak. It is all connected. You cannot build a solid house on a weak foundation, and you cannot put a rigid glass window in a flexible wall. This is why I spend so much time on the prep work. The actual installation of the glass takes two hours. The prep takes two days.
Structural integrity of glass stacks
Installing glass blocks requires a methodical approach to vertical alignment using spacers that maintain a consistent quarter inch gap. These spacers stay in the wall. You do not pull them out like tile spacers. They provide the structural support that keeps the blocks from crushing the mortar at the bottom of the stack. A standard glass block weighs about five pounds. If you stack ten of them, that is fifty pounds of pressure on the bottom joint. Without spacers, that mortar will squeeze out like toothpaste. This leads to uneven joints and a window that looks like a DIY disaster. I hate DIY disasters.
- Check the rough opening for plumb and level using a laser.
- Apply a liquid waterproofing membrane to all raw wood surfaces.
- Set the bottom course of blocks in a heavy bed of glass block mortar.
- Insert vertical and horizontal spacers at every junction.
- Embed stainless steel reinforcement rods every two courses.
- Fill the perimeter gap with expansive foam or high grade sealant.
- Grout the joints and clean the glass surfaces immediately.
The weight of the glass is a factor many people ignore. On the Janka Hardness Scale, we measure how much force it takes to embed a steel ball into wood. While glass does not have a Janka rating, its density is similar to many hardwoods, but it has zero give. If the house settles, the wood will compress. The glass will not. It will shatter or pop out of the frame. That is why the perimeter expansion gap is the most important part of the job. I leave a half inch gap all the way around. I fill it with a backer rod and then silicone. This allows the house to breathe without crushing the window. If you skip the backer rod, you are asking for a structural failure.
The grout line reality
Grout in a shower window must be non porous or sealed with a high quality penetrating sealer to prevent mold growth. I prefer epoxy grout for windows. It is waterproof by nature and does not require sealing. It is harder to work with, but the results are permanent. If you use standard cementitious grout, you will be looking for tile cleaning tips within six months. The steam carries soap scum and skin cells into the pores of the grout. Once it is in there, it is a breeding ground for bacteria. Epoxy grout shuts that door. It is like a plastic shield for your joints.
When you are finishing the window, look at how the tile meets the glass. This is where most people mess up. They use grout in the corner. Grout will crack in a corner. You must use a color matched caulk that is 100 percent silicone. It allows the two different materials to move independently. If you see a crack in your shower corner, water is getting behind the tile. That leads to mold and rot. I have torn out enough showers to know that a tiny crack in the corner usually means the studs behind it are black with rot. Do not be that guy. Use the right sealant from the start.
Modern designs for small bathrooms
Using glass blocks in a small shower creates the illusion of more space while providing necessary privacy. It allows natural light to enter the space, which is essential for making a cramped bathroom feel open. I often see people trying to cram a standard window into a small shower, but the maintenance is a nightmare. Glass blocks are the logical choice. They are durable, easy to clean, and they do not have a frame that will rust or rot. For those looking for showers with a style, glass blocks offer a classic look that has been updated with new patterns and colors.
You can even find frosted or wavy patterns that obscure the view while letting the light in. This is great for bathrooms that face a neighbor’s house. You get the sun, but they do not get a show. I have installed these in multi million dollar homes and small apartments. The physics remain the same. The light refraction from the glass can actually hide small imperfections in your tile work, though I do not suggest relying on that. Always aim for perfection. A well lit shower shows off your craftsmanship, especially if you have used modern designs that emphasize clean lines and high quality materials.
Finishing touches and baseboards
The transition from the shower to the rest of the bathroom should be handled with careful attention to the baseboards and trim. Many installers forget that the shower window height affects the visual line of the room. If your window is too low, it can interfere with the baseboard height on the exterior wall. I always coordinate with the trim carpenter. We look at baseboards makeover ideas to ensure the whole room looks cohesive. You do not want a beautiful glass block window only to have the baseboard hacked around it because of poor planning.
“Deflection is the silent killer of the high end remodel; measure twice or pay twice.” – Master Flooring Axiom
The final word on structural glass is simple. Respect the water. If you treat the installation with the same precision you would use for a site finished white oak floor, it will last. Use the right membranes. Use the right spacers. Never use an em dash when a period will do. Keep your joints tight and your sealant thick. If you do that, you will have a window that looks as good in twenty years as it does the day you finish it. I do not care about aesthetics if the engineering is garbage. Build it right, and the beauty will follow naturally.