
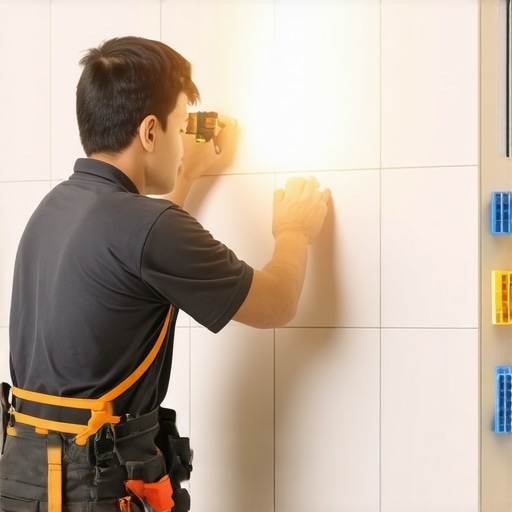
The secret to using a laser level for perfect tile rows
Most guys skip the leveling compound. They think the underlayment will hide the dip. It won’t. I spent three days grinding concrete on a job last month just so the floor wouldn’t click like a castanet. I have spent 25 years on my knees with a moisture meter and a level. I view a floor as a performance surface, not a decoration. Most homeowners think a laser is a luxury, but in reality, it is the only way to combat the inherent deception of a concrete slab. If you do not have a reference line that is governed by the laws of physics and light, you are just guessing. And guessing leads to lippage, cracked grout, and a floor that looks like a topographical map of the Ozarks.
The horizontal plane and the geometry of precision
Laser levels provide an absolute reference point by projecting a perfectly straight beam of light across multiple planes. This eliminates the cumulative error inherent in manual spirit levels. By using a laser, installers ensure that the first course of tile is plumb and level regardless of subfloor irregularities. When you set a laser in the center of a room, you are establishing a benchmark that does not sag or bend. A standard 4 foot level can have a manufacturing tolerance of 0.029 degrees, which sounds small until you are 20 feet away from your starting point. At that distance, a tiny deviation becomes a half inch nightmare. The secret is to find the high point of the floor first. You cannot lower a high spot without a grinder, but you can always build up the low spots with self-leveling underlayment or a thicker bed of thin-set. I always use a 360-degree green beam laser because the human eye perceives green light at a higher frequency, making it visible even in bright rooms where red lasers wash out. This is especially true when setting tile for showers that wow modern designs for 2025, where natural light often floods the workspace.
“A floor is only as good as the subfloor beneath it; deflection is the enemy of every joint.” – Master Flooring Axiom
Why your subfloor is lying to you every day
Subfloors are rarely flat and never level, even in new construction where the concrete has had months to cure. Moisture content and structural settling create dips and crowns that are invisible to the naked eye but catastrophic for large format tile. Most people think a subfloor is a static object. It is not. Concrete is a porous sponge that expands and contracts with the ambient humidity. If you are working in a region with high humidity, like the coastal areas, your subfloor might be holding onto 5 percent more moisture than it should. This moisture can interfere with the bond of your thin-set. When using a laser, you see the truth. You see the 1/8 inch dip that will cause your porcelain to crack when a heavy refrigerator is rolled over it. I always check the L/360 deflection rating before I even open a bag of mortar. If the joists are too far apart, no amount of laser light will save your grout lines from eventually powdering out. You have to address the structural integrity before you worry about the aesthetics. This is why I always recommend checking grout restoration secrets for long-lasting results before you start, so you know what failure looks like.
| Tool Type | Accuracy per 30ft | Visible Range | Best Use Case |
|---|---|---|---|
| Spirit Level | +/- 0.5 inch | 4 to 6 feet | Small repairs |
| Red Laser | +/- 1/8 inch | 30 to 50 feet | Interior low light |
| Green Laser | +/- 1/16 inch | 100+ feet | Large format layout |
| Rotary Laser | +/- 1/16 inch | 500+ feet | Commercial grading |
The red light that never lies about your mistakes
Using a laser level for tile requires a two-point verification process where the laser is checked against a physical chalk line to ensure the diode has not drifted. The beam serves as a constant guide for the top edge of the tile, ensuring that the rows remain perfectly parallel. One contrarian data point that most amateurs miss is the battery heat. If you leave a laser running for four hours, the internal components can heat up, causing the diode to shift by a fraction of a millimeter. It sounds like overkill, but when you are using 24×48 inch tiles, that shift is the difference between a flat floor and a toe-tripping hazard. I always use a tripod. Never set your laser on a bucket or a stack of tiles. The vibrations from your wet saw or even someone walking across the room can shake the laser, throwing off your line. You want a rock-solid foundation for the tool so the tool can give you a rock-solid line for the floor. This precision is what allows you to transition into other areas, like installing chic baseboard designs that transform rooms in 2025, without having a massive gap at the bottom of the wood.
- Calibrate the laser every morning before the first tile is set.
- Mark the laser line on the wall with a pencil as a secondary reference.
- Use a target card to check the height of the tile in the center of the room.
- Set the laser at the finished floor height to account for the thin-set bed.
- Verify the squareness of the room using the 3-4-5 rule with the laser lines.
Managing grout lines and the chemistry of bonding
Grout lines are the shock absorbers of a tile system, and their consistency depends entirely on the precision of the initial layout. A laser level allows for the micro-adjustment of spacers to account for the slight size variations found even in rectified tiles. I have seen guys try to eye-ball grout lines on a 20 foot run. It never works. By the time they reach the far wall, they are off by an inch. The physics of the bond are also critical. You need 95 percent coverage for natural stone and 80 percent for ceramic in dry areas. When you use a laser to keep your rows straight, you spend less time shifting tiles around and more time ensuring that the thin-set hasn’t skinned over. If the mortar skins over, the chemical bond is compromised. It might stick today, but in two years, that tile will sound hollow. If you find your grout is already looking rough, you might need to look into how to refresh grout without replacing it, but prevention is always better than the cure. A laser ensures that your lines are so straight that the grout becomes a design element rather than a distraction.
“Lippage is not just an aesthetic failure; it is a structural hazard that leads to edge chipping and premature wear.” – TCNA Handbook for Ceramic, Glass, and Stone Tile Installation
Baseboards and the transition of the vertical plane
The relationship between the floor and the baseboard is the most visible indicator of a professional installation. A level floor allows for a tight fit between the bottom of the baseboard and the tile, eliminating the need for unsightly caulk beads. When I finish a floor, I want to see a baseboard that sits flush. If the floor has a dip, the baseboard will either have a gap or it will have to follow the curve of the floor, which looks amateur. By using a laser level, you can determine if you need to scribe the baseboard or if you can rely on a standard install. For those looking to upgrade their trim, baseboards makeover ideas to elevate your space can provide the inspiration needed to match a high-end tile job. Remember that the expansion gap is your friend. Do not shove the tile tight against the wall. Leave a 1/4 inch gap for the house to breathe. The baseboard will hide it. This is why we use lasers. We measure the world in 1/16ths so the final product looks like it grew out of the ground perfectly level.