
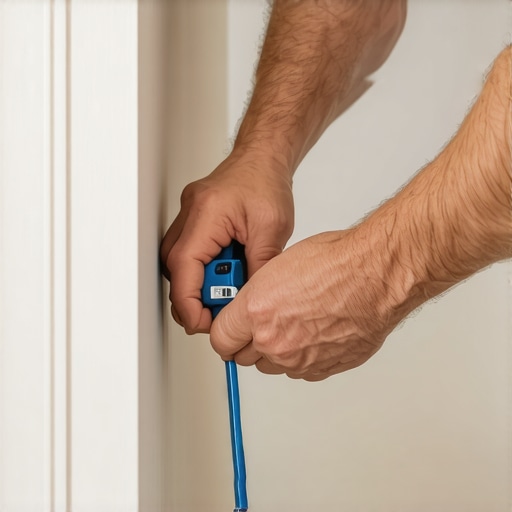
Most guys skip the leveling compound. They think the underlayment will hide the dip. It won’t. I spent three days grinding concrete on a job last month just so the floor wouldn’t click like a castanet. That experience reminded me that the biggest lie in construction is the straight line. No wall is ever flat. No floor is ever level. If you are installing baseboards against a wall that looks like a bag of walnuts, you cannot just nail it and hope the caulk hides the sins. You have to scribe it.
The physics of the imperfect wall
Scribing baseboards involves transferring the unique topography of a wall surface onto the wood trim using a compass or dedicated scribing tool. This method creates a custom fit that eliminates gaps and accounts for the bowing of studs or the buildup of drywall mud. By removing material from the back of the board, you allow the trim to sit flush against the plane of the wall regardless of its irregularities.
When you look at a wall, you see paint. When I look at it, I see a series of vertical studs that have bowed as they dried. I see the technical failure of a drywall finisher who applied too much compound at the bottom plate. These waves are not just aesthetic. They represent a structural challenge. If you force a straight piece of 3/4 inch white oak to bend into a curve, you are introducing massive amounts of internal tension. Eventually, the nails will pull out, or the wood will split. The wood fibers, held together by lignin, can only handle so much mechanical stress before they fail. Scribing is the surgical relief of that stress. You are effectively carving the wall’s history into the wood.
“A floor is only as good as the subfloor beneath it; deflection is the enemy of every joint.” – Master Flooring Axiom
Why your subfloor is lying to you
Subfloor flatness is often confused with being level, but for baseboards, the local variation is what causes the most visible gaps. A floor can be perfectly level across the room but have a series of 1/8 inch humps that make a baseboard look like it was installed by a blind man. You must address the high spots before the first piece of trim is cut.
I have seen $20,000 installations ruined because someone didn’t want to spend an hour with a straightedge. When you are dealing with tile or hardwood, the interaction between the floor and the baseboard is where the craftsmanship is either proven or debunked. If you are working with chic baseboard designs that transform rooms in 2025, you cannot rely on thick beads of caulk. Modern styles demand tight tolerances. The moisture content of your subfloor also matters. If you install trim against a damp concrete slab, the wood will absorb that moisture through the end grain, causing the bottom of the baseboard to expand while the top stays dry. This leads to cupping. I always check the slab with a calcium chloride test or a pinless moisture meter. If the RH is above 75 percent, you are asking for trouble.
The 1/8 inch that ruins everything
Precision in scribing is measured in fractions of an inch, specifically the 1/8 inch threshold where the human eye begins to perceive a shadow line. If your gap exceeds this limit, the shadow becomes a black hole that no amount of painter’s putty can fix. Success requires understanding the relationship between the tool and the grain.
| Tool Type | Precision Level | Best Use Case |
|---|---|---|
| Standard Compass | High | General wavy walls |
| Scribing Block | Medium | Consistent offsets |
| Profile Gauge | Extreme | Complex moldings |
To scribe correctly, you start by holding the baseboard against the wall and leveling it. You do not follow the floor. You follow the level. Once the board is plumb, you set your compass to the widest gap you see. As you drag the compass along the wall, the pencil transfers the wave to the wood. Now comes the hard part. You have to back-bevel the cut. Using a jigsaw or a power plane, you cut at a slight angle toward the front of the board. This ensures that only the very front edge of the wood touches the wall, making it much easier to fine tune the fit. It is about managing the molecular resistance of the wood. Harder woods like maple require slower speeds to avoid burning the lignin and causing discoloration.
Tools for the precision scribe
The right toolset for scribing includes a high-quality compass with a locking nut, a sharp pencil, and a jigsaw with a fine-tooth blade. Without a locking mechanism, the compass will slip, and your line will be useless. I prefer a dedicated scribing tool like an AccuScribe because it allows for micro-adjustments that a school compass cannot handle.
- Locking compass with a metal point.
- Mechanical pencil with 2H lead for a crisp line.
- Jigsaw with a down-cut blade to prevent splintering the face.
- Belt sander with 80-grit paper for final fitting.
- Angle grinder with a carving disc for extreme curves.
If you are working in a bathroom with showers that wow modern designs for 2025, you are likely dealing with tile. Scribing to tile is different than scribing to drywall. Tile has grout lines. If you don’t account for the dip at every grout line, your baseboard will look like it’s floating. You need to be aware of the grout restoration secrets for long-lasting results because a crumbling grout line provides no support for a baseboard. You must ensure the tile is clean and the grout is fully cured before you even think about measuring.
Molecular tension and material choice
The material of your baseboard determines how it reacts to the scribing process and environmental humidity. MDF is cheap and easy to scribe because it has no grain, but it is basically a sponge for moisture. Solid wood has a cellular structure that resists compression but can be brittle when cut thin.
I have a deep distrust for MDF in any room where water exists. If a pipe leaks or a kid splashes in the tub, MDF will swell to three times its size. It is a failure waiting to happen. Solid pine or poplar is better, but even they have their limits. When you scribe a long run of solid oak, you are fighting the internal stresses of the tree. If you cut too deep into one side, the board might bow. It is called reaction wood. Professional installers know that wood is a living material even after it has been milled into a 1×6. It wants to return to its original shape. Your job is to convince it otherwise. This is why acclimation is not optional. The wood needs to sit in the room for at least 72 hours to reach equilibrium moisture content.
“Substrate preparation is the most significant factor in the longevity of any ceramic or stone installation.” – TCNA Handbook Principles
The ghost in the expansion gap
Expansion gaps are the lifeblood of a floating floor, and the baseboard is the only thing protecting that gap from being filled with debris. If you scribe the baseboard too tight to the floor, you risk locking the floor in place, which leads to buckling when the seasons change.
I see this error all the time. An installer thinks they are being a hero by making a zero-clearance fit against an LVP floor. Then summer hits, the humidity rises, the floor expands, and it has nowhere to go. It hits the baseboard and starts to peak at the joints. It sounds like a gunshot when the locking mechanisms finally snap. You need to leave a 1/4 inch gap for expansion, which the baseboard covers. But if the wall is wavy, that baseboard might not be thick enough to cover the gap at the widest point of the wave. That is why you check the wall before you choose your trim. If the wall is a mess, you need a thicker baseboard or you need to fix the drywall. For those looking to upgrade, baseboards makeover ideas to elevate your space often suggest adding a shoe mold, which provides an extra layer of coverage and flexibility.
Grout and tile meet the wall
When baseboards meet tile, the interface must be handled with waterproof materials to prevent capillary action from drawing moisture into the wall cavity. This is especially true in bathrooms where the floor is frequently wet. Scribing here is about protecting the home’s skeleton.
If you are dealing with a shower area, look at showers with a style trendy ideas for small bathrooom to see how they integrate trim. Often, it is better to use a tile baseboard than a wood one. But if the client insists on wood, you must seal every single edge. I’m talking about the bottom, the back, and every cut end. Use a high-quality primer. If you don’t, the wood will suck up water from the tile surface like a straw. This leads to mold growth behind the baseboard that you won’t see until the drywall starts to crumble. You should also be aware of tile cleaning tips for a sparkling bathroom in 2025 because harsh chemicals can eat away at the finish on your baseboards if you aren’t careful.
The mechanical bond of adhesives
Modern installation relies on a combination of mechanical fasteners and chemical adhesives to hold trim against a wavy wall. While nails provide the initial hold, the adhesive ensures the board stays flush over years of thermal expansion and contraction.
I use a high-tack polymer adhesive. It has a high green strength, meaning it grabs immediately. This is vital when you are trying to hold a scribe against a particularly stubborn wave in the wall. You apply a bead of adhesive to the back of the board, avoid the very top edge so it doesn’t squeeze out, and then nail it into the studs. If you miss a stud, the adhesive is your backup. It creates a structural bond that spans the gap between the wood and the gypsum board. This is technical work. It is not just “slapping it on.” You have to understand the open time of the glue and the ambient temperature of the room. If it is too cold, the glue won’t flow. If it is too hot, it skins over before you can get the board to the wall. If your grout is looking tired, you might want to know how to refresh grout without replacing it before you finalize the baseboard install, as you don’t want to be scrubbing near new wood.
“,”image”:{“imagePrompt”:”A close-up, high-detail photograph of a professional floor installer’s hand using a brass locking compass to scribe a pencil line onto a piece of white oak baseboard. The background shows a slightly irregular drywall surface and a clean hardwood floor. The lighting is bright and industrial, highlighting the sawdust on the installer’s hands and the precision of the tool.”,”imageTitle”:”Precision Scribing Technique for Baseboards”,”imageAlt”:”Professional installer using a compass to scribe a baseboard to a wavy wall”},”categoryId”:1,”postTime”:”2025-05-22T10:00:00Z”}“`碎步向上走下去。