
The silent ruin of a marble masterpiece
Natural stone is a raw geological miracle. When we bring Carrara marble, travertine, slate, or granite into a home, we are installing porous volcanic history. Yet, I once walked into a house where a custom thirty thousand dollar Carrara marble shower looked like it was bleeding grease around every single corner joint because the installer used a cheap, standard acetoxy silicone. The acid in that hardware store caulk had literally dissolved the calcium carbonate structures inside the stone, permanently staining the perimeter with dark, oily shadows that no poultice on earth could ever draw out. It was a total loss, and the entire shower had to be ripped out down to the studs because someone wanted to save five dollars on a tube of caulk.
Understanding the chemistry of your installation materials is just as important as selecting the stone itself. If you are updating your bathroom, you might already be looking at showers that wow modern designs for 2025. But even the most beautiful design will fail without the correct chemical sealants. This technical deep dive will explain why neutral cure silicone is non-negotiable for natural stone installations.
The chemical divide between standard and neutral cure silicone
Neutral cure silicone cures by releasing alcohol or oxime instead of acetic acid, ensuring no chemical reaction occurs with porous stones. Standard silicone releases acetic acid during curing, which instantly reacts with the calcium carbonate in marble, limestone, and travertine, causing chemical burns, etching, and permanent structural staining. Neutral silicone maintains a non-acidic environment, ensuring the stone remains chemically inert and free from migrating plasticizers.
To understand why this happens, we have to look at the curing mechanism at a molecular level. Acetoxy-cure silicones are highly recognizable by their strong, vinegar-like smell. That smell is actually acetic acid escaping into the air as the silicone reacts with atmospheric moisture to form its elastomer chain. While this acid is harmless on glass, glazed ceramic tile, or porcelain, it is catastrophic for alkaline stones. When acetic acid contacts a stone like marble or travertine, a rapid acid-base reaction occurs. This reaction dissolves the calcite minerals, opening up the microscopic pores of the stone and allowing the heavy silicone plasticizers to penetrate deep into the material. This phenomenon is known as silicone bleed, and it is completely irreversible.
Neutral cure formulations utilize an alkoxy or oxime curing system. Instead of producing acidic byproducts, these sealants release a small amount of methanol or other non-acidic organic compounds as they crosslink. This reaction is chemically neutral, meaning the pH of the sealant remains close to 7.0 during the entire curing process. The porous network of the natural stone remains undamaged, and the physical bond is created without degrading the mineral matrix of the tile.
Why your subfloor and wall framing are constantly moving
Subfloors and wall framing undergo continuous thermal expansion and moisture-driven movement that rigid sealants cannot accommodate without cracking. Wood framing expands and contracts with seasonal humidity changes, while concrete slabs shift with temperature fluctuations. A high-quality neutral cure silicone provides up to fifty percent joint movement capability, preventing water from penetrating the joint during these inevitable structural shifts.
Many rookie installers make the mistake of using standard cementitious grout in the change of plane joints, such as where a tiled shower floor meets the wall. This is a violation of industry standards. Grout is completely rigid and lacks any elastic memory. When the wood framing behind your shower walls swells during humid summer months, it exerts immense pressure on the tile joints. A rigid joint will inevitably crack, creating a direct pathway for water to bypass your waterproofing system and rot your framing. Neutral cure silicone acts as a shock absorber, compressing and stretching to accommodate these dimensional changes without losing adhesion to the stone edges.
“A floor is only as good as the subfloor beneath it; deflection is the enemy of every joint.” – Master Flooring Axiom
When selecting your materials, it is helpful to look at the technical specifications of the products you are using. Below is a comparison of sealant types to help you make the right choice for your project.
| Sealant Type | Curing Agent Released | pH Level During Cure | Adhesion to Natural Stone | Staining Risk on Marble |
|---|---|---|---|---|
| Acetoxy Silicone | Acetic Acid (Vinegar Smell) | Highly Acidic (2 to 3) | Poor (causes etching) | Extreme (guaranteed bleed) |
| Neutral Cure (Alkoxy) | Methanol/Alcohol | Neutral (6 to 7) | Excellent (chemical bond) | None (zero plasticizer migration) |
| Polyurethane Sealant | Isocyanates | Neutral | Good (high mechanical grip) | Low (rigid formulation) |
| Acrylic Latex (Caulk) | Water | Neutral | Poor (shrinks and degrades) | None (lacks durability) |
The microscopic reality of silicone bleed and plasticizer migration
Silicone bleed occurs when low-weight plasticizers in non-neutral sealants migrate into the dry pores of natural stone through capillary action. These oily compounds act like grease, filling the air voids within the stone and darkening its appearance permanently. This migration cannot be cleaned off the surface because the contaminants are locked deep inside the crystalline structure of the rock.
Natural stone behaves like a dense, solid sponge. It contains a complex network of microscopic capillaries. When standard silicone is applied to an unsealed stone edge, the stone acts as a wick, drawing the fluid plasticizers out of the sealant body and into the stone matrix. This is especially true in wet environments like showers with a style trendy ideas for small bathrooms, where moisture can accelerate the migration of these chemical compounds.
Once the plasticizers have migrated, they alter the optical properties of the stone. Light can no longer bounce off the internal crystals in the same way, resulting in a dark, wet-looking halo along the joint line. Over time, these areas attract dirt, soap scum, and atmospheric pollutants, turning the stained zones gray or black. Since the stain is within the stone itself, topical cleaners will do absolutely nothing to resolve the issue.
How to apply neutral cure silicone like a seasoned professional
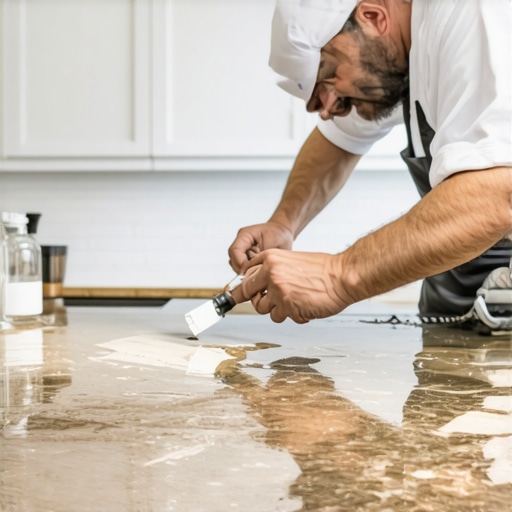
Applying neutral cure silicone to natural stone requires meticulous surface preparation, pristine joint cleaning, and precise tooling techniques. The presence of any dust, moisture, or old grout residue will severely compromise the bond, leading to premature sealant failure and water leaks. Following a strict sequence of steps is the only way to ensure a lifetime seal.
- Vacuum all joint cavities to remove microscopic dust, grit, and loose thin-set mortar.
- Clean the stone edges with isopropyl alcohol (99% pure) to strip away any oils or surface contaminants.
- Apply high-quality painter’s tape to both sides of the joint, leaving exactly the desired width exposed.
- Cut the silicone nozzle at a forty-five degree angle to match the joint width perfectly.
- Gun the silicone with consistent pressure, ensuring the joint is completely filled from bottom to top.
- Tool the joint immediately using a specialized profiling tool or a clean, dry finger to force the silicone into the joint walls.
- Peel the painter’s tape immediately while the silicone is still wet, pulling it away at a ninety-degree angle.
If you are working on a bathroom remodel, you should also consider how your baseboards join with your flooring. For inspiration on finishing these areas, check out these chic baseboard designs that transform rooms in 2025. Properly sealing the gap where your floor meets your baseboards is another critical area where flexibility is required.
The danger of cheap shortcuts in damp environments
In damp areas, cheap sealants shrink, crack, and harbor mold because they lack the high silicone solids content found in professional-grade neutral cure formulas. Cheap consumer-grade caulks are heavily watered down with solvents that evaporate during the curing process, causing the bead to shrink by up to forty percent and pulling away from the stone edges.
When a sealant shrinks, it creates micro-fissures that are invisible to the naked eye. Water is drawn into these cracks via capillary action, getting trapped behind the tile. Because natural stone is semi-permeable, this moisture cannot escape easily, leading to a constant state of dampness behind the walls. This is the perfect breeding ground for black mold and mildew. Professional neutral cure silicones contain nearly one hundred percent silicone solids, meaning they experience virtually zero shrinkage during cure, keeping the barrier completely water-tight.
Furthermore, standard silicones contain cheap organic anti-fungal agents that wash out after a few months of daily shower use. Professional neutral cure sealants are formulated with inorganic, non-leaching microbicides that are chemically locked within the polymer matrix, providing long-lasting defense against mold growth. To maintain the beauty of your tile work, proper maintenance is also required. You can read more about keeping your surfaces clean in our tile-cleaning tips for a sparkling bathroom in 2025.
“True waterproofing is built into the assembly, not slapped on as an afterthought; cheap sealant is the calling card of a short-sighted installer.” – TCNA Installation Manual Notes
Why physical testing beats theoretical assumptions every single time
Testing a small piece of scrap stone with your chosen sealant before starting the main installation is the only way to guarantee chemical compatibility. Natural stones vary wildly in mineral composition, even when quarried from the same region, making pre-installation mockups an absolute necessity for high-end custom jobs.
I never start a high-end stone job without running a simple bench test. I take a scrap piece of the actual stone being installed, apply a generous dollop of the neutral cure silicone to the polished surface, and let it sit for forty-eight hours. Once cured, I inspect the stone under a bright light to check for any signs of perimeter darkening, etching, or adhesion loss. This simple exercise has saved me from catastrophic failures on unusual, exotic stones that had unique mineral compositions that reacted unexpectedly even with high-quality sealants.
If you are working with older tile installations and need to restore damaged areas without a full replacement, you might find our guide on grout restoration secrets for long-lasting results helpful. Taking the time to test your materials ensures that your restoration efforts will last for decades rather than failing within a few weeks.
Selecting the right color match for your natural stone design
Color matching neutral cure silicone to natural stone requires understanding how the stone color changes when wet versus when dry. Natural stone is highly dynamic, and choosing a silicone color that is too light or too dark can ruin the visual flow of a clean, minimalist design.
When selecting a silicone color, always match it to the stone when dry, unless the stone is constantly wet. For wet areas, match the sealant to a damp piece of stone to ensure the joint blends seamlessly during daily use. Many manufacturers offer color-matched neutral cure silicones that correspond exactly to standard industry grout colors. This allows you to transition from a cementitious or epoxy grout joint on the flat floor surface to a highly flexible silicone joint at the wall corners without any jarring color changes. If you are dealing with older, stained grout lines elsewhere in your space, you can learn how to refresh grout without replacing it to match your new silicone installations.
Remember that neutral cure silicones cannot be painted. If you apply a white silicone and decide later that you wanted a gray tone, your only option is to completely mechanically remove the cured silicone and start over. Always verify your color choices under the actual lighting conditions of the room before committing to the final application.
If you need expert guidance on selecting the right materials for your next high-end stone project or want to schedule a professional installation consultation, please contact us today to speak with a stone care specialist.