
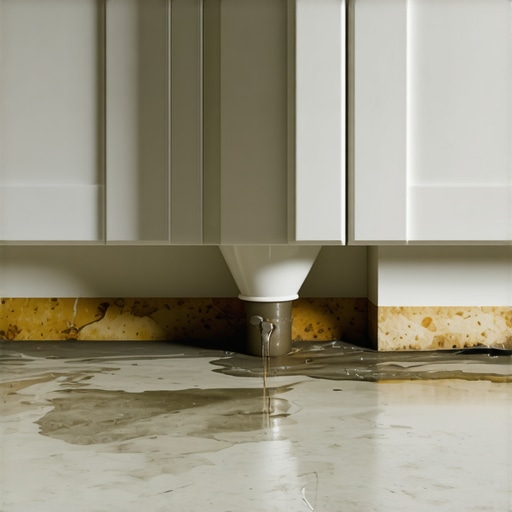
The moisture trap waiting behind your vanity
Damp smells under your bathroom sink are caused by microscopic water bypass through degraded grout joints, failing silicone seals, and unsealed subfloor penetrations behind the vanity cabinetry. When water escapes the splash zone of your sink or adjacent showers, it travels along structural paths of least resistance, pooling beneath the cabinet floor where zero airflow exists. This stagnant environment creates a perfect incubator for fungal growth and structural rot.
I once walked into a house where a $15,000 wide-plank walnut floor was cupping so bad it looked like a potato chip because the installer didn’t check the crawlspace humidity, and the adjoining master bathroom had a slow, invisible subfloor leak migrating right under the threshold. That job taught me that moisture never stays where it starts. It travels. It hunts out raw, unsealed wood. In bathrooms, everyone blames the trap under the sink when they smell rot. They change the washers, tighten the slip joints, and go about their day. Yet the musty, earthy stench remains. That is because the water isn’t coming from the copper or PVC lines. It is coming from the wet floor assembly itself, seeping backward under the vanity base through microscopic gaps.
When you take a shower, water vapor and direct overspray run down the walls. If your perimeter seals are shot, that water finds the subfloor. Once liquid water hits a plywood or oriented strand board subfloor, it triggers a slow, chemical degradation of the wood binders. This release of organic compounds is the actual source of that damp, heavy smell under your vanity cabinet. To stop it, we have to look past the plumbing and focus entirely on the physical assembly of your tile, grout, and subfloor integration.
The physics of capillary action in cementitious grout
Cementitious grout is highly porous and absorbs water through capillary suction, pulling moisture deep into the subfloor assembly where it cannot easily evaporate. Standard sanded or unsanded grouts act like hard sponges, drawing in dirty bathwater and holding it against the underlying thin-set mortar. If your waterproofing membrane is non-existent or punctured, this moisture transfers directly into your home’s structural framing.
“A floor is only as good as the subfloor beneath it; deflection is the enemy of every joint.” – Master Flooring Axiom
To understand why your vanity cabinet smells like a swamp, you must zoom into the crystalline structure of portland cement. When you mix grout with water, hydration creates microscopic pathways called capillary pores. These pores act as drinking straws for moisture. Every time water splashes from nearby modern showers with tiled bases, these capillary straws drink. The water migrates sideways under your tile. It bypasses the ceramic glaze and rests directly on the subfloor plywood. Over time, the plywood starts to rot. If your tile installation lacks a proper sheet membrane or liquid-applied waterproofing barrier, your subfloor is essentially acting as a secondary sponge.
This water movement is aggravated by structural deflection. When someone walks across the bathroom, the subfloor bends. Even a microscopic bounce, one that you cannot feel with your feet, is enough to fracture the rigid crystalline bond of cementitious grout. These micro-cracks accelerate capillary water absorption. Once the liquid gets under the tile, it cannot dry upward because of the impermeable glaze on your porcelain or ceramic tiles. It can only dry downward or sideways. It moves sideways into the dark cavity beneath your vanity, where the raw, unfinished bottom of the cabinet absorbs it, releasing that familiar, stale odor.
The structural failure of tile installations near plumbing lines
Structural failures in bathroom tile happen because installers fail to seal the raw edges of wood subfloors around pipe penetrations, allowing liquid water to seep into the wood core. When pipes are run through floors, wide holes are drilled that expose the vulnerable, end-grain layers of plywood or OSB. Without a 100 percent waterproof collar seal, any water on the tile floor will gravitate directly toward these open holes.
Look under your sink. You will likely see copper water lines and a black or white drain pipe disappearing into the cabinet bottom, and if you are lucky, through the tile floor itself. Now look closely at how those holes were cut. Usually, a subfloor installer or plumber took a spade bit or hole saw, hacked out a rough opening, and ran the pipe. The raw, internal layers of the wood subfloor are completely exposed inside that hole. If water escapes from adjacent small bathroom showers, it runs across the floor, slips under the vanity base, and falls right down that pipe hole.
The wood drinks this water instantly. This causes wood rot, which releases heavy organic smells. To make matters worse, many installers fail to use a flexible, mold-resistant polyurethane sealant at the transition where the tile meets the wood cabinet or drywall. Instead, they slap grout into that joint. Grout is rigid. It cracks immediately when the house settles or when the cabinet expands and contracts with seasonal humidity changes. Once that joint cracks, it becomes an open highway for water run-off. You can learn about restoring these systems by reading about grout restoration secrets for long-lasting results to see how critical proper sealing is to structural health.
Evaluating subfloor materials and moisture capacity
The type of subfloor beneath your tile dictates how fast it will rot when exposed to minor, hidden bathroom leaks. Different wood and cementitious materials react in vastly different ways to sustained high humidity levels under your sink.
| Subfloor Material | Moisture Tolerance | Expansion Rate | Fungal Resistance |
|---|---|---|---|
| Plywood (CDX/Underlayment Grade) | Moderate | Low to Moderate | Poor |
| Oriented Strand Board (OSB) | Very Poor | High (Edge Swelling) | Extremely Poor |
| Cement Backer Board (CBU) | High | Negligible | Excellent |
| Fiber-Cement Underlayment | High | Low | Excellent |
As shown above, OSB is the worst offender. The resin glues holding the wood flakes together will break down rapidly when exposed to continuous humidity. Once wet, OSB swells, particularly at its cut edges, and it never shrinks back to its original thickness. This swelling creates a hump in your tile floor, which cracks the tile grout and invites even more water to penetrate. If you smell dampness, check the subfloor material from the basement or crawlspace if possible. If you see dark staining or white, fuzzy mold growth on the underside of your bathroom subfloor, the structural integrity of your floor is already compromised.
Cement backer board does not rot, but do not let that fool you. It is entirely water-permeable. Water passes right through it like a sieve. If your installer laid cement board directly over plywood without an intervening waterproof membrane like a liquid red barrier or a sheet membrane, the cement board simply transfers the wetness directly down to the wood beneath it. The cement board remains intact, but the wood subfloor beneath it rots in silence, sending musty odors up through the gaps around your plumbing vanity.
How baseboards and perimeter joints hide water damage
Baseboards and bottom wall plates hide water damage by masking the physical evidence of rot while acting as a wick that draws moisture upward into the drywall. When water pools behind a vanity or under a sink, it is drawn into the raw back of baseboard trim and the bottom edge of the wallboard, out of sight but highly active.
Many homeowners ignore their baseboards when looking for the source of a damp smell. They assume the issue is strictly inside the cabinet. However, the baseboard is often the primary vehicle for water migration. Water seeps under the baseboard and gets trapped between the wood trim and the drywall. Since air cannot reach this space, it stays wet for weeks after a single spill or shower steam event. If you are looking to update these areas while fixing structural issues, exploring chic baseboard designs that transform rooms can help you plan a replacement that integrates better moisture protection.
To check for this, run your fingers along the bottom edge of your baseboard where it meets the tile. If the wood feels soft, or if you notice the paint is bubbling, peeling, or discoloring, water has saturated the wood. This is a common consequence of washing floors with too much water or ignoring slow leaks from the shower door. The wet baseboard wicks moisture up into the gypsum core of the drywall, creating a hidden mold colony behind your vanity. If you need to replace damaged trim, consider looking into modern baseboards makeover ideas to elevate your space using moisture-resistant materials like solid PVC or treated wood instead of cheap, paper-faced MDF which disintegrates at the first sign of water.
The step by step system to locate and dry out the moisture trap
Stopping the damp smell under your sink requires a methodical approach to find the source, dry the structural wood, and seal the entire envelope against future water intrusion.
Follow this structural checklist to isolate and remediate the issue:
- Inspect the perimeter grout lines: Look for hairline fractures, missing chunks of grout, or powdery white efflorescence, which indicates water is evaporating out of the joint and leaving mineral deposits behind.
- Perform a moisture meter test: Use a pinless moisture meter on your vanity bottom, adjacent walls, and subfloor to map the exact boundaries of the wet zone.
- Remove the escutcheon plates: Slide back the metal trim rings around your water supply lines to expose the raw drywall or wood cuts behind them and check for dampness or soft wood.
- Clean and treat the affected tiles: Thoroughly clean the surrounding tile with appropriate solutions. Read up on tile cleaning tips for a sparkling bathroom to ensure you do not use harsh chemicals that eat away at surviving sealers.
- Apply a deep penetrating grout sealer: If the grout is structurally sound but porous, apply an active solvent-based penetrating sealer to block capillary water action. Alternatively, research how to refresh grout without replacing it to restore its water-repellent qualities.
- Seal the vanity cabinet penetrations: Fill the raw wood edges of the pipe holes in your cabinet with a high-grade neutral-cure silicone sealant to prevent water from dripping onto the subfloor.
If you find that the grout is completely soft and crumbling, sealer will not save it. You must scrape out the old grout and replace it. While working on this, you might also consider choosing eco-friendly tile solutions for sustainable homes if you decide to rip out water-damaged sections of your floor and rebuild with green, low-VOC waterproofing systems and recycled porcelain materials.
Why too much cushion under your bathroom floor causes joint failure
Many homeowners believe that putting a thick, soft rubber or foam underlayment under their bathroom luxury vinyl plank or tile floor will make it warmer and more comfortable. This is a critical mistake. Too much cushion under a floating floor or tile system actually causes the locking mechanisms or mortar joints to snap under pressure.
When you step on a floor with too much deflection, the joint bends. In a click-lock vinyl floor, this repetitive flexing breaks the tiny tongue-and-groove plastic edges. Once those lock joints break, water from your sink or shower slips straight through the open seams. The water accumulates under the planks, trapped by the plastic backing. It cannot evaporate. It sits there, rotting the subfloor, and sending a horrific damp smell straight up through the expansion gaps at the walls. A bathroom floor must be completely rigid. Use a dense, high-compression underlayment or a direct-bond tile installation over a cementitious backer board with no squish whatsoever. This prevents joint failure and keeps water on top of the surface where it can be wiped away safely.
Rebuilding the subfloor connection for a permanent fix
If the smell persists and you find that your subfloor is indeed soft, you have no choice but to cut out the bad section and rebuild it. This is not as difficult as it sounds, but it requires precision. Cut the damaged plywood back to the center of the nearest floor joists so your new patch has solid structural support. Treat the surrounding joists with a borate-based wood preservative to kill any lingering fungal spores that could cause future dry rot.
“Deflection is the silent killer of floors; if the framing moves, the surface fails.” – Master Flooring Axiom
Install a new piece of exterior-grade plywood of the exact same thickness. Fasten it with deck screws, not nails, space them every six inches to prevent squeaks and movement. Once the patch is secure, apply a high-quality liquid waterproofing membrane over the entire repaired zone. Extend this membrane at least six inches up the wall studs and around all plumbing pipes. This creates a continuous, impervious bathtub liner. If a leak ever happens under your sink again, the water will stay on top of the waterproof membrane. It cannot soak into the wood. It will run out onto the bathroom floor where you will see it immediately, allowing you to dry it up before it ever has a chance to turn into a smelly, rotting mess.