
The chemistry of calcium stearate buildup
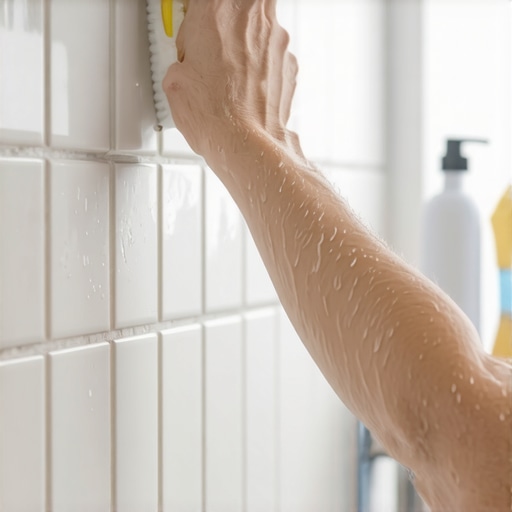
To clean soap scum from grout without bleach, you must use an acidic solution like distilled white vinegar mixed with dish soap or a paste of baking soda and hydrogen peroxide. These agents break the calcium stearate bonds without eroding the cementitious matrix or the pigment of your grout lines. I spent three days grinding concrete on a job last month just so the floor wouldn’t click like a castanet. That job reminded me that the foundation is everything. Grout is no different. It is a porous mineral structure. When you wash your body, the fats in the soap react with the minerals in your water. This creates a waxy substance called soap scum. It is a physical bond that grips the sand in your grout. Bleach only changes the color. It does not break the bond. I have seen countless showers where the grout was white but the pores were packed with dead skin and fat. It is disgusting. You need a chemical reaction to dissolve the wax. Distilled white vinegar contains acetic acid. This acid attacks the alkaline minerals in the soap scum. It turns the solid wax into a liquid you can wipe away. It is simple physics. It is reliable chemistry.
Why harsh oxidizers destroy your shower integrity
Bleach is a high-alkaline oxidizer that weakens the portland cement binder within grout and causes premature crumbling of the joint. Using bleach regularly leads to increased porosity and eventual water intrusion behind the tile substrate which ruins the waterproofing layer and the wall studs. Most people reach for the bottle with the blue cap because they want a fast result. They are trading long-term structural health for a five-minute fix. I have pulled down walls where the tile just fell off the backer board. The grout looked fine on the surface, but the bleach had eaten through the sealer and the cement. It turned the grout into a soft powder. You are essentially dissolving the glue that holds your shower together. This is especially dangerous near the floor where water sits. If you want a real solution, you should look at grout restoration secrets for long-lasting results instead of pouring chemicals down the drain. You need to respect the pH scale. Portland cement is alkaline. Bleach is very alkaline. They do not get along over time. The oxidation process strips the color from the grout. Your dark grey joints will turn splotchy and white. It looks terrible. It feels cheap. Don’t be the person who ruins a ten thousand dollar tile job with a five dollar bottle of bleach.
“A floor is only as good as the subfloor beneath it; deflection is the enemy of every joint.” – Master Flooring Axiom
The acidity balance in natural cleaners
Mixing white vinegar with a surfactant like grease-cutting dish soap creates a powerful cleaning agent that clings to vertical tile surfaces and penetrates deep into grout pores. This combination breaks down the surface tension of the water and allows the acetic acid to reach the embedded soap scum. You need a ratio of one part vinegar to one part soap. Heat the vinegar first. Hot molecules move faster. They hit the soap scum with more energy. I always tell my clients to use a spray bottle. Apply the mix. Let it sit for ten minutes. Do not let it dry. If it dries, the wax just re-solidifies. You are looking for a chemical transition. While you wait, you can think about the transition from your floor to your walls. Often, people neglect the joint where the tile meets the base. You might find inspiration in chic baseboard designs that transform rooms in 2025 to see how a clean transition should look. After the dwell time, use a nylon brush. Avoid wire brushes. Steel will scratch the glaze on your ceramic or porcelain. It will also leave tiny metal fragments in the grout. Those fragments will rust. Then you have orange stains that are impossible to remove. It is a common mistake. Stick to nylon.
| Cleaning Agent | pH Level | Effect on Grout |
|---|---|---|
| Distilled Vinegar | 2.5 | Dissolves mineral deposits |
| Baking Soda | 9.0 | Mild abrasive, neutralizer |
| Hydrogen Peroxide | 4.5 | Mild oxidizer, antimicrobial |
| Bleach | 12.5 | Corrosive to cement binders |
Steam as a molecular hammer
Steam cleaning uses pressurized water vapor at temperatures exceeding 200 degrees Fahrenheit to blast soap scum out of the grout matrix without any chemical additives. This method is the safest for the environment and the most effective for deep sanitization of the tile surface. I love steam. It is pure. It is powerful. When water turns to gas, it expands. When it hits the grout, it forces its way into the microscopic holes. It melts the soap scum instantly. I have a professional unit that smells like hot metal and ozone. You can get a handheld one for your home. It works. You just have to be careful with the heat near your baseboards makeover ideas to elevate your space because excess moisture can warp wood. Steam also kills mold spores. Mold loves soap scum. It is a food source. If you remove the food, you remove the mold. No bleach required. Just pure H2O. It is a beautiful thing to watch the grime just melt and run down the wall. You wipe it with a microfiber cloth. The tile looks new. The grout is intact. This is how pros do it when they don’t want to come back for a warranty call.
Guarding the perimeter near your baseboards
Protecting the intersection of the floor tile and the wall base is essential to prevent moisture from seeping into the subfloor or the wall plate during heavy cleaning. Use painter’s tape or a dry towel to mask off wood baseboards and transitions before applying liquid cleaners to the grout. I have seen beautiful oak baseboards ruined by vinegar runoff. The acid reacts with the tannin in the wood. It turns black. You can’t sand that out. It goes deep. If you are cleaning a shower, focus on the corners. The corners are where the house moves. Usually, there is caulk there, not grout. If the caulk is moldy, you have to rip it out. You can’t clean it. Grout is rigid. Caulk is flexible. If you have grout in your corners, it will crack. I promise you. If you want to see what a proper setup looks like, check out showers that wow modern designs for 2025. They use the right materials in the right places. Use a small brush for the edges. Control the liquid. Don’t just spray like a maniac. Use a sponge to catch the drips. It is about precision. It is about respect for the materials. If you take care of the perimeter, the whole room stays solid.
- Acquire a high-quality nylon grout brush with stiff bristles.
- Prepare a 50/50 mixture of distilled white vinegar and blue dish soap.
- Apply the solution and allow a 10-minute dwell time for chemical breakdown.
- Scrub in small circular motions to lift the emulsified wax.
- Rinse with warm water and dry immediately with a microfiber towel.
- Inspect for any remaining dull spots or mineral haze.
Restoring the grout matrix after cleaning
Once the grout is clean and dry, you must apply a high-quality penetrating sealer to close the pores and prevent future soap scum from bonding to the cement. A sealed grout joint acts as a hydrophobic barrier that repels water and fatty acids, making future cleaning much easier. Cleaning is only half the battle. If you don’t seal it, you just opened the door for more dirt. It is like sanding a floor and not putting down a finish. It won’t last a week. Use a sealer that contains fluoropolymers. They are expensive but they work. They don’t change the color. They just sit in the pores. If you are tired of scrubbing, you might want to learn how to refresh grout without replacing it entirely. Sometimes a colorant sealer is the way to go. It covers stains and seals at the same time. I’ve used it on jobs where the homeowner used bleach for ten years and the grout was permanent beige. It saved the floor. You want the water to bead up on the surface. If the water soaks in, your sealer has failed. Test it every six months. Just a few drops. If it stays as a bead, you are good. If it disappears, get the bottle out. It is a simple maintenance routine. It saves you from the knee-breaking work of a full regrout later.
“A floor is only as good as the subfloor beneath it; deflection is the enemy of every joint.” – Master Flooring Axiom
If you have questions about your specific tile or need a pro to handle the deep stuff, you can always contact us for advice. We see a lot of mistakes. We fix a lot of mistakes. Don’t be a statistic. Clean it right. Use the science of the materials. Forget the bleach. Your tile will thank you for the next thirty years. It is about the long game. It is about the integrity of the build. Keep your tools sharp and your grout sealed. That is the only way to live. If you want more general advice on bathroom maintenance, see our tile cleaning tips for a sparkling bathroom in 2025. We cover everything from porcelain to natural stone. Each material has its own rules. Learn them. Respect them. Work hard. It pays off in the end. It always does.