
I spent three days grinding concrete on a job last month just so the floor would not click like a castanet, and that same level of obsession applies to stone maintenance. Most guys think a floor is just something you walk on, but natural slate is a living thing with a history. I recall walking into a high-end bathroom where the homeowner had used a common grocery-store acidic cleaner on a massive slate walk-in shower for six months. The stone was etched so deeply it looked like a chalkboard that had been scrubbed with a brick. That is what happens when you treat metamorphic rock like it is a piece of plastic. Slate is built from layers of compressed silt and clay, and those layers have tiny microscopic voids that love to trap moisture and calcium stearate. If you do not respect the chemistry of the stone, you will destroy the finish before you even get the scum off.
The microscopic reality of slate stone surfaces
Slate tile is a metamorphic rock composed of phyllosilicates and quartz that requires pH-neutral cleaning agents to prevent mineral etching. Because slate is naturally foliated, it possesses a cleft surface that traps soap scum within its tiny ridges and valleys. You must understand that soap scum is not just dirt. It is a chemical reaction between the fatty acids in your soap and the calcium or magnesium ions in your water. This creates a hard, waxy substance known as lime soap. On a surface as textured as slate, this bond becomes mechanical as much as it is chemical. If you go in there with a metal scraper or a stiff wire brush, you are going to flake the stone layers. Once you lose those layers, the natural color is gone forever.
The chemistry of the soap scum bond
Soap scum consists of insoluble calcium and magnesium stearates that bond to the microscopic pores of natural stone tile and grout. When you take a shower, the steam opens up the tiny capillaries in the slate. As the water evaporates, it leaves behind a film. If you have hard water, this film acts like a glue. I have seen showers where the grout looks black, but it is actually just layers of old skin cells and soap fats. To break this down without eating into the stone, you need a surfactant that lowers the surface tension of the water. This allows the cleaner to get underneath the scum layer. You can find more about maintaining these surfaces in our tile cleaning tips for a sparkling bathroom in 2025 guide. The key is patience. You are not scrubbing, you are emulsifying.
“A floor is only as good as the subfloor beneath it; deflection is the enemy of every joint.” – Master Flooring Axiom
The one pH point that ruins everything
Maintaining a pH-neutral environment is essential for slate tile because acidic solutions like vinegar or lemon juice dissolve the calcium carbonate binders in the stone. Most homeowners reach for white vinegar because they think it is a safe natural cleaner. In my world, vinegar is for salad, not for slate. Vinegar has a pH of around 2.5, which is highly acidic. When that acid hits the slate, it starts a reaction called etching. It literally eats the top layer of the stone. You might get the soap scum off, but you will leave behind a dull, white mark that no amount of scrubbing will fix. You need a dedicated stone soap or a mixture of highly diluted dish soap. If the pH is not between 7 and 10, stay away from it. This is especially true for showers that wow in modern homes where dark slate is a centerpiece.
A step by step protocol for scum removal
Removing soap scum from slate requires a systematic approach using warm water, a plastic scraper, and a non-acidic stone cleaner to protect the surface. I always tell my clients to start with a steam cleaner if they have one. Heat is your best friend when dealing with wax-based scum. The steam softens the fatty acids without the need for harsh chemicals. Once the scum is soft, use a plastic putty knife to gently lift the heavy deposits. Do not use a metal one unless you want to see silver streaks on your black slate. After the bulk is gone, apply your pH-neutral cleaner and let it sit for ten minutes. This dwell time is when the surfactants do the heavy lifting. Then, scrub with a soft nylon brush in a circular motion. This reaches the low points of the cleft stone without damaging the peaks. This method ensures your showers with a style remain pristine for years.
| Cleaning Agent | pH Level | Safety for Slate | Effectiveness on Scum |
|---|---|---|---|
| White Vinegar | 2.5 | High Risk | Moderate |
| Lemon Juice | 2.0 | High Risk | Moderate |
| Dish Soap (Diluted) | 7.5 | Safe | Good |
| Specialty Stone Soap | 8.0 | Very Safe | High |
| Ammonia (Diluted) | 11.0 | Moderate Risk | Very High |
The ghost in the slate cleft
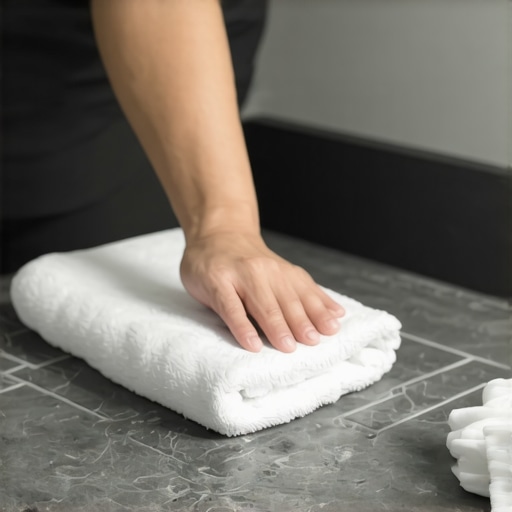
Residual soap scum often hides in the deep textures of slate tile and requires a specialized grout brush to reach into the crevices. Even after you think the surface is clean, the clefts can hold onto microscopic particles. This is where people go wrong. They dry the floor and see white hazy spots. That is either the scum or the minerals in your tap water. You must use a microfiber cloth to buff the stone dry immediately after rinsing. If you let it air dry, you are just redepositing the minerals from your water back into the stone. I have spent decades seeing people ruin perfectly good baseboards and tiles because they were too lazy to use a dry towel. Water is a solvent, and leaving it to sit on your slate is an invitation for trouble. Use a towel and get it bone dry.
Sealing the defense against calcium
Applying a high-quality penetrating sealer is the most effective way to prevent soap scum from bonding to the slate tile surface in the future. A sealer does not make the stone waterproof. It makes it water-resistant by filling the pores with a resin. Think of it like a wax job on a car. The soap scum will still land on the tile, but it will sit on top of the sealer instead of getting inside the stone. I recommend an impregnating sealer that lets the stone breathe. If you use a topical sealer, it will peel off in the high humidity of a shower. You need to reapply this sealer every twelve to eighteen months. If water stops beading on the surface, you are overdue. This is a non-negotiable part of stone ownership. Neglecting this leads to deep staining that might require grout restoration secrets to fix.
- Use only pH-neutral cleaners specifically labeled for natural stone.
- Avoid all abrasive pads like steel wool or green scouring sponges.
- Rinse the area thoroughly with distilled water if your tap water is exceptionally hard.
- Dry the stone with a clean microfiber cloth to prevent water spots.
- Inspect the grout lines for cracks where moisture can seep behind the slate.
The final word on slate preservation
Long-term slate maintenance involves daily squeegeeing and weekly cleaning with stone-safe products to avoid heavy buildup. If you take thirty seconds to squeegee the walls after every shower, you will only have to deep clean once a quarter. It is the lazy path that leads to the hard work. I have seen slate floors that are fifty years old and look better than the day they were installed because the owner understood that stone is a commitment. It is about the chemistry of the water and the physics of the stone layers. Take care of the stone, and it will outlast the house. If you are looking to upgrade your space with sustainable options, check out our eco-friendly tile solutions. Remember that a clean floor is a structural necessity, not just a cosmetic one.