
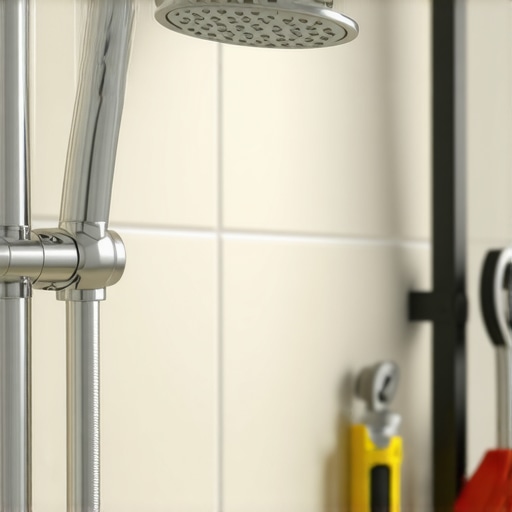
Listen, I have spent twenty-five years staring at the underside of bathroom floors. I have seen what happens when a simple drip is ignored. Most guys skip the leveling compound and the proper waterproofing behind the wall. They think the underlayment will hide the dip. It won’t. I spent three days grinding concrete on a job last month just so the floor wouldn’t click like a castanet. That client thought a tiny drip at the shower head was just an annoying sound. They didn’t realize the water was running back along the arm, behind the tile, and feeding a colony of mold that had eaten the subfloor alive. When you see water spraying from the connection between the shower head and the arm, you are looking at a structural threat, not a cosmetic nuisance. My hands are stained with the residue of a thousand plumbing repairs and the dust of failed grout. I have learned that a floor is only as good as the waterproofing above it. If your shower is leaking, your tile, your grout, and eventually your baseboards are in the line of fire. You need to fix this now, and you need to do it with mechanical precision.
The drip that rots the floor
To fix a leak between the shower head and the arm, you must address the mechanical seal by replacing the PTFE tape or the internal rubber washer. This involves unscrewing the head, cleaning the threads of mineral deposits, and applying new sealant in a clockwise direction to ensure a watertight fit. Most people ignore the physics of the leak. They think the water only goes down the drain. It doesn’t. Surface tension allows water to travel backwards along the chrome shower arm. It reaches the escutcheon plate, the metal ring against the tile, and seeps into the wall cavity. This moisture then travels down the studs until it hits the subfloor. I have seen $20,000 bathroom renovations destroyed by a $2 roll of bad thread tape. We are talking about hydrostatic pressure. When the shower is on, the water is under force. If there is a gap in the threads, that pressure forces water into places it should never be. This is why understanding the chemistry of your sealant is as important as knowing how to use a pipe wrench. If you are planning a renovation to avoid these issues, look into showers that wow modern designs for 2025 to see how modern waterproofing systems integrated into the design can save your home from rot.
The molecular reality of thread sealing
The connection between a shower head and its arm relies on National Pipe Thread standards which are tapered to create a seal through metal-to-metal compression. A leak occurs when these threads are either damaged by mineral buildup or when the sealing medium like PTFE tape has degraded over time. Let us look at the microscopic level. Chrome-plated brass threads are not perfectly smooth. They have tiny valleys and ridges. Polytetrafluoroethylene, or PTFE, is a synthetic fluoropolymer of tetrafluoroethylene. It is incredibly slippery and hydrophobic. When you wrap this tape around the threads, you are filling those microscopic valleys. This allows you to tighten the shower head further without the metal seizing. Without this lubrication, the threads would bind before the taper is tight enough to stop the water. If you live in an area with hard water, calcium carbonate and magnesium deposits build up in these threads. They act like tiny rocks, preventing a flush seal. You have to dissolve these with acetic acid before you even think about putting new tape on. If you don’t, the new tape will just bunch up and fail. This is the same reason we tell people to stay on top of tile cleaning tips for a sparkling bathroom in 2025. Keeping minerals away from your fixtures and grout prevents the structural degradation of the entire wet area.
“A floor is only as good as the subfloor beneath it; deflection is the enemy of every joint.” – Master Flooring Axiom
Why your grout cannot stop the flood
Grout is a porous material made of Portland cement and sand which acts as a filler between tiles rather than a primary waterproofing barrier. When a shower head leaks, water can penetrate the grout lines through capillary action, leading to saturated wall boards and eventual floor failure. Many homeowners believe that their tile and grout are waterproof. That is a lie. Grout is like a hard sponge. If you have a constant drip from the shower head arm hitting the wall, the grout will absorb that moisture. Over time, this causes the grout to soften and crack. Once the grout fails, the water has a direct path to the drywall or backer board. This is where the real nightmare begins. If you are dealing with old, stained grout from years of minor leaks, you should look into grout restoration secrets for long-lasting results. But remember, restoration is only a surface fix. If the leak has been happening for years, you might be looking at a structural rebuild. The water travels down the wall and pools behind the chic baseboard designs you just installed. It rots the wood from the back where you cannot see it. This is why I am so obsessed with the shower arm connection. It is the beginning of a chain reaction that ends with me replacing your joists.
The mechanics of the shower arm connection
A standard shower arm is a 1/2 inch NPT pipe that protrudes from the wall to meet the shower head swivel joint. The seal is either mechanical through threads or compressive through a rubber O-ring or washer located inside the shower head female connection. You need to identify which seal your head uses. Most modern, high-end heads use a rubber washer. If you have a washer, you do not actually need much PTFE tape. In fact, too much tape can prevent the head from screwing on deep enough to compress the washer. This is a common mistake. People think more is better. It is not. If the washer is dry-rotted or flattened, it won’t matter how much tape you use. It will leak. I have seen guys crank down on a shower head with a 12-inch pipe wrench, trying to stop a drip, only to crack the brass fitting inside the wall. Now you are not just fixing a leak, you are tearing out tile. You have to be surgical. Check the washer for elasticity. If it feels like plastic, throw it away. Replace it with a high-grade EPDM rubber washer. This material resists heat and chlorine much better than the cheap stuff found in discount bins.
| Sealant Type | Best Use Case | Cure Time | Resistance Level |
|---|---|---|---|
| PTFE Tape | Threaded metal joints | Immediate | High |
| Pipe Dope | Permanent installations | 24 Hours | Extreme |
| Rubber Washer | Swivel joints | Immediate | Medium |
| Silicone Sealant | Escutcheon plates | 12 Hours | Low (Mechanical) |
Tools of the professional installer
The right tools for fixing a shower head leak include a pair of tongue-and-groove pliers, a clean microfiber cloth, a small brush for thread cleaning, and high-density PTFE thread seal tape. Using a cloth between the pliers and the fixture is essential to prevent marring the finish. I see it all the time. A homeowner tries to fix a leak and ends up scratching the chrome so bad it looks like it was attacked by a bear. Use a rag. Protect the finish. You also need a needle or a small pick. Why? Because the tiny holes in the shower head, the nozzles, get clogged with sediment. When they clog, the back-pressure increases. That pressure looks for the weakest point, which is usually the connection to the arm. If you clean the head while you have it off, you reduce the strain on the threads. This is part of a larger maintenance mindset. Just as you would look for baseboards makeover ideas to elevate your space, you should treat your plumbing fixtures as high-performance machines that require tuning. A clean shower head flows better, leaks less, and lasts longer. Don’t be the person who uses a massive pipe wrench on a delicate fixture. Use finesse.
- Unscrew the shower head by turning it counter-clockwise with protected pliers.
- Remove all old tape and debris from the arm threads using a stiff brush.
- Soak the shower head in vinegar to dissolve internal mineral deposits.
- Check the internal rubber washer for cracks or loss of flexibility.
- Apply 3 to 5 wraps of PTFE tape in a clockwise direction.
- Hand-tighten the head first to avoid cross-threading.
- Give it a final quarter-turn with the pliers to seat the seal.
Fixing the connection without breaking the pipe
To ensure a successful repair, you must apply the PTFE tape in the same direction the shower head will be screwed on, which is clockwise when looking at the end of the pipe. This prevents the tape from unravelling as you tighten the connection. If you wrap it the wrong way, the leading edge of the female thread on the shower head will catch the tape and peel it back. This creates a lump that prevents a tight seal and often makes the leak worse. I recommend using the pink or yellow high-density tape. The white stuff is often too thin for old, worn threads. Wrap it tightly so you can see the shape of the threads through the tape. This is called ‘bedding’ the tape. Once the tape is on, inspect the arm. If the arm itself is loose in the wall, you have a bigger problem. The drop-ear elbow, the fitting the arm screws into, might not be properly braced. A vibrating shower arm can eventually lead to a fatigue failure of the copper pipe. If that happens, the leak won’t be in your shower, it will be in your crawlspace or the ceiling below. I once walked into a house where the kitchen ceiling had collapsed because a vibrating shower arm had finally snapped a solder joint. All because they didn’t secure the pipe behind the tile.
“A floor is only as good as the subfloor beneath it; deflection is the enemy of every joint.” – Master Flooring Axiom
Protecting the baseboards from hidden moisture
Moisture from a shower leak often migrates to the baseboards through the wall cavity or along the floor-to-wall transition, causing swelling, paint peeling, and mold growth. Sealing the gap between the tile and the baseboard with a high-quality 100 percent silicone sealant is the best defense. If you have wood baseboards in a bathroom, you are playing with fire. Even if they are painted, the bottom edge is often raw wood. This raw wood wicks up moisture like a straw. If your shower head is spraying water against the wall and it’s running down to the floor, those baseboards are doomed. You need to ensure your bathroom has proper drainage and that the transition from tile to wall is airtight. I always recommend using a silicone-based caulk that matches your grout color for the change of plane. Do not use regular grout at the floor-to-wall transition. It will crack because the floor and the wall move at different rates. That crack is an invitation for water. If you’re looking for more ways to protect your bathroom, consider eco-friendly tile solutions for sustainable homes in 2025, which often include better integrated waterproofing systems that handle moisture more effectively than traditional methods.
The silent threat to your subfloor
When water penetrates the tile layer due to a fixture leak, it eventually reaches the subfloor, which is typically plywood or oriented strand board. These materials lose structural integrity when saturated, leading to floor deflection and tile failure. This is the molecular zooming I talk about. Plywood is held together by glues. Constant moisture breaks those chemical bonds. The wood layers start to delaminate. Once the subfloor loses its stiffness, it starts to bend. Tile is rigid. It cannot bend. When the subfloor moves, the tile or the grout must break. Most people see a cracked grout line and think they just need to re-grout. They don’t realize the subfloor underneath is now the consistency of wet cardboard. If you find yourself in this situation, you are beyond simple repairs. You are looking at a full tear-out. This is why a $10 shower head repair is so important. It is the cheapest insurance policy you will ever buy for your home. I have seen entire floor systems fail because of a ‘small’ leak that the homeowner ‘got around to’ six months too late. Don’t be that homeowner. Fix the drip, save the floor.
Final inspection of the system
After completing the repair, turn on the water and observe the connection for at least two minutes to ensure no micro-drips are present under pressure. Wipe the joint with a dry tissue; any sign of moisture on the paper indicates a failed seal that requires re-adjustment. If it still leaks, do not just tighten it harder. Take it apart. Check if the tape bunched up. Check if the washer is seated crooked. Check if there is a hairline crack in the shower head’s plastic housing. Sometimes, the leak isn’t the threads, it’s a crack in the fixture itself from over-tightening. If the fixture is fine, and the threads are clean, and you used the right tape, it will hold. Once you are sure it is dry, slide the escutcheon plate back against the wall and apply a small bead of silicone around the top and sides, leaving the bottom open. This allows any water that might get behind the plate to drain out rather than being trapped against the wall. This is the mark of a professional. We don’t just fix the problem; we manage the failure points. Your tile, your grout, and your subfloor will thank you for the attention to detail. [{“@context”:”https://schema.org”,”@type”:”HowTo”,”name”:”How to Fix a Leak Between the Shower Head and Arm”,”step”:[{“@type”:”HowToStep”,”text”:”Unscrew the shower head counter-clockwise using protected pliers.”},{“@type”:”HowToStep”,”text”:”Clean the threads of the shower arm and head using a brush and vinegar to remove mineral deposits.”},{“@type”:”HowToStep”,”text”:”Inspect the internal rubber washer for damage and replace if necessary.”},{“@type”:”HowToStep”,”text”:”Wrap 3 to 5 layers of PTFE tape clockwise around the shower arm threads.”},{“@type”:”HowToStep”,”text”:”Reattach the shower head and hand-tighten, followed by a quarter-turn with pliers.”}],”totalTime”:”PT20M”,”supply”:[“PTFE Tape”,”Rubber Washer”,”Vinegar”],”tool”:[“Pliers”,”Microfiber Cloth”,”Small Brush”]}]