
The invisible foundation of a mosaic masterpiece
Mosaic tile installation requires a perfectly flat substrate to ensure the grout lines remain consistent across the entire pattern. Achieving a level 5 finish on your subfloor or wall backing is the only way to prevent thin-set squeeze-through, which is the primary cause of ruined mosaic patterns during the grouting process. Most guys skip the leveling compound. They think the underlayment will hide the dip. It won’t. I spent three days grinding concrete on a job last month just so the floor wouldn’t click like a castanet. If you do not start with a surface that is flat within one eighth of an inch over ten feet, your mosaic will look like a topographical map of the Andes instead of a professional floor. Mosaics are unforgiving. Because the tiles are small, they follow every hump and valley in the subfloor. When you go to spread your grout, the deeper pockets will hold more material while the high spots will be wiped clean, creating an uneven color and a physical tripping hazard. You have to respect the physics of the bond. I have seen fifteen thousand dollar walnut floors fail because of moisture, but I have seen just as many mosaic showers fail because the installer did not understand deflection. If the floor moves, the grout cracks. It is that simple.
“A floor is only as good as the subfloor beneath it; deflection is the enemy of every joint.” – Master Flooring Axiom
Why your subfloor is lying to you
Subfloor deflection refers to the vertical movement of the floor joists under a load, which directly impacts the longevity of the grout. For natural stone mosaics, the L/720 deflection rating is the industry standard to prevent the brittle grout joints from powdering or popping out over time. You might walk on a plywood subfloor and think it feels solid. It is not. Plywood is organic. It breathes. It expands. It contracts. If you glue a rigid glass mosaic directly to a living, breathing piece of wood, something has to give. Usually, it is the grout. I always tell my clients that the prep work is where the money is spent. The tile is just the jewelry. You need an uncoupling membrane. This layer of plastic and fleece acts as a shear break. It allows the subfloor to move horizontally without snapping the tile or the grout. In showers, this becomes even more vital because of the thermal expansion. When you turn on the hot water, the tile expands. When the water turns off, it shrinks. Without that protection, your beautiful pattern will have a hairline crack running through it within six months. Check out these showers that wow to see how a stable foundation leads to better design outcomes.
The chemical reality of the bond
Grout chemistry involves a complex hydration process where Portland cement forms calcium silicate hydrate crystals to lock tile edges together. The water-to-powder ratio must be measured with laboratory precision to ensure the pigment stays suspended and the compressive strength reaches the required PSI. If you add too much water, you are effectively drowning the cement. The water will evaporate, leaving behind microscopic voids. These voids make the grout porous and weak. It will absorb every drop of dirty mop water. It will grow mold. It will crumble. I use a digital scale. My helpers think I am crazy until they see the results. A perfect mix should have the consistency of peanut butter. It should hang on the trowel without sliding off. When you are working with a mosaic, the sheer number of grout lines means you have more surface area of grout than actual tile in some cases. This makes the chemical integrity of the mix the most important part of the job. For those looking to fix old mistakes, grout restoration secrets can help, but getting it right the first time is better.
| Grout Type | Ideal Joint Width | Primary Benefit | Physical Limitation |
|---|---|---|---|
| Sanded Grout | 1/8 inch to 1/2 inch | Structural strength | Can scratch delicate glass |
| Unsanded Grout | Less than 1/8 inch | Smooth finish for walls | Shrinks in wide joints |
| Epoxy Grout | Variable | Chemical resistance | Difficult to clean during install |
| High-Performance Cement | 1/16 inch to 1/2 inch | Rapid setting and color fast | Expensive per bag |
The 1/8 inch that ruins everything
Expansion gaps at the perimeter of a mosaic installation must be maintained at a minimum of 1/4 inch to allow for building movement. Filling these perimeter joints with hard grout instead of 100 percent silicone caulk will cause the floor to tent or buckle as the seasons change. People always ask me why I leave a gap against the wall. They think it looks unfinished. I tell them it is a breathing room. If the house settles, that gap takes the pressure. If you pack it with grout, the pressure travels into the field of the tile. This is when you hear a loud bang in the middle of the night and find your bathroom floor has humped up like a grave. This is especially true when you are installing chic baseboard designs. The baseboard is not just for looks. It covers that essential expansion gap. I never let my baseboards sit tight against the tile. I leave a tiny gap and fill it with a color-matched sealant. This prevents the baseboard from pinning the floor down. A floor needs to be a floating island of sorts, even if it is glued down.
Techniques for preserving the design
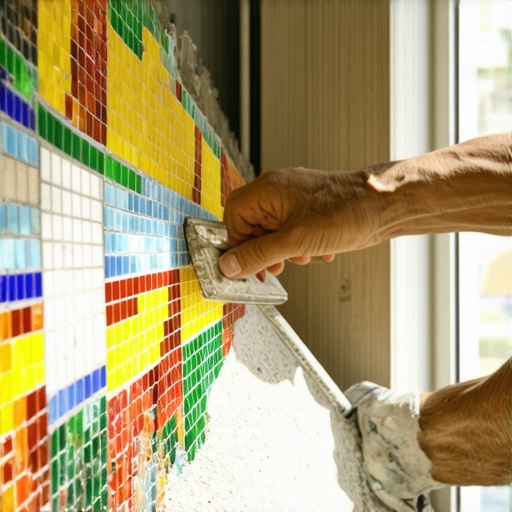
Grouting a mosaic requires a diagonal float motion to ensure the voids are filled without pulling the grout back out of the shallow joints typical of sheet-mounted tile. Using a soft-point rubber float allows the installer to compress the grout into the interstices of the pattern without dislodging the small tiles. The biggest mistake people make is using a sponge that is too wet. I call it the wash-out. If you use too much water during the cleanup, you pull the pigment out of the top layer of the grout. The result is a splotchy, white-washed look that ruins a dark grout line. You want a damp sponge, not a dripping one. You should be able to squeeze it and not see a single drop of water. I use a two-bucket system. One for the initial heavy wipe and one for the final polish. If you do not change your water every twenty square feet, you are just moving thin-set haze around. For more on keeping things clean after the fact, see these tile cleaning tips.
- Check every sheet of mosaic for consistent spacing before the thin-set dries.
- Use a white thin-set for glass or light-colored stone to prevent darkening the tile.
- Wait at least 24 hours for the mortar to cure before applying grout.
- Mix the grout by hand to avoid whipping air bubbles into the paste.
- Perform a test area to ensure the grout color does not stain the tile surface.
[image placeholder]
Managing moisture in the shower environment
Shower installations demand waterproof membranes and vapor retarders behind the mosaic to prevent efflorescence, which is the migration of salt minerals to the grout surface. In high-moisture areas, epoxy grout is the superior choice because it is non-porous and impervious to bacterial growth. When I build a shower, I think like a plumber. I want to know where every drop of water is going. Most people think the tile is the waterproof layer. That is a lie. Water goes through grout. It is a sieve. The real waterproofing is the liquid-applied membrane or the sheet membrane under the tile. If that is done wrong, your grout will always stay damp. This leads to a smell that you can never quite get rid of. It is the smell of rotting 2x4s behind a beautiful mosaic. If you are planning a remodel, consider showers with a style that also prioritize these hidden technical details. It is not just about the trendy look. It is about the stack-up of the assembly.
The finishing touch of baseboards
Baseboard installation over a newly grouted mosaic floor must be handled with precision nailing to avoid cracking the perimeter tiles or compressing the expansion joint. Selecting moisture-resistant materials for baseboards in wet areas prevents wicking and mold formation at the floor-to-wall transition. I see guys shoot nails straight down into the floor. That is a crime. You nail into the studs. The baseboard should hover a fraction of an inch above the tile. This prevents the wood from sucking up water if there is a spill. It also allows the floor to move. If you want to see how to elevate this look, check out baseboards makeover ideas. A well-chosen baseboard acts as the frame for your mosaic artwork. It hides the messy edges and the necessary gaps. It is the difference between a DIY job and a master installation. I always use a 100 percent silicone caulk at the bottom of the baseboard, never grout. Grout will crack at that transition every single time because the wall and the floor move at different rates.
“For mosaics, the maximum allowable variation is 1/8 inch in 10 feet from the required plane.” – TCNA Handbook excerpt
The ghost in the expansion gap
Movement joints are essential components of large-scale mosaic installations, required every 20 to 25 feet in interior settings and more frequently in areas exposed to direct sunlight. Ignoring these structural breaks leads to compressive stress that manifests as spalling grout or shearing tiles. I call it the ghost because you do not see the problem until it is too late. The sun hits a mosaic floor in a sunroom and the tiles expand. If there is no place for that energy to go, the floor literally explodes. I have seen it happen. A loud crack like a gunshot and a line of tile just pops up. You have to design your patterns around these joints. You can use color-matched sealant so they blend in, but you cannot omit them. For those interested in long-term sustainability, eco-friendly tile solutions often focus on these durable installation methods to ensure the floor lasts fifty years instead of five. It is better for the planet and better for your wallet. If you do not have the stomach for the technical details, you can always contact us for professional guidance. A mosaic is a permanent decision. Treat it with the respect it deserves.