
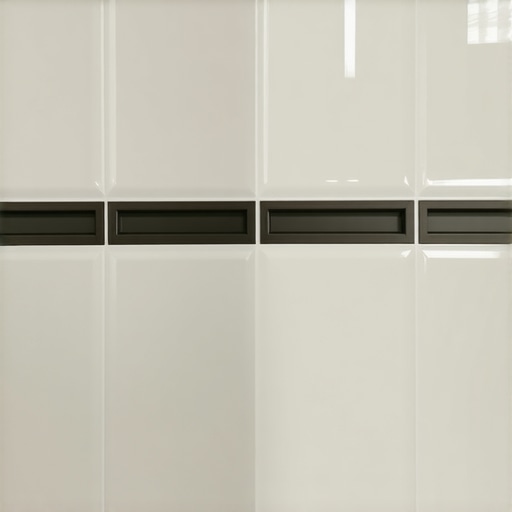
Most guys skip the leveling compound. They think the underlayment will hide the dip. It won’t. I spent three days grinding concrete on a job last month just so the floor wouldn’t click like a castanet. That is the reality of professional flooring. If you do not respect the subfloor, the finish will betray you every single time. This same logic applies to tile edges. You can buy the most expensive Italian porcelain on the market, but if the edge is a raw, jagged mess of grout and chipped glaze, the whole room looks like a DIY disaster from a discount big-box store. Hiding those edges with metal trim profiles is not just about looks. It is about protecting the structural integrity of the tile assembly. [IMAGE_PLACEHOLDER]
The thin line between professional and amateur results
Hiding tile edges with metal trim profiles involves selecting the correct profile height to match your tile thickness plus the thin-set bed. These profiles provide a clean transition between surfaces, protect the fragile edges of ceramic and porcelain from impact, and eliminate the need for traditional bullnose tiles. When I walk onto a job site, the first thing I look at is the corners. If I see a thick, chunky line of grout where a wall meets a floor, I know the installer was lazy. A pro uses a metal profile. These strips, often called Schluter strips or edge guards, are engineered to take the brunt of foot traffic or vacuum cleaner hits that would otherwise shatter the edge of a tile. We are talking about the physics of impact. Ceramic is incredibly strong under compression, but its edges are vulnerable to shear forces. A stainless steel or anodized aluminum L-angle absorbs that energy. It transfers the shock into the setting bed rather than the glaze.
Why your subfloor is lying to you
Subfloor flatness is the single most important factor when installing metal trim profiles because any dip or crown will cause the trim to dive or rise relative to the tile surface. A subfloor must be flat within 1/8 inch over 10 feet to ensure the metal edge remains straight. I have seen it a thousand times. An installer thinks they can use a little extra thin-set to level out the trim. It never works. The trim is rigid. The tile follows the floor. If the floor is wavy, that metal strip will look like a roller coaster. You need to spend the time with the grinder or the self-leveling underlayment before the first tile even touches the ground. This is especially true when you are working on showers that wow, where the verticality of the wall is just as important as the levelness of the floor. If your wall studs are bowed, your metal trim will highlight that curve like a neon sign.
The molecular reality of the thin-set bond
The chemical bond between the metal trim and the tile adhesive depends on the mechanical key provided by the perforated anchoring leg of the profile. Modified thin-sets with high polymer content are required to ensure a permanent bond between the non-porous metal surface and the substrate. When you embed that metal strip into the mud, you are creating a sandwich. The anchoring leg, which is that flat part with the holes in it, needs to be fully encapsulated. I see guys buttering the back of the trim, which is useless. You need to notch the substrate, press the trim in, and then trowel more thin-set over the leg. This ensures that the tile sits on top of a solid, void-free base. If there is air under that leg, the trim will eventually flex. Flex leads to grout cracking. Grout cracking leads to water infiltration. In a bathroom, water is the enemy that never sleeps. You can learn more about maintaining these joints in my guide on tile cleaning tips.
“A floor is only as good as the subfloor beneath it; deflection is the enemy of every joint.” – Master Flooring Axiom
Choosing the right metal for the mission
Selecting a metal profile requires balancing aesthetic goals with environmental demands like moisture levels and chemical exposure. Anodized aluminum is standard for dry areas, while 304 or 316-grade stainless steel is mandatory for commercial kitchens or wet environments to prevent corrosion and pitting. Not all metals are created equal. If you put a cheap aluminum trim in a shower where the homeowner uses harsh acidic cleaners, that trim will oxidize and turn black within two years. You want the right tool for the job. | Material | Corrosion Resistance | Flexural Strength | Best Use Case | | :— | :— | :— | :— | | Anodized Aluminum | Moderate | High | Kitchen Backsplashes | | Stainless Steel (304) | High | Very High | Residential Showers | | Stainless Steel (316) | Extreme | Very High | Commercial Pools | | Solid Brass | Low (Patinas) | High | Luxury Transitions |
The ghost in the expansion gap
Expansion gaps are necessary at the perimeter of every tile installation to accommodate the thermal expansion and contraction of the building structure. Metal trim profiles act as a finished boundary that allows the tile to move independently while covering the required movement joint. Every house breathes. It expands in the summer and contracts in the winter. If you butt your tile tight against a wall or a metal frame without a gap, the floor will tent. I have seen entire living rooms pop up like a tent because the installer forgot the 1/4 inch gap. The metal trim hides this gap. It provides a hard edge for the tile to finish against, while the space behind the trim allows the structure to shift. This is why we use 100 percent silicone sealant at these transitions instead of hard grout. Hard grout has zero flexibility. It will crumble the moment the house settles. For more on finishing these spaces, check out chic baseboard designs.
The 1/8 inch that ruins everything
Precision cutting of metal trim profiles requires a miter box or a specialized metal-cutting blade to ensure 45-degree joins are tight and free of burrs. A gap of even 1/8 inch at a miter joint will trap dirt and create a sharp edge that can snag clothing or cut skin. Most installers use a standard hacksaw. That is a mistake. A hacksaw leaves a jagged edge. I use a non-ferrous metal blade on a sliding miter saw. It gives me a factory-clean edge every time. When you are joining two pieces of trim at an outside corner, the fit must be surgical. If you leave a gap, the grout will eventually fall out of it. You are left with a sharp, ugly hole. Precision is the difference between a floor that lasts thirty years and one that needs a repair in six months.
“Edge protection profiles shall be selected based on the anticipated traffic and environmental exposure of the installation.” – TCNA Handbook
Checklist for a defect-free trim installation
- Verify subfloor flatness within 1/8 inch over 10 feet.
- Select a profile height exactly 1/16 inch taller than the tile thickness.
- Use a dedicated metal-cutting blade for all miter cuts.
- Ensure the anchoring leg is 100 percent encapsulated in thin-set.
- Clean all excess adhesive off the metal face before it cures.
- Leave a 1/16 inch gap between the tile and the metal for grout.
Thermal expansion and adhesive failure
Thermal expansion coefficients differ significantly between ceramic tile and metal trim, meaning the adhesive must be flexible enough to absorb the differential movement. Failure to use a polymer-modified mortar can result in the trim delaminating from the substrate during temperature swings. Think about a sunroom. The sun hits that metal trim and it heats up fast. Metal expands much quicker than porcelain. If you used a cheap, dry-set mortar, the bond will snap. You need those polymers. They act like tiny rubber bands inside the cement, allowing the metal to grow and shrink without breaking the seal. This is the chemistry that keeps your edges tight. If you are worried about the longevity of your grout in these high-stress areas, look into grout restoration secrets for long-term maintenance.
Strategic finishing with baseboards
Baseboards provide the final aesthetic bridge between the floor tile and the wall, often working in tandem with metal trim to hide the required expansion gaps. The integration of high-quality baseboards ensures that the perimeter of the room is as durable as the center. Once the tile and trim are set, the baseboard is the final piece of the puzzle. It covers the vertical expansion gap and protects the wall from the mop. If you are looking to elevate the space, consider baseboard makeover ideas. A tall, clean baseboard against a crisp metal tile edge is the hallmark of modern design. It creates a silhouette that looks engineered rather than just decorated.
Final considerations for the Master Architect
People often ask why I am so obsessed with the details of a metal strip. It is because the floor is a machine. Every component has a job. The subfloor provides the strength, the thin-set provides the bond, the tile provides the wear surface, and the metal trim provides the protection. If any one of those fails, the machine breaks. Do not let your installation be the one that fails because you wanted to save ten dollars on a piece of trim or twenty minutes on subfloor prep. If you need professional guidance on your next project, feel free to contact us. We believe in doing it right the first time because there is no such thing as a quick fix in the flooring world. Success is measured in decades, not days.