
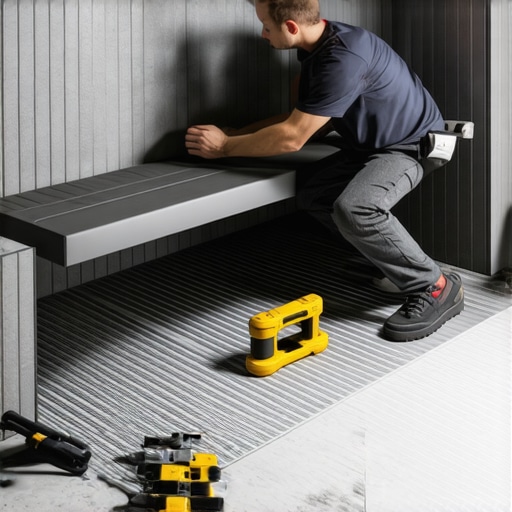
I spent three days grinding concrete on a job last month just so the floor wouldn’t click like a castanet, and that same level of obsession is exactly what you need for a floating bench. Most guys think you just slap a piece of stone on some brackets and call it a day. They are wrong. Last year, I was called to a remodel in a high-end condo where a floating bench had literally ripped out of the wall, taking three square feet of expensive porcelain tile with it. The installer had used standard wood blocking and drywall screws. The wood rotted because of micro-capillary moisture migration, and the screws snapped under the shear force of a 200 pound man. It was a mess that cost the homeowner eight grand to fix. If you want a bench that actually stays on the wall, you have to stop thinking like a decorator and start thinking like a bridge builder. We are talking about cantilevered loads, moisture-impermeable membranes, and the chemical bond of high-polymer mortars. This is not a project for the faint of heart or the light of tool bag. You need to understand the physics of weight distribution and the chemistry of how grout reacts to movement before you ever touch a wet saw.
The structural reality of cantilevered shower seating
A floating shower bench requires structural blocking, heavy-duty stainless steel brackets, and moisture-proof backing to support the weight of a human without failing. The bench acts as a lever, exerting massive downward force on the lower mounting points and pulling outward on the upper fasteners. You must use doubled-up 2×6 framing and structural lag screws to ensure the assembly does not flex, which would otherwise crack the grout and compromise the waterproofing. This is the foundation of any successful bathroom upgrade, much like how showers that wow depend on what is hidden behind the finish material. If the framing moves even a sixteenth of an inch, the tile will pop. You need to ensure your wall studs are perfectly plumb. If they are bowed, the bracket will not sit flush, creating a gap that invites mechanical failure once the load is applied. I always use a six-foot level to check the verticality of the framing before I even think about the tile. If the studs are off, I sister new lumber to them until they are dead on. This is the difference between a floor guy and a hack.
“A floor is only as good as the subfloor beneath it; deflection is the enemy of every joint.” – Master Flooring Axiom
The physics of the steel bracket system
Selecting the right bracket involves calculating the maximum weight capacity and choosing 304 grade stainless steel to prevent corrosion. Most floating benches utilize heavy-duty C-channel or T-bracket designs that are bolted directly into the wall studs. These brackets must be rated for at least 500 pounds to account for the dynamic load of a person sitting down quickly. The steel must be thick enough to resist deflection, usually a minimum of 1/4 inch, because any bending will shatter the tile at the point of contact. You are looking for a material that can handle the high-humidity environment without oxidation. I have seen guys use powder-coated steel that eventually rusted from the inside out because a single scratch in the coating allowed moisture to penetrate. Stainless steel is the only way to go. You also need to consider the length of the bracket. It should extend to within two inches of the front edge of the bench. If the bracket is too short, the front of the bench becomes a diving board, and the stone will eventually snap along its natural cleavage lines or the epoxy joints.
Waterproofing the puncture points in the membrane
Waterproofing a floating bench requires a liquid applied membrane or a bonded sheet system that seals the holes made by the mounting hardware. Every screw that goes into a stud is a potential leak path for water to enter the wall cavity and rot the framing. You must use polyurethane sealant in every pilot hole and apply a thick layer of waterproofing membrane over the bracket flanges before the tile is installed. This creates a monolithic barrier that keeps the showers dry behind the scenes. When you look at tile cleaning tips, you realize that keeping a shower clean is easy, but keeping it structurally sound is the hard part. The intersection where the bracket meets the wall is the most dangerous zone. I typically apply three coats of liquid membrane, allowing each coat to dry to a rubbery finish before applying the next. This ensures that even if the grout fails, the water has nowhere to go but down the drain. I also recommend using a pre-sloped bench top. Even a floating bench needs a 1/4 inch per foot slope toward the drain to prevent water from pooling against the back wall where the grout is most vulnerable.
Selecting the right tile and stone for the surface
The bench surface should be a non-porous material like quartz or large-format porcelain tile to minimize grout lines and prevent water absorption. A single slab is always better than individual tiles because it eliminates the risk of grout failure on the seating surface. If you do use tile, ensure it is a through-body porcelain with a high PEI rating to withstand the friction of use. For those interested in eco-friendly tile solutions for sustainable homes in 2025, there are many recycled glass and stone options that offer the necessary density. Porous stones like marble or travertine are a mistake for a bench unless you plan on sealing them every six months. They will soak up body oils and soap scum, leading to permanent staining and bacterial growth. I prefer a 3cm quartz slab. It is heavy, but it is bulletproof. When you are setting the stone on the brackets, use a high-quality epoxy adhesive rather than standard thin-set. Epoxy has a higher tensile strength and a bit of flexibility, which is necessary when bonding stone to metal. Standard mortar will eventually break its bond with the steel as the two materials expand and contract at different rates during temperature changes in the shower.
| Material Property | 304 Stainless Steel | Powder Coated Steel | Aluminum Brackets |
|---|---|---|---|
| Corrosion Resistance | Excellent | Moderate | Low (Pitting risk) |
| Tensile Strength | High | High | Medium |
| Flexibility | Low | Low | Medium |
| Cost | Premium | Moderate | Low |
The role of grout and movement joints
Grout at the junction of the bench and the wall must be replaced with a 100 percent silicone sealant to allow for independent movement. The bench and the wall will move at different rates, and a rigid grout joint will inevitably crack and leak. Using color-matched caulk ensures a professional look while maintaining a waterproof seal that can stretch and compress. If your grout is already failing in other areas, you might look into grout restoration secrets to bring the rest of the shower up to par. I always leave a 1/8 inch gap at the change of plane. If you jam the tile or the slab tight against the wall, the expansion will cause the tile to tent or the bench to pull the wall tile off. This is a basic TCNA rule that most people ignore. Also, consider the type of grout you use for the rest of the bench if you aren’t using a solid slab. Epoxy grout is the gold standard here. It is essentially plastic and does not allow water to pass through. If you are dealing with an old installation, you can learn how to refresh grout without replacing it, but for a new bench, do it right the first time with high-performance materials.
Integrating baseboards and transitions outside the shower
The transition from the tiled shower area to the bathroom floor should be managed with waterproof baseboards that complement the bench design. While the bench is the focal point inside the stall, the baseboards provide the finished look for the room and protect the drywall from floor mopping and splashes. You can find inspiration in baseboards makeover ideas to elevate your space. I often suggest using the same stone as the bench for the baseboards to create a cohesive architectural theme. This is especially effective in modern, minimalist designs where chic baseboard designs can transform a standard bathroom into a spa-like retreat. If you use wood baseboards in a bathroom, you are asking for trouble. They will swell and rot within a few years. I always recommend PVC or tiled baseboards that are set in a bed of thin-set and grouted just like the floor. This creates a bathtub-like effect for the entire room, meaning a small overflow from the shower or the sink won’t ruin your walls. It is about building for the worst-case scenario, not just the photo shoot.
“Every change of plane in a wet area requires a flexible sealant; cementitious grout in a corner is a guaranteed failure point.” – TCNA Handbook Section EJ171
- Confirm wall framing is doubled 2×6 kiln-dried lumber.
- Use 5/16 inch stainless steel structural screws with 3 inch embedment.
- Apply liquid waterproofing membrane in three distinct, perpendicular layers.
- Ensure a 1/4 inch per foot slope on the bench top for drainage.
- Fill all change-of-plane joints with 100 percent RTV silicone sealant.
The chemical bonding of thin-set to brackets
High-performance thin-set mortars modified with polymers are required to bond tile over the metal and waterproofing layers. Standard unmodified mortar does not have the adhesive strength to stick to the smooth surface of a waterproofing membrane or the metal of a bracket flange. You need a mortar that meets ANSI A118.15 standards, which defines the highest level of bond strength for difficult substrates. These mortars contain long-chain polymers that create a mechanical and chemical lock. When I am mixing my thin-set, I look for a consistency like peanut butter. If it is too wet, it will shrink as it cures, pulling the tile out of alignment. If it is too dry, it won’t wet out the back of the tile, leading to hollow spots. I always back-butter the tile or the stone slab. This ensures 100 percent coverage. In a shower, a hollow spot under a tile is a reservoir for mold and bacteria. You can hear it when you tap on the tile, a dull thud instead of a sharp click. If I hear a thud, I rip it out and start over. That is the only way to ensure a job lasts thirty years instead of three.
Final considerations for a lifetime installation
Building a floating bench is a high-stakes game. You are mixing structural engineering with delicate finish work. If you skip a step or use cheap materials, the house always wins. The moisture in a shower is relentless, searching for any tiny hole in your defense. I have seen entire subfloors rotted out because of a single poorly sealed screw on a bench bracket. Take your time. Let your waterproofing cure for the full 24 hours. Don’t rush the grout. And for heaven’s sake, don’t use wood inside the bench. Use the right steel, the right chemicals, and the right tile. If you have questions about specific products or need a professional assessment of your subfloor before starting a massive project like this, you can always contact us for expert guidance. A floor, and a bench, are meant to be walked on and sat on, not worried about. Treat every installation like it is going in your own mother’s house and you will never go wrong. Detail work is the only thing that separates the masters from the amateurs in this trade. Check your level, check your moisture, and never trust a subfloor you didn’t prep yourself.