
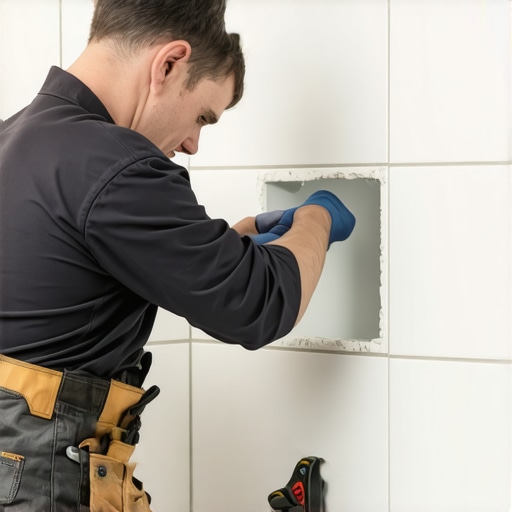
I have spent twenty five years on my knees with a moisture meter and a level. I view every surface in a home as a performance plane. Whether it is a subfloor or a bathroom wall, the physics of the substrate do not change. Most guys skip the plumb check. They think the tile backer will hide the bow. It will not. I spent four hours shimming studs on a bathroom remodel last month just so the cabinet flange would not sit a quarter inch off the wall. If your wall is out of plumb by an eighth of an inch, your medicine cabinet door will swing open every time you brush your teeth. I treat flooring and wall tile as structural engineering challenges rather than cosmetic choices. When you cut into a wall to install a recessed cabinet, you are not just making a hole. You are altering the structural integrity of a vertical assembly. You need to understand the moisture content of the two by four studs and how the chemical bond of modified thinset reacts to the surface tension of the backer board. This is not a task for the weekend warrior who wants a quick fix. This is a surgical operation that requires a deep respect for the Tile Council of North America standards. If you ignore the geometry of the room, the room will eventually ignore your design intent by cracking or leaking. We are going to look at the microscopic reality of this installation from the framing physics to the molecular bond of the grout.
The phantom flatness of a bathroom wall
Installing a recessed medicine cabinet in a tile wall requires a perfectly flat substrate to ensure the flange sits flush against the finished surface. You must check the wall for bows and crowns using a six foot straightedge before any tile is laid. If the wall deviates by more than one eighth of an inch over ten feet, the tile will lip and the cabinet will look like an afterthought. I have seen fifteen thousand dollar bathroom jobs ruined because the installer did not check the crawlspace humidity or the wall plumb. A bathroom wall is a dynamic system. The studs are often wet from the lumber yard. As they dry in the conditioned air of your home, they twist. This twisting can snap the bond of your thinset. I always use a moisture meter on the studs before I even think about hanging cement board. If the moisture content is above twelve percent, the framing is still moving. You do not want to lock a rigid tile system onto a moving wooden skeleton. This is the same reason we let hardwood acclimate for weeks. Wood is a sponge and it will fight your installation every step of the way. When we talk about level and plumb, we are talking about the foundation of the entire aesthetic. A recessed cabinet is the focal point of the vanity area. If the grout lines surrounding it are not perfectly symmetrical, the human eye will catch the error instantly. We are aiming for a zero tolerance environment where the cabinet becomes part of the wall architecture rather than a bulky protrusion.
“A floor is only as good as the subfloor beneath it; deflection is the enemy of every joint.” – Master Flooring Axiom
Why your wall studs are lying to you
Wall studs in modern construction are rarely straight or plumb which necessitates the use of shims and sistered framing to create a true rough opening. Most builders use grade two lumber that has been rushed through a kiln. This results in internal stresses that manifest as crowns. When you find your location between two studs, you cannot assume they are sixteen inches on center or that they are vertical. I use a plumb bob and a laser level to map the entire wall. If the studs are bowed, I sister them with new, straight timber or use plastic shims behind the backer board. You have to think about the load path. While a medicine cabinet is not heavy, the tile around it adds significant weight. You are creating a void in the wall. That void must be supported by a header and a sill. I treat the rough opening like a miniature window. If you just cut the drywall and shove the cabinet in, you are asking for the wall to sag. This is especially true in older homes where the framing might be actual two inch thick oak. In those cases, you need to be careful not to split the wood when you are framing your box. The structural zoomed reality is that every screw you drive into a stud creates a localized stress point. We want to distribute that stress evenly across the assembly. When you prepare the rough opening, ensure that the measurements are exactly one quarter inch larger than the cabinet box. This gives you room to square the cabinet perfectly even if the house has settled. A tight fit is actually your enemy because it leaves no room for the micro movements of the home.
The structural reality of the rough opening
The rough opening for a medicine cabinet must be framed with a header and sill to prevent the weight of the tile from compressing the cabinet box. Without proper framing, the movement of the house will transfer directly to the cabinet causing doors to bind or mirrors to crack. You must use three inch deck screws to secure your framing. Do not use drywall screws because they have no shear strength. They will snap the moment the wood expands. I have seen cabinets held in by finish nails. It is a disgrace. You want a mechanical connection that can withstand the vibrations of a slamming door. When the rough opening is set, you need to think about the transition to the substrate. I prefer using high density cement backer units. These boards have a linear expansion coefficient that is much lower than plywood or drywall. This means they will not grow and shrink as much when the shower is running and the humidity spikes. In the context of showers that wow modern designs for 2025, we see more integration of recessed elements. This requires a heightened focus on the vapor barrier. You must lap your moisture barrier over the framing of the rough opening so that any condensation that forms behind the tile is directed down to the floor or evaporated through the grout. It is a game of managing water molecules.
Moisture physics behind the tile
Effective moisture management in a tiled bathroom involves the use of a continuous vapor barrier and liquid applied membranes to protect the wooden framing from rot. The area behind a medicine cabinet is a prime location for mold because air circulation is limited. I always apply a liquid waterproofing membrane to the inside of the rough opening and the surrounding backer board. This creates a monolithic shield. Think about the chemistry here. These membranes are typically styrene butadiene rubbers. They stay flexible. If the house moves, the membrane stretches rather than tearing. This is vital because the grout between your tiles is not waterproof. Grout is a capillary system. It absorbs water. That water then travels through the grout and hits the thinset. If you do not have a membrane, that water hits your studs. Over five years, that leads to dry rot. I have torn out enough bathrooms to know that what you cannot see is more important than what you can. This is the same principle I apply to floors. If the subfloor is damp, the hardwood will fail. If the wall framing is damp, the tile will pop. You have to respect the hydrologic cycle within your own walls. If you are dealing with old grout issues elsewhere, you might look into how to refresh grout without replacing it to keep the rest of the bathroom up to the same standard as your new installation.
| Material Property | Cement Backer Board | Gypsum Wallboard | Plywood Substrate |
|---|---|---|---|
| Moisture Resistance | High | Low | Medium |
| Deflection Rating | L/360 | L/240 | L/360 |
| Bond Strength | Excellent | Poor | Fair |
| Linear Expansion | 0.005% | 0.015% | 0.20% |
The bond chemistry of thinset mortar
Modified thinset mortar uses polymer additives like ethylene vinyl acetate to create a flexible yet incredibly strong bond between the tile and the substrate. When you are tiling around a recessed cabinet, the bond must be perfect. You are dealing with many small cuts and narrow strips of tile. I use a notched trowel to ensure one hundred percent coverage on the back of the tile. This is called back buttering. If you have air pockets behind the tile, they become weak points. If a child bumps into the cabinet, a tile with a void behind it will crack. The chemistry of the thinset is an exothermic reaction. As the Portland cement hydrates, it forms needle like crystals that grow into the pores of the tile and the backer board. The polymers act like tiny rubber bands, allowing the assembly to absorb the shock of a slamming cabinet door. I never use mastic in a bathroom. Mastic is an organic adhesive that can re emulsify when wet. It is essentially glue. In a humid environment, mastic will fail and your tiles will slide down the wall. You need the mineral bond of a true mortar. This is especially true if you are using large format tiles which have become popular in 2025. These tiles place more stress on the bond coat and require a higher polymer content to stay in place. Always check the expiration date on your thinset bag. If the polymers have degraded, your floor or wall will eventually delaminate. Precision in chemistry leads to longevity in construction.
Grout lines and the geometry of precision
Grout serves as the expansion joint for your tile assembly and must be packed tightly into the joints to ensure structural stability and water resistance. When you reach the edges of the medicine cabinet, the grout joint becomes even more important. You should never grout the gap between the tile and the cabinet flange. That joint needs to be a flexible high quality caulk or silicone. The cabinet and the tile have different expansion rates. If you use rigid grout, it will crack and fall out within six months. I use a color matched silicone that matches the grout. This allows the cabinet to vibrate and move independently of the tile wall. For the rest of the wall, the grout should be mixed with distilled water to prevent efflorescence. Efflorescence is that white salty powder that sometimes appears on grout. It is caused by minerals in tap water reacting with the cement. If you want your bathroom to stay looking sharp, you should follow tile cleaning tips for a sparkling bathroom in 2025. A clean grout line is the mark of a professional. When you are wiping the grout, do not use too much water. If you wash out the pigment, the grout will be splotchy. You want a consistent, sandy texture that fills the entire depth of the tile. This provides lateral support to the tiles, preventing them from shifting under pressure. It is the final step in creating a solid, engineered surface.
“A surface that cannot move will eventually break; the secret to a long lasting floor is controlled flexibility.” – Master Flooring Axiom
Final integration with baseboards and fixtures
The successful installation of a recessed cabinet must account for the surrounding architectural elements like baseboards and vanity lighting to create a cohesive look. I have seen guys install a beautiful cabinet only to realize it is too low and hits the faucet or too high and makes the room look short. You have to map the entire wall. This includes the distance from the floor. If you are upgrading your trim, consider baseboards makeover ideas to elevate your space to match the new high end look of your tiled walls. The baseboard provides the visual anchor for the wall. If your wall is perfectly plumb and your cabinet is centered, but your baseboards are crooked, the whole room will feel off. I use a laser level to project a grid across the entire bathroom. This ensures that the cabinet, the tile rows, and the baseboards are all in perfect alignment. It is about the relationship between horizontal and vertical lines. When you screw the cabinet into the rough opening, do not over tighten the screws. You can distort the cabinet box, causing the mirror to sit at an angle. Use a hand screwdriver for the final turns. Listen to the wood. Feel the resistance. This is where the mechanic with sawdust under his nails excels. It is about the touch and the years of experience knowing when a screw is seated just right. You are not just building a bathroom. You are building a machine that has to function every day for the next thirty years.
Installation Checklist for Success
- Verify wall plumb and stud moisture content below twelve percent.
- Frame rough opening with structural headers and sills using deck screws.
- Install high density cement backer board with alkali resistant tape on joints.
- Apply liquid waterproofing membrane to the entire cavity and surrounding area.
- Layout tile to ensure symmetrical cuts around the cabinet flange.
- Use polymer modified thinset with one hundred percent back buttering coverage.
- Leave a one eighth inch gap between cabinet and tile for silicone sealant.
- Mix grout with distilled water and pack joints completely for maximum density.