
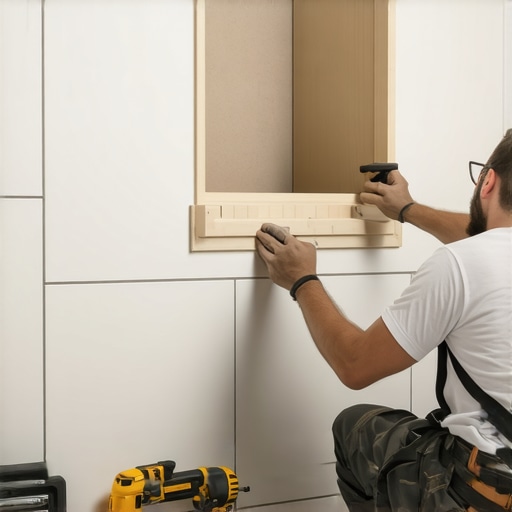
The hidden anatomy of the wet wall
To install a recessed niche in an existing tile wall, you must identify a clear stud bay, cut through the tile and substrate with surgical precision, install structural blocking for support, and apply a high-grade waterproofing membrane before setting the new niche box and finishing with matching tile and grout. This process requires a diamond-blade angle grinder and a deep understanding of what lies behind the ceramic surface. I spent three days grinding concrete on a job last month just so the floor wouldn’t click like a castanet, and that same obsession with the sub-surface is what saves a shower niche. Most guys skip the leveling compound or the structural blocking. They think the tile will hide the dip or the lack of support. It won’t. If the framing inside that wall moves by even a fraction of an inch, your new grout will crack and water will find its way into your subfloor. Every single installation starts with the physics of the wall. You aren’t just making a hole; you are re-engineering the structural integrity of that vertical plane. Before you even touch a tool, you need to know exactly where your studs are. A standard stud finder is often useless through thick tile and cement board. You need to use a high-powered magnet to find the screws in the substrate or, better yet, use a small pilot hole in a discreet corner to feel for the timber. Once you find the two studs that define your bay, you are operating within a 14.5 inch wide space. This is your canvas. If you find a vent pipe or an electrical line in there, your project just became a plumbing job. Never assume the wall is empty. The cavity is a highway for the home’s mechanical systems. When I work on showers that wow modern designs for 2025, I always ensure the cavity is pristine before I commit to the cut.
Choosing your weapons for the surgical cut
Cutting tile that is already installed requires a variable speed angle grinder equipped with a continuous rim diamond blade and a vacuum attachment to manage the massive amounts of silicate dust. You cannot use a hammer and chisel because the vibration will shatter the bond of the surrounding tiles. Use blue painter’s tape to mark your perimeter precisely. The tape serves two purposes. It gives you a clear line to follow and it protects the edges of the tiles you are keeping from chipping. This is the moment of no return. You are cutting into a finished surface. You must maintain a steady hand and a high RPM. If the blade bogs down, it will kick. A kickback can gouge a tile three feet away. Wear a P100 respirator. The dust from cement board and ceramic is toxic to your lungs over time. I have seen guys do this with a dry sponge and a prayer. Don’t be that guy. Use a vacuum shroud. It keeps the workspace clean and allows you to see your line. Once the tile is cut, you have to penetrate the substrate. If it is old-school mud and lath, you are in for a fight. If it is modern cement board, an oscillating tool with a carbide grit blade will make quick work of it. You want the hole to be exactly the size of your niche flange. Too big and you have nothing to screw into. Too small and you will be grinding away at the edges for an hour while your knees give out on the shower floor. Accuracy here is what separates the mechanics from the amateurs.
“A tile installation is only as durable as the substrate it clings to; movement is the death of ceramic.” – Master Flooring Axiom
Framing the skeletal support for the niche
Structural integrity in a retrofit niche depends on the installation of horizontal blocking at the top and bottom of the opening to create a rigid frame for the niche box. You cannot simply glue the niche to the drywall on the other side of the wall. You must cut pieces of 2×4 timber to fit snugly between the existing studs. To do this in a finished wall, you have to use pocket screws or toe-nailing techniques. I prefer using construction adhesive and structural screws to ensure that the blocking becomes a part of the house’s bones. This blocking provides the substrate for your waterproofing and the mechanical fastening point for the niche itself. If your niche is heavy, such as a solid marble unit, this framing is non-negotiable. Without it, the weight will pull on the surrounding tiles and cause them to delaminate. We are talking about the chemistry of the bond. The thin-set is an adhesive, but it is not a structural brace. Use a level to ensure your bottom sill is perfectly flat or, even better, sloped slightly toward the shower pan at a 1/16th inch pitch. This ensures that water doesn’t sit on the shelf of the niche and breed mold. Drainage is the most ignored part of niche installation. If water pools in the corner, your grout will eventually fail, and you will be looking at grout restoration secrets for long-lasting results sooner than you think. The sill must be the hardest working part of the frame.
| Niche Type | Material | Waterproofing Level | Difficulty |
|---|---|---|---|
| Pre-fabricated | High-density foam | Factory sealed | Beginner |
| Stainless Steel | 304 Grade Steel | Gasket required | Intermediate |
| Custom Site-Built | Cement board | Manual membrane | Professional |
The chemistry of the secondary water barrier
Waterproofing a retrofit niche requires a liquid-applied membrane that bridges the gap between the existing shower wall and the new niche insert to prevent capillary action from rotting the studs. You have essentially created a giant leak in your shower. Now you have to heal it. I use a high-performance elastomeric membrane that meets ANSI A118.10 standards. You apply this with a brush or a roller. It starts out bright green or blue and dries to a darker shade. You need two coats. Don’t rush this. The first coat fills the pores. The second coat builds the mil-thickness required to actually stop water molecules. Pay extreme attention to the corners. This is where 90 percent of shower failures happen. The joint where the niche box meets the tile substrate is a movement joint. Use a mesh tape embedded in the liquid membrane to reinforce this transition. This creates a flexible, waterproof gasket. If you are using a pre-fabricated foam niche, the flange should be glued to the substrate with a specialized sealant. I have seen people try to use regular bathroom caulk for this. That is a recipe for disaster. Caulk is a topical seal; you need a structural waterproof bond. When you are dealing with moisture, you have to think like a scientist. Water is a solvent. It will eventually find any weakness in your armor. If you are also updating the room’s look, consider how your niche interacts with chic baseboard designs that transform rooms in 2025 to keep a unified aesthetic throughout the space.
Layout logic and the centering of the grout lines
Proper tile layout for a recessed niche involves centering the opening so that the grout lines align with the existing wall pattern to create a visually integrated look. This is the hardest part of a retrofit. In a new build, you plan the niche around the tile. In a retrofit, the tile is already there, and it dictates where the niche goes. If you cut the hole and find that you have a 1/2 inch sliver of tile on one side, it will look like a hack job. You have to calculate your cuts before you strike the first blow with the grinder. I spend more time with a tape measure and a pencil than I do with the saw. You want the niche to look like it was always there. This means your horizontal grout lines should run straight through the niche. The vertical lines should be balanced. If the niche is 12 inches wide and your tiles are 12 inches wide, you should try to replace one full tile with the niche. If the tiles are offset, you have to be clever. Use a matching grout to hide any slight imperfections in the cut. This is where your skills as a finisher come into play. The thin-set you use to set the niche tile must be polymer-modified. This gives it the flexibility to handle the thermal expansion and contraction of the shower. Hot water hits the tile, the tile expands. Cold water hits it, it contracts. If your thin-set is too rigid, the tile will pop off the foam or the cement board. It is basic thermodynamics.
“Waterproof does not mean water-tight if the flashing is compromised.” – TCNA Handbook Standard
Critical tools for the niche retro-fit checklist
- Variable speed angle grinder with vacuum shroud
- P100 silica-rated respirator and eye protection
- Diamond-grit oscillating tool blades for substrate precision
- Laser level for horizontal alignment across the shower wall
- ANSI A118.10 liquid waterproofing membrane
- Structural timber screws and 2×4 blocking material
- Polymer-modified thin-set with high shear strength
- Small format tile for niche interior to minimize complex cuts
Finishing the perimeter with aesthetic precision
The final step of a niche installation is the application of color-matched 100 percent silicone sealant at all change-of-plane joints to allow for structural movement without cracking. Grout is not waterproof, and it is not flexible. If you put grout in the corners of your niche, it will crack within six months. This is a fact of life. You must leave a 1/8 inch gap at every corner and fill it with silicone. This creates a movement joint. When the house settles or the wood studs swell with humidity, the silicone stretches. The grout stays put. This is the difference between a job that lasts five years and a job that lasts fifty. Most homeowners hate the look of silicone because they think it looks messy. If you use a profiling tool and some soapy water, you can get a line that looks as clean as a factory edge. This is also a good time to inspect the rest of your shower. If the existing grout looks dingy, you can use specialized cleaning techniques to bring it back to life. A new niche in a dirty shower looks like a diamond in a coal mine. Take the time to clean the surrounding area. After the silicone has cured for 24 hours, the shower is ready for use. You have successfully performed surgery on your bathroom. You have added storage and value without a full demolition. It takes patience, the right chemistry, and a respect for the structural reality of the wall. Final thoughts focus on maintenance. Keep the niche dry and avoid using harsh chemicals that can break down the sealant. Your hard work in the framing and waterproofing stages is what ensures this project remains a success for the life of the home.{“@context”:”https://schema.org”,”@type”:”HowTo”,”name”:”How to install a recessed niche in an existing tile wall”,”description”:”A professional guide to retrofitting a shower niche into a finished tile wall using structural framing and waterproofing techniques.”,”step”:[{“@type”:”HowToStep”,”text”:”Locate the stud bay and mark the cut lines using a level and painter’s tape.”},{“@type”:”HowToStep”,”text”:”Cut the tile and substrate using an angle grinder with a vacuum attachment.”},{“@type”:”HowToStep”,”text”:”Install horizontal blocking between studs to support the niche frame.”},{“@type”:”HowToStep”,”text”:”Apply two coats of liquid waterproofing membrane to the cavity and flanges.”},{“@type”:”HowToStep”,”text”:”Set the niche box and tile the interior surface using polymer-modified thin-set.”},{“@type”:”HowToStep”,”text”:”Apply 100 percent silicone sealant to all internal corners and edges.”}]}