
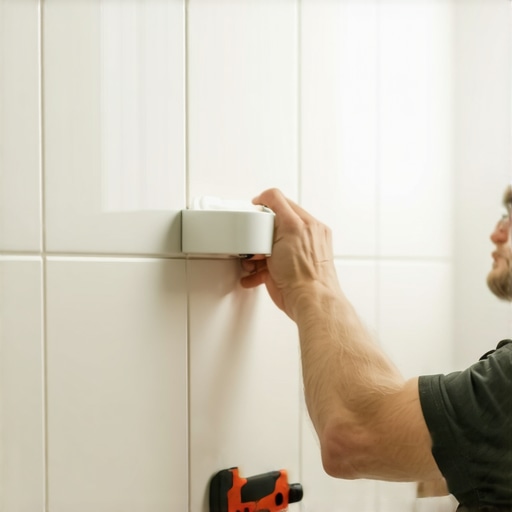
I once walked into a luxury bathroom in South Florida where a twenty thousand dollar custom shower was rotting through the floor joists because of a three dollar mistake. The installer had cut a hole for a recessed soap dish and simply slapped it into the wall with a bit of mastic. They didn’t integrate the niche into the waterproofing membrane. Six months later, the humidity of the Everglades met the steam of the shower, and the backer board turned into a sponge. The entire wall had to be ripped out to the studs. I spent three weeks rebuilding that shower because someone didn’t understand the physics of water migration. If you think a soap dish is just a place to put a bar of Ivory, you are building a ticking time bomb behind your tile. Structural integrity in a wet environment is about managing the path of least resistance for every drop of water.
The hidden physics of moisture migration
Installing a recessed soap dish requires maintaining a continuous waterproof membrane across the wall cavity. You must integrate the dish flange with the existing waterproofing system using liquid membranes or fleece bonded fabrics. Failure to seal these junctions leads to capillary action and structural rot behind the tile surface. Water does not just flow down a drain; it moves through grout via capillary action and finds gaps in the substrate. When you penetrate a shower wall to install a niche, you create a breach in the envelope. The molecular reality of water vapor is that it will seek out every unsealed edge. To prevent this, your installation must treat the soap dish flange as an extension of the wall itself. This means using an ANSI A118.10 certified waterproofing membrane that overlaps the niche and the backer board by at least two inches. Without this overlap, you are relying on thin-set and grout to keep water out. Grout is a filter, not a sealer. It will allow moisture to pass through. If that moisture hits raw studs or non-waterproofed insulation, you are inviting black mold to take up permanent residence in your walls.
Why your plastic insert is a liability
A plastic recessed soap dish often fails because the smooth surface of the flange does not provide a mechanical bond for thin-set. You must use a pre-fabricated niche made of high density foam or stainless steel with a factory-applied fleece. These materials ensure that the waterproofing chemicals can form a permanent bond. Many homeowners buy cheap plastic inserts from big-box retailers. These inserts have a glossy finish that is chemically inert to most cementitious adhesives. You might get it to stick for a year, but the constant thermal expansion and contraction of the shower will eventually break that bond. When the bond breaks, a microscopic gap forms between the tile and the niche flange. Water enters that gap and begins its slow destruction of your subfloor and framing. I prefer using high-density polystyrene niches that are pre-coated with a cementitious surface. These units become part of the wall, moving at the same rate as the rest of the tile assembly. They don’t flex when you lean on them, and they don’t sweat in high-humidity environments like the swampy coast of Houston or the humid summers of the Midwest. If you are aiming for showers that wow, you cannot start with a flimsy plastic foundation.
“A floor is only as good as the subfloor beneath it; deflection is the enemy of every joint.” – Master Flooring Axiom
The surgical cut and the membrane bond
Cutting the hole for your recessed soap dish requires precision to ensure the flange is flush with the backer board surface. You must avoid cutting through structural studs while ensuring the niche has solid blocking for support. A flush mount is mandatory for the waterproofing membrane to lay flat and prevent water pooling. Most guys use a utility knife and hope for the best, but I prefer a multi-tool with a diamond blade for cement board. You want the niche to fit snugly, but you also need to ensure that the backer board is secured tightly around the perimeter of the opening. If the board flexes, the grout lines around the soap dish will crack within months. Once the hole is cut, you apply a bead of high-quality polyurethane sealant to the back of the flange before sliding it in. This is your primary defense. After the niche is fastened, you apply a liquid-applied waterproofing membrane or a fleece tape over the seams. The goal is a monolithic surface. Think of it like a boat hull. If there is one pinhole, the boat sinks. If there is one unsealed seam in your soap dish, your wall rots. This level of detail is what separates a master from a weekend warrior who thinks showers with a style are just about the tile patterns.
| Material Type | Bond Strength | Waterproofing Ease | Thermal Expansion |
|---|---|---|---|
| Plastic / ABS | Low | Difficult | High |
| Stainless Steel | Medium | Moderate | Medium |
| Pre-Sloped Foam | High | Easy | Low |
| Custom Framed | Variable | Expert Only | Variable |
Adhesive chemistry in wet environments
Modified thin-set mortar is the only acceptable adhesive for installing a recessed soap dish and its surrounding tile. You must use a mortar that meets ANSI A118.15 standards to ensure a high polymer content for flexibility and water resistance. Never use mastic in a shower niche because it will re-emulsify when exposed to moisture. The chemistry of thin-set is fascinating. The polymers in the mix create a bridge between the cement and the substrate, forming a hydrophobic lattice that resists water penetration. When you are tiling a niche, you are dealing with gravity and constant water exposure. You need a sag-resistant mortar that holds the tile in place on the vertical surfaces of the soap dish. If you use a cheap, unmodified thin-set, the water will eventually break down the bond. This is especially true if you are installing eco-friendly tile solutions which often have different absorption rates than standard ceramic. The bond must be absolute. I spend more money on my mortar than some guys spend on their entire tool kit, and that is why my showers don’t leak.
The 1/8 inch that ruins everything
Proper drainage in a soap dish requires a subtle slope of at least one eighth of an inch toward the shower floor. You must ensure the bottom shelf of the niche does not allow water to pool against the back wall. Standing water will eventually degrade the grout and the waterproof seal. It sounds like a small detail, but a flat shelf is a disaster. Water has surface tension. It will sit there, slowly eating away at the minerals in your grout and creating a breeding ground for bacteria. When I set the bottom tile of a niche, I always put a slight pitch on it. You can’t see it with the naked eye, but the water knows where to go. This is the same logic we use in subfloors to prevent pooling. If you don’t slope the niche, you will be looking for tile cleaning tips every weekend just to keep the slime at bay. Precision is the difference between a clean shower and a moldy mess.
- Confirm the niche location is between studs.
- Apply waterproof sealant to the niche flange back.
- Secure the niche with stainless steel screws.
- Apply fleece tape or liquid membrane over all joints.
- Ensure a minimum 2-inch overlap on all sides.
- Verify the bottom shelf has a 1/8 inch outward slope.
Grout is not a waterproof barrier
Grout serves as a sacrificial joint and an aesthetic filler, but it is not a waterproof material. You must use a high-performance epoxy grout or a cementitious grout with a built-in sealer for the area around the soap dish. Even then, the waterproofing behind the tile is the real hero. People always ask me why their grout is cracking around the soap dish. It is usually because the sub-structure is moving. If you have followed the proper niche installation steps, the grout should stay intact. However, in the corners of the niche, you should never use grout. You must use a 100 percent silicone caulk that matches your grout color. Silicone is flexible and truly waterproof. It allows for the expansion and contraction that happens when you turn on the hot water. If you use grout in those corners, it will crack, and water will get behind the tile. For older showers, you might need how to refresh grout advice, but for a new installation, do it right the first time. Use silicone in the changes of plane.
“Water always finds the path of least resistance, usually through an unsealed penetration in the substrate.” – TCNA Handbook Logic
Perimeter seals and baseboard transitions
The integrity of a shower system extends to the floor and the surrounding walls where the tile meets the dry area. You must ensure that the baseboards and flooring transitions are sealed against the humidity coming from the shower. Moisture from a poorly sealed soap dish can travel down the wall and ruin your baseboards. I have seen water travel six feet down a wall cavity and pop the paint off a baseboard in the hallway. It is all connected. When you finish your shower, pay attention to the transition to the rest of the room. Using chic baseboard designs is great, but if they are made of cheap MDF, the steam from your shower will make them swell like a marshmallow. Always use a solid wood or PVC baseboard near the wet area. If you are doing a baseboards makeover, ensure you use a high-quality primer and paint to resist the humidity. The soap dish is just one piece of a larger structural puzzle that includes the floor, the walls, and the ventilation system of the home. Don’t let a small detail ruin the whole project.