
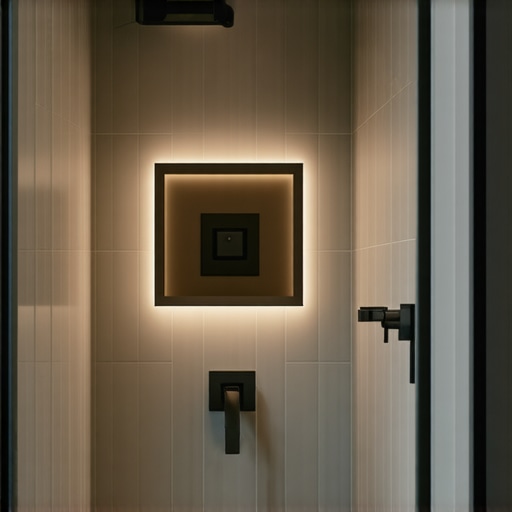
The hidden mechanics of the illuminated shower niche
Most guys skip the leveling compound. They think the underlayment will hide the dip. It won’t. I spent three days grinding concrete on a job last month just so the floor wouldn’t click like a castanet. I see that same laziness in shower builds. They slap a niche in a wall, forget the waterproofing corners, and then wonder why the drywall in the bedroom is damp. If you want that high-end glow of an indirectly lit niche, you have to do the ugly work first. A shower niche is not just a hole in the wall. It is a structural engineering challenge that must combat constant moisture, heat expansion, and the physics of light reflection. When you introduce electricity into that mix, you either do it by the book or you prepare for a catastrophic failure of the tile assembly.
The structural reality of the wet wall
Building an indirectly lit shower niche requires precise framing with 2×4 or 2×6 studs, a minimum of a half-inch cement board or foam backer, and an integrated waterproof LED channel. The framing must account for the deflection limits of the wall. If your studs are warped or have more than a 1/8 inch deviation over 10 feet, your tile will eventually crack at the corners of the niche. You need to ensure the rough opening is perfectly square. I have seen countless installers try to fix a crooked niche with an extra thick layer of thin-set. That is a recipe for shrinkage and debonding. You must shim the studs before the backer board goes on. This is where the longevity of the installation begins. For more inspiration on layouts, check out showers with a style trendy ideas for small bathrooms to see how these recessed units fit into compact spaces.
“A floor is only as good as the subfloor beneath it; deflection is the enemy of every joint.” – Master Flooring Axiom
The physics of the framing gap
A professional indirectly lit niche utilizes a recessed lip to hide the LED strip from direct view, creating a soft wash of light. This requires a two-stage framing process. First, the main box is constructed between the studs. Second, a smaller internal frame or a specialized prefabricated niche is installed to create the ‘shelf’ where the light strip will sit. The light should never be visible to the eye. It should hit the back wall of the niche and bounce outward. This means the depth of the niche needs to be at least 4 inches to allow for the LED channel and the tile thickness. If you go too shallow, the light will look harsh and hot spots will appear on the tile surface. You are building a light box, not just a soap holder.
Waterproofing the recessed cavity
Waterproofing an indirectly lit niche demands the use of a liquid-applied membrane or a bonded fleece sheet to seal every internal corner and the electrical penetration point. This is the stage where most people fail. Every single corner of that niche is a potential leak point. I prefer using a liquid membrane like Hydro Ban or a sheet system like Kerdi. You must apply the sealant in a continuous, unbroken film. When you drill the hole for the low-voltage wire, that hole must be filled with a 100 percent silicone sealant that is compatible with your waterproofing. If water gets behind the tile and finds that wire path, it will travel back to your transformer and short out the entire system. This is why you must treat the niche like a submarine hull. For a deeper look at modern aesthetics, see showers that wow modern designs for 2025 which often feature these complex lighting setups.
Electrical routing for the light strip
All electrical components for a shower niche must be UL-listed for wet locations and powered by a Class 2 low-voltage driver located in an accessible dry area. You cannot just bury a transformer behind the tile. It has to be in a closet or a vanity where it can be replaced if it fails. Use IP67-rated LED strips. These are encased in a silicone sleeve that protects the diodes from steam and direct spray. The wire itself should be 18-gauge or 16-gauge CL2 rated for in-wall use. When I run the wire into the niche, I always leave a service loop. This gives you extra slack if you need to pull the strip out later for repairs. The light channel should be made of anodized aluminum to act as a heat sink. LEDs get hot, and if they cannot dissipate that heat, the adhesive backing will fail and the strip will sag within a month.
Thin-set chemistry and the vertical slip
The mortar used for shower niche tile must have high polymer content and thixotropic properties to prevent the tile from slipping or sagging during the cure. You are looking for an ANSI A118.15 rated thin-set. This is a professional grade mortar that has enough ‘grab’ to hold heavy porcelain or stone on a vertical surface without the need for spacers on every side. I mix my mortar to a peanut butter consistency. If it is too wet, it will shrink as the water evaporates, pulling the tile away from the waterproofing. If it is too dry, it won’t wet out the back of the tile, and you will have a hollow bond. You want 95 percent coverage on the back of the tile in a wet area. Anything less is a failure in the making. This is especially true near the base of the shower where water pressure is highest. Consider how your walls meet the floor by looking at chic baseboard designs that transform rooms in 2025 to ensure a clean transition from the wet zone to the dry zone.
“The integration of light into a wet environment requires the absolute isolation of electrical components from moisture migration paths.” – Master Flooring Axiom
Light diffraction on porcelain and stone
The choice of tile finish significantly impacts the quality of the indirect lighting, with polished surfaces creating specular highlights and matte surfaces providing a diffused glow. If you choose a high-gloss subway tile for the back of your niche, every individual LED diode will be reflected in the glass like a string of pearls. This is usually not the look clients want. A honed stone or a matte porcelain will catch the light and spread it evenly across the surface. This creates that high-end, soft-focus effect. You also have to consider the color temperature. A 3000K warm white is best for most residential bathrooms. Anything higher than 4000K will look like a hospital and make your grout lines look blue or gray. Use the table below to compare how different materials react to indirect light.
| Material Type | Light Reflectivity | Diffusion Quality | Heat Retention |
|---|---|---|---|
| Polished Marble | High | Low (Mirror Effect) | High |
| Matte Porcelain | Medium | High (Soft Glow) | Medium |
| Natural Slate | Low | Very High (Texture Focus) | Low |
| Glass Mosaic | Very High | None (Sparkle) | Low |
The final seal of the grout
Grout in a shower niche acts as the secondary defense against water intrusion and must be either a high-performance epoxy or a polymer-modified cementitious grout. Regular hardware store grout is too porous for a niche that will hold soap and shampoo bottles. Those bottles trap water against the grout line, leading to mold and mildew. I always recommend an epoxy grout for the niche because it is non-porous and chemically resistant. It is harder to work with, but it will never need to be sealed. If you are working with an existing shower and need to fix old mistakes, read grout restoration secrets for long-lasting results to understand the chemistry of a proper seal. For basic maintenance, you can also look at how to refresh grout without replacing it before the situation requires a full tear-out. Cleanliness is also vital, so check tile cleaning tips for a sparkling bathroom in 2025 to keep that new light looking bright.
Niche installation checklist
- Verify the rough opening is square and plumb within 1/16 inch.
- Install fire-rated blocking for the low-voltage wire path.
- Apply two coats of liquid waterproofing membrane, allowing 12 hours between coats.
- Dry-fit the LED aluminum channel and miter the corners for a clean fit.
- Use a level to ensure the bottom shelf of the niche has a 1/8 inch pitch toward the shower for drainage.
- Test the LED strip for 24 hours before tiling to ensure no factory defects.
- Butter the back of every tile to ensure 100 percent mortar coverage.
- Seal all wire penetrations with marine-grade silicone.
The transition to baseboards and floors
The aesthetic of a high-end shower niche is ruined if the surrounding walls and baseboards are not integrated with the same level of precision. Once the niche is done, you have to look at how that wall meets the floor. If you are using large format tile, the grout lines should align with the niche’s center point or its edges. When the tile transitions to the dry area of the bathroom, the baseboard choice becomes paramount. A cheap plastic baseboard will clash with a $2,000 custom niche. You want something with weight and profile. Look into baseboards makeover ideas to elevate your space to find a profile that matches the architectural style of your new shower. It is the small details, the 1/8 inch gaps and the color of the caulk, that separate a DIY job from a master installation. If you need professional guidance on your next project, do not hesitate to contact us for expert advice. Your floor and your walls are a single system. Treat them that way.