
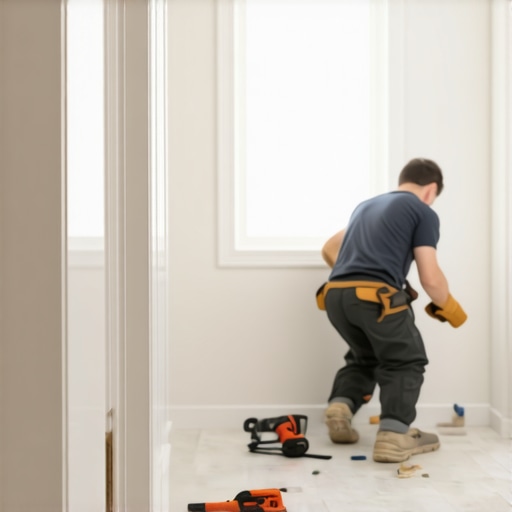
The shadow of the uneven subfloor
To install extra tall baseboards in a small bathroom you must first address subfloor flatness and wall plumbness to avoid visible gaps at the floor line. Success depends on the structural integrity of the mounting surface. Most guys skip the leveling compound. They think the underlayment will hide the dip. It won’t. I spent three days grinding concrete on a job last month just so the floor wouldn’t click like a castanet. When you are dealing with a baseboard that stands seven or eight inches tall, every minor deviation in the floor is magnified. A one-sixteenth inch dip in the tile becomes a massive shadow line under a tall profile. I have seen fifteen thousand dollar projects look like amateur hour because the installer didn’t want to get his hands dusty with a grinder. You have to verify the moisture content of the slab before you even think about trim. If that concrete is pumping out vapor, your tall baseboards will cup and pull away from the wall within six months. I always carry a moisture meter and a ten foot straightedge. If I see light under that level, the grinder comes out. This is not about aesthetics, it is about the physics of a flat plane meeting a vertical surface. You can find inspiration for these projects at chic baseboard designs that transform rooms in 2025 to see how height impacts the visual scale of a room.
The physics of scribing tall profiles against crooked tile
Scribing involves using a compass or a specialized tool to transfer the exact contour of an uneven floor onto the bottom edge of the baseboard. This process is the only way to achieve a professional fit in bathrooms where tile or grout lines are not perfectly level. In a small bathroom, you are often dealing with floors that slope toward a drain or have high spots from improper thin-set application. When you are using showers with a style that features heavy tile, the floor often has subtle waves. A tall baseboard is rigid. It will not bend to follow the floor. You must cut the floor into the board. I use a sharp compass and a power planer. I set the baseboard level, even if it means it is hovering an inch off the floor at one end. I then drag the compass across the floor, marking the profile on the wood. Once I plane down to that line, the board sits tight against every hump and dip in the tile. This is where the chemistry of the material matters. If you are using MDF, you have to be careful not to blow out the bottom edge. If you are using solid poplar or pine, you have to watch the grain direction so the planer doesn’t catch and shatter the piece. This is the difference between a floor that looks like it grew out of the wall and one that looks like it was slapped on by a weekend warrior. High-end baseboards makeover ideas rely entirely on this scribing precision.
“A floor is only as good as the subfloor beneath it; deflection is the enemy of every joint.” – Master Flooring Axiom
The geometry of the inside corner and coping techniques
Coping is the process of back-cutting the end of one baseboard to fit the profile of the adjacent board, which prevents gaps during seasonal humidity changes. Mitering inside corners in a bathroom is a recipe for failure. Small bathrooms are high-humidity environments. The wood will expand and contract. If you miter your inside corners, those joints will open up and look like a gaping wound within a year. Coping allows one board to butt straight into the corner while the second board is carved to overlap it. This creates a mechanical lock. Even if the boards move, the joint stays tight. For tall baseboards, this is difficult because there is more surface area to cut. I use a coping saw or a specialized grinder disc. You have to understand the profile. You cut at a forty-five degree angle first to reveal the profile line, then you back-cut it. This leaves a thin leading edge that you can file down for a microscopic fit. It is tedious work. It makes your hands ache. But when you see that corner fit together without a drop of caulk, you know it is done right. Most modern tile cleaning tips focus on the surface, but the integrity of the corners determines how long that bathroom stays looking new.
| Material Type | Moisture Resistance | Scribing Ease | Expansion Rate |
|---|---|---|---|
| MDF | Low | Medium | High |
| Solid Pine | Medium | High | Medium |
| PVC | High | High | Low |
| Primed Poplar | Medium | High | Medium |
Managing the humidity of a wet room and adhesive selection
Selecting a moisture-resistant adhesive and the correct fastener length is vital for securing tall baseboards in bathrooms where steam and water are present. You cannot just use standard construction adhesive. You need something that won’t break down when the shower is running for twenty minutes. I prefer a polyurethane-based adhesive. It bonds to the drywall and the studs with a grip that won’t quit. When dealing with tall trim, the leverage on the board is greater. If a kid kicks the top of an eight inch baseboard, it can pull the nails right out of the wall if you didn’t hit the studs. I use two and a half inch finish nails and I angle them into the wall plate and the studs. This creates a cross-nailing pattern that locks the board in place. In environments with heavy tile and thick grout, you also have to worry about the gap behind the board. If the wall is bowed, don’t try to pull the board to the wall with just nails. You will split the wood. Use a shim behind the board to keep it straight and then fill the top gap with a high-quality acrylic caulk that has high flexibility. If you are working in a region like the Pacific Northwest, the constant dampness means you should back-prime your boards. This prevents the wood from sucking up moisture from the back side and bowing outward. It is the small details that the big-box stores won’t tell you because they just want to sell you a bundle of wood.
“Wood flooring and trim must be acclimated to the environment to reach a dynamic equilibrium with the site conditions.” – NWFA Standard
The professional installer tool kit for tall trim
- A digital moisture meter to check slab and wall humidity
- A ten foot professional grade straightedge for floor leveling
- A high-quality compass with a locking mechanism for scribing
- A coping saw with extra-fine tooth blades
- A pneumatic finish nailer with two and a half inch 16-gauge nails
- Polyurethane-based construction adhesive for high-moisture areas
- A power planer for aggressive wood removal during scribing
The final step is the finish. Do not use cheap caulk. Use something with a high movement capability. In a small bathroom, every line is visible. If your caulk cracks, it collects dust and hair, and suddenly that beautiful tall baseboard looks like a mess. Take the time to sand your joints. Start with 120 grit and move to 220. If you can feel the transition with your fingernail, it isn’t smooth enough. I tell my apprentices that the goal is to make the wood look like it was poured into place. It takes patience and a lot of time on your knees, but that is what it means to be a master of the craft. Stop looking for shortcuts and start looking at the physics of the room.