
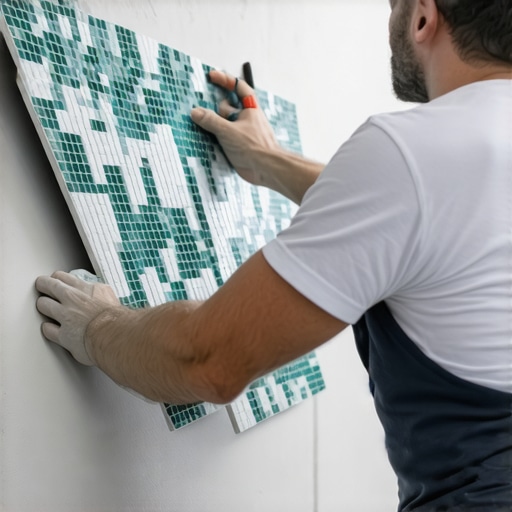
Most guys skip the leveling compound. They think the underlayment will hide the dip. It won’t. I spent three days grinding concrete on a job last month just so the floor wouldn’t click like a castanet. When you are working with mosaic tile, that dip is a death sentence. You can’t hide a subfloor failure under a mesh sheet. If your floor isn’t flat within an eighth of an inch over ten feet, your mosaic project is doomed before you even open the bag of thin-set. I have seen fifteen thousand dollar bathroom remodels look like a grid of squares because the installer thought he could eyeball the transitions. He was wrong. The lines showed up because the subfloor was a rolling hill of despair. I do not care how pretty the tile looks in the showroom. If the structural engineering of the substrate is garbage, the final product will be garbage.
The phantom grid and the mesh trap
To install mosaic tile sheets without seeing lines, you must remove excess mesh overhang and stagger the sheets to break the visual repetition of the factory edges. Achieving an invisible seam requires the installer to treat the gap between sheets with the same mathematical precision as the gap between individual tiles. This means manual adjustment of every perimeter stone to ensure the joint width remains consistent across the entire field. When you slap a sheet down and leave the factory edge as is, you are inviting a visible grid to haunt your shower floor for the next twenty years.
The mesh backing on most mosaic products is the primary culprit of the visible seam. Manufacturers often leave a fraction of a millimeter of mesh protruding from the side of the sheet. When two sheets are pushed together, this tiny overlap prevents the tiles from nesting at the correct distance. I take a fresh utility blade to every single edge. You need to trim that mesh flush with the tile. If you don’t, that extra hair of width adds up. Over a ten-foot run, those tiny increments create a massive drift that forces you to stretch the grout lines, making the sheets stand out like a sore thumb. I’ve spent decades fixing the mistakes of guys who were too lazy to use a blade. They wonder why their grout looks like a map of the interstate system. I know why. It is because they didn’t respect the geometry of the sheet.
“A floor is only as good as the subfloor beneath it; deflection is the enemy of every joint.” – Master Flooring Axiom
The physics of the interlocking edge
Invisible mosaic seams depend on the manual manipulation of individual tesserae at the junction points where two separate sheets meet on the substrate. You cannot trust the factory to have spaced the tiles perfectly on the mesh. You have to be the final quality control officer. This involves pulling individual tiles off the mesh and hand-setting them along the seam line. This breaks up the linear regularity that the human eye is designed to detect. If the eye sees a straight line of grout that is even a fraction wider than the interior joints, the brain immediately registers the sheet pattern. By staggering the tiles and hand-adjusting the gaps, you camouflaged the transition entirely.
Think about the way light hits a surface. In showers with a style trendy ideas for small bathrooms, the lighting is often directional or recessed. This creates shadows. If one sheet is sitting a hair higher than the next because of a glob of thin-set, the shadow will highlight the seam. This is why I use a beating block on every square inch. You don’t just push the tile with your hands. You use a rubber-faced block and a mallet to vibrate the tiles into the mortar bed. This levels the sheets and forces air pockets out. Air pockets are the enemy of longevity. They lead to cracked grout and loose tiles. If you want a floor that lasts, you have to work for it. You have to ensure that the mortar coverage is ninety-five percent or higher in wet areas. Anything less is a failure of the craft.
| Tile Type | Mesh Backing Quality | Typical Gap Size | Acclimation Time |
|---|---|---|---|
| Glass Mosaic | High / Clear Poly | 1/16 Inch | 24 Hours |
| Natural Stone | Medium / Fiber | 1/8 Inch | 48 Hours |
| Porcelain | High / Paper Face | 1/16 Inch | 24 Hours |
| Recycled Glass | Low / Paper Face | 3/32 Inch | 24 Hours |
Thin-set chemistry and the trowel of truth
Using the correct trowel size and thin-set consistency ensures that mortar does not squeeze up through the grout joints and ruin the mosaic aesthetic. Most beginners use a trowel that is far too large. For a standard mosaic, a 3/16 inch V-notch trowel is often the maximum you should consider. If you use a 1/4 inch square notch, you will have thin-set oozing out of every hole. Cleaning that out is a nightmare that will leave you wishing you had stayed in bed. You want just enough mortar to grab the tile but not enough to fill the void meant for grout. If the mortar fills the gap, the grout will be thin and prone to flaking. This leads to the need for grout restoration secrets for long-lasting results much sooner than necessary.
The chemistry of your mortar matters more than the color. You need a polymer-modified thin-set with high sag resistance. When you are working on a wall, you don’t want those sheets sliding down and opening up the seams. I look for mortars that meet or exceed ANSI A118.4 or A118.15 standards. These products have the mechanical bond strength to hold onto the back of a glass tile or a dense porcelain. If you use a cheap, unmodified bag of mud from a big box store, you are asking for trouble. The tiles will release over time, especially in high-moisture environments like a shower. I’ve seen sheets fall off the wall because the installer saved five dollars on a bag of mortar. It is a pathetic way to run a business. You spend thousands on materials and then skimp on the glue that holds it all together. It makes no sense.
Staggering the sheets like a bricklayer
Offsetting mosaic sheets in a brick-joint or staggered pattern prevents the alignment of vertical and horizontal seams across the entire floor surface. If you lay your sheets in a perfect grid like a checkerboard, the eye will find the lines. It is unavoidable. But if you cut your first sheet in half and start the second row with an offset, you break the pattern. You force the seams to terminate into the middle of the adjacent sheet. This simple trick hides the transitions. It takes more time and results in more waste, but the result is a monolithic surface that looks like it was laid tile by tile rather than sheet by sheet.
When you get to the corners and the edges where the tile meets the baseboards makeover ideas to elevate your space, you must be even more diligent. People think they can hide a bad cut behind a piece of wood. A real pro makes the cut perfect anyway. I use a wet saw with a fresh diamond blade for every mosaic job. If the blade is dull, it will chip the edges of the small tiles. Those chips catch the grout and create dark spots that look like dirt. It ruins the clean lines you worked so hard to create. If you are doing a high-end bathroom, you cannot afford to have chipped edges at the transition to the baseboard. It looks amateur. It looks like you didn’t care. And in this business, your reputation is built on the details that most people think they can hide.
- Trim all excess mesh from the edges of every sheet before installation
- Use a laser level to establish a perfectly square starting line
- Apply thin-set with a 3/16 inch V-notch trowel to prevent squeeze-through
- Back-butter sheets if the tiles are translucent or have deep textures
- Flatten the mortar ridges with the flat side of the trowel before placing the tile
- Use a rubber beating block to set the tile and level the surface
- Hand-adjust tiles at the seams to maintain consistent grout joint width
- Remove any mortar from the joints using a soft brush while it is still wet
- Select a grout color that closely matches the tile to minimize contrast
- Seal the grout immediately according to the manufacturer instructions
The grout color deception
Selecting a grout color that provides low contrast with the tile color is the most effective way to hide minor spacing inconsistencies in mosaic sheets. High contrast grout, like black grout with white tile, is unforgiving. If your spacing is off by even half a millimeter, the high contrast will scream it to the world. If you want the sheets to disappear, choose a grout that is one shade lighter or darker than the tile itself. This creates a soft, unified look where the shadows in the grout joints blend into the color of the tesserae. I tell my clients this every day. They want the bold look, but they don’t have the subfloor for it. If they insist on high contrast, I charge them double for the labor because I know I will be spending hours with a spacer and a toothpick.
Maintenance is the other side of the grout coin. In a shower, grout is subject to soap scum and hard water. If you don’t use a high-quality epoxy or high-performance cement grout, those seams will eventually darken. This is why following tile cleaning tips for a sparkling bathroom in 2025 is vital. You have to keep the surface clean to prevent the grout from highlighting the grid pattern over time. A dirty seam is a visible seam. I always recommend a sealer for cementitious grouts. It keeps the moisture out and the color in. If you ignore the sealer, you are basically inviting the mold to set up shop in your beautiful new shower. I’ve ripped out enough moldy tile to know that a little prevention goes a long way.
“Grout is not a structural component; it is a cosmetic filler that requires a stable foundation to remain intact.” – TCNA Installation Guide
Moisture control in the wet zone
Waterproof membranes and proper slope-to-drain ratios are the hidden heroes of a successful mosaic tile installation in showers. Before a single tile is laid, the waterproofing must be perfect. I don’t trust old-school mud beds alone anymore. I use modern membranes that provide a continuous barrier. If water gets behind the tile and sits on the subfloor, it will eventually cause the mortar to break down. When the mortar breaks down, the tile shifts. When the tile shifts, the seams open up. It is a chain reaction of failure. In showers that wow modern designs for 2025, we are seeing more large-format walls paired with mosaic floors. This creates a complex junction where the floor meets the wall.
The expansion gap at the perimeter is non-negotiable. You cannot grout the joint where the floor meets the wall. It must be caulked with a 100 percent silicone sealant that matches the grout color. Structures move. Houses breathe. If you grout that corner, it will crack within six months. That crack will look like a jagged line of failure. By using silicone, you allow for the natural movement of the building without sacrificing the waterproof integrity of the shower. It is these small, technical choices that separate a master from a handyman. A handyman wants to get paid and leave. A master wants the floor to be there fifty years after he is gone. I build for the next generation, not for the next check. If you follow these steps, your mosaic sheets will look like a single, continuous work of art. The lines will be a mystery to everyone but you. That is the mark of a true craftsman.