
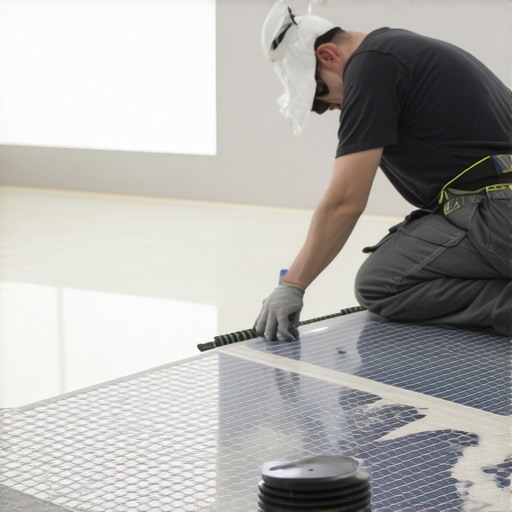
Most guys skip the leveling compound. They think the underlayment will hide the dip. It won’t. I spent three days grinding concrete on a job last month just so the floor wouldn’t click like a castanet. I once walked into a house where a custom mosaic bathroom floor looked like a rolling sea because the installer used a half-inch notched trowel on a sheet that is only an eighth of an inch thick. You cannot hide structural incompetence with more mud. Mosaic tile is a demanding medium. It is flexible, following every ripple in your subfloor like a tight shirt on a lumpy back. If your substrate is not planar, your finished product will look amateurish. We are talking about the physics of deflection and the chemistry of polymer-modified thin-set. If you want a floor that stands up to scrutiny and the test of time, you have to stop thinking about the tile and start thinking about the slab. Professional results come from the prep work that no one sees but everyone feels underfoot.
The physics of a perfectly planar substrate
Substrate flatness is the absolute foundation of a wave-free mosaic tile installation. You must achieve a surface deviation of less than 1/8 inch over a 10-foot span to prevent lippage. This requires mechanical grinding of high spots and the application of self-leveling underlayment to eliminate low-point voids. Without a flat plane, the mesh-backed sheets will conform to every imperfection. When I talk about flat, I mean surgical flatness. You take a ten-foot straightedge and you slide it across that floor. If you see light under that bar, you have a problem. In wet areas like showers that wow, this is even more vital because water must move toward the drain without pooling in the valleys of a wavy tile job. You are fighting gravity and the fluid dynamics of thin-set. If you do not win the battle at the subfloor level, you have already lost the war. [IMAGE_PLACEHOLDER]
“A floor is only as good as the subfloor beneath it; deflection is the enemy of every joint.” – Master Flooring Axiom
Why your subfloor is lying to you
Existing subfloors often contain micro-deviations that are invisible until the grout lines of a mosaic pattern highlight them. Using a digital moisture meter and a laser level reveals that wood joists and concrete slabs are rarely as true as they appear. Correcting these structural inconsistencies before laying thin-set is the only way to ensure a professional result. I have seen guys try to “build up” the mortar to level out a dip. That is a recipe for disaster. As the water evaporates from the thin-set, the mortar shrinks. If you have a thick pocket of mud in one spot and a thin layer in another, they will shrink at different rates. This pulls the tile down into the dip, creating the very waves you were trying to avoid. You need a stable, non-compressible surface. If you are working on a remodel, check out these baseboards makeover ideas to elevate your space to see how a flat floor interacts with your trim.
| Substrate Type | Max Deviation (10 ft) | Recommended Prep |
|---|---|---|
| Concrete Slab | 1/8 inch | Diamond Grinding |
| Plywood Subfloor | 1/8 inch | Sand Joists / Leveler |
| Cement Backer Board | 1/16 inch | Mesh Tape & Thin-set |
The trap of the thick mortar bed
Excessive mortar thickness causes tile slumping and hydrostatic pressure issues during the curing process. For mosaic tiles, a 3/16 inch V-notch trowel provides the optimal bond without allowing the flexible mesh to sink or float unevenly. Maintaining a consistent ridge height is essential for a uniform surface plane across the entire installation. Many installers think a bigger trowel is better for coverage. They are wrong. With mosaics, the goal is 100 percent coverage with the thinnest possible bed. If you have too much mud, it will squeeze up through the tiny gaps between the mosaic pieces. This makes a mess of your grout lines and forces you to spend hours picking out dried mortar before you can even think about grouting. If you find yourself in that mess, you will be looking for how to refresh grout without replacing it sooner than you think. Keep your ridges small, keep your angle consistent, and do not let the mortar skin over before you set the sheet.
Chemistry of the modern bond coat
Polymer-modified thin-set uses ethylene-vinyl acetate to create a chemical bond that far exceeds the strength of standard portland cement. These thixotropic additives allow the mortar to hold its shape under the weight of the tile while remaining workable during the setting phase. Selecting the correct C2TE rated adhesive ensures that your mosaic patterns stay exactly where you place them. In a high-humidity environment like Houston, the moisture in the air can slow down the drying time of your thin-set. In a dry place like Phoenix, the slab might suck the moisture right out of the mud before it has a chance to bond. You have to understand the environment. You have to know how the molecules are moving. A good bond is not just about stickiness; it is about the crystalline structure that forms as the cement hydrates. If that process is interrupted by heat or excessive moisture, your floor is going to fail.
“The maximum allowable variation in the substrate for tile with all edges shorter than 15 inches is 1/4 inch in 10 feet.” – TCNA Handbook Standards
- Verify substrate flatness with a 10-foot straightedge
- Check moisture content of wood or concrete
- Apply a primer to porous substrates to prevent premature drying
- Use a flat side of the trowel to burn the mortar into the substrate
- Set tiles with a rubber grout float to ensure even pressure
- Maintain a 1/8 inch expansion gap at all perimeters
The ghost in the expansion gap
Movement joints are a structural requirement for any tile installation to accommodate thermal expansion and building settlement. Leaving a perimeter gap of 1/4 inch ensures that the tile assembly can breathe without tenting or cracking. This gap is hidden by baseboards and is a non-negotiable step for long-term durability. People forget that houses move. They breathe. The wood expands when it is humid and shrinks when the heater kicks on in the winter. If you butt your tile tight against the wall, that energy has nowhere to go but up. That is how you get a floor that pops. When you finish the job, look into chic baseboard designs that transform rooms in 2025 to cover those essential gaps. A floor is a living thing. You have to give it room to exist. If you ignore the physics of movement, your beautiful mosaic will eventually tear itself apart. This is especially true in showers with a style where temperature swings are extreme and frequent.
The final word on mosaic precision
Installing mosaic tile is an exercise in patience and technical discipline. It is not about the aesthetic beauty of the stone or glass; it is about the integrity of the layers beneath. You must be a mechanic first and an artist second. From the initial grind of the concrete to the final pass of the sponge during grout cleanup, every movement must be calculated. If you find your grout getting dirty over time, you can always use tile cleaning tips for a sparkling bathroom in 2025 or seek out grout restoration secrets for long lasting results. But the wave? You cannot clean away a wave. You cannot grout away a dip. You build it right from the bottom up, or you build it twice. Respect the materials, respect the standards, and never trust a subfloor that you have not checked with a level yourself.