
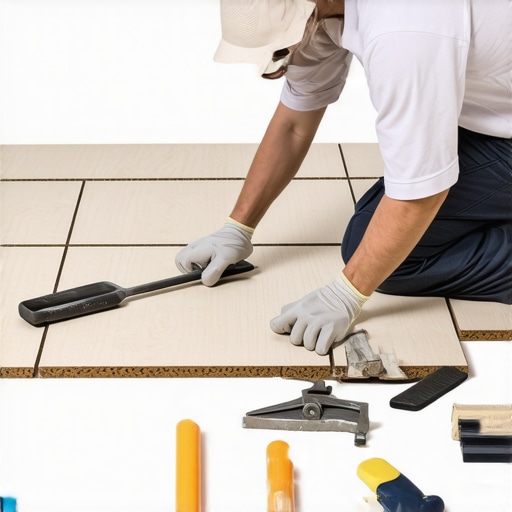
I have spent twenty five years on my knees with a moisture meter and a level, smelling of WD-40 and oak dust. Most guys skip the leveling compound. They think the underlayment will hide the dip. It will not. I spent three days grinding concrete on a job last month just so the floor would not click like a castanet. A floor is not a decoration. It is a performance surface. When you install tile over a wood subfloor, you are fighting physics. Wood is an organic material that breathes, expands, and bends. Tile is a rigid, crystalline structure that does not forgive. If the wood moves and the tile does not, the bond breaks. That is the reality of the trade. You have to respect the structural integrity of the house before you even look at a box of ceramic. The following guide is not about aesthetics. It is about engineering a floor that will last a century.
The subfloor secret that ruins your grout
Installing tile over a wood subfloor correctly requires a rigid, deflection-free foundation where the substrate movement is minimized to prevent grout cracking. You must ensure the plywood is at least 1 1/8 inches thick in total or use an uncoupling membrane to isolate the tile from the wood movement. Many installers think a thin sheet of luan is enough. It is a lie. Luan is too soft and will compress under the weight of the mortar. You need high quality exterior grade plywood or a specialized OSB like Advantech that is rated for structural spans. If your floor has a bounce, your grout will fail. It is that simple. I have seen countless homeowners try to save money by skipping the subfloor prep, only to call me back three years later when their grout restoration secrets cannot fix the fact that the floor is literally falling apart. You must check the joist spacing. If your joists are twenty four inches on center, you have a problem that a bucket of thinset cannot solve.
Deflection is the silent killer of ceramics
Deflection is the amount of vertical flex in a floor system under a specific load, measured by the L over 360 standard for ceramic tile. This means the floor should not bend more than the total span divided by 360 when a person walks across it. If you are installing natural stone like marble, that requirement jumps to L over 720. Wood is flexible, but tile is brittle. When the joists flex, the subfloor dips. This creates a shear force that rips the tile away from the mortar. You can calculate this by measuring the length of the joist run and checking the wood species. A Douglas Fir joist has different structural properties than a Pine joist. If the deflection is too high, you have to sister the joists or add a layer of 3/8 inch plywood screwed every six inches. Do not use drywall screws. They have no shear strength. Use coated floor screws that will bite into the wood and stay there.
“A floor is only as good as the subfloor beneath it; deflection is the enemy of every joint.” – Master Flooring Axiom
Why your plywood is lying about its strength
The nominal thickness of plywood is rarely the actual thickness, meaning a 3/4 inch sheet is often thinner, which significantly impacts the structural stiffness of your tile installation. You must verify the actual thickness with calipers to ensure it meets the TCNA requirements for ceramic tile substrates. Look for the stamp on the wood. It must be exposure rated. Interior grade plywood uses glues that will delaminate if they get damp from the water in your thinset. When that happens, the top layer of the wood peels off, taking your expensive tile with it. I have seen entire showers that wow in photos but fail in person because the installer used the wrong wood behind the curb. You need a solid, double layer of wood to create a stiff enough platform. The first layer is your structural subfloor. The second layer is your underlayment. Offset the seams. Never let four corners meet in one spot. That is a recipe for a crack that will follow the line of the wood perfectly.
The chemistry of the bond coat
The bond coat is the chemical and mechanical link between the tile and the substrate, usually consisting of a polymer modified thinset mortar that meets ANSI A118.4 standards. This adhesive must be able to withstand the different rates of expansion between the wood subfloor and the rigid tile. Not all thinsets are the same. If you buy the cheap bags at the big box store, you are getting mostly sand and very little latex. You want a high performance mortar with a high polymer content. This allows the mortar to have a tiny bit of flexibility. It acts like a shock absorber. When you mix your mortar, use a slow speed drill. If you whip it too fast, you introduce air bubbles. Air does not stick to tile. You want a dense, creamy consistency that hangs on the trowel but spreads easily. Always back butter your tiles, especially if they are larger than twelve inches. This ensures 100 percent coverage. Any void under the tile is a weak point where a dropped pot or a heavy chair leg will cause a fracture.
The expansion gap at the perimeter edge
The expansion gap is a mandatory 1/4 inch space left around the entire perimeter of a tiled room to allow the wood subfloor to expand and contract with seasonal humidity changes. This gap is later covered by baseboards and should never be filled with hard grout or mortar. Wood is like a sponge. In the summer, it soaks up moisture and grows. In the winter, it dries out and shrinks. If you butt your tile tight against the wall studs or the drywall, the floor has nowhere to go. It will tent. This means the tiles will literally pop off the floor in a V shape in the middle of the room. I have walked into houses where it sounded like a gunshot went off because the floor finally gave way under the pressure. You must use a 100 percent silicone sealant in any change of plane or where the tile meets a different material. Grout is rigid. Silicone is flexible. Use it in the corners of your trendy ideas for small bathrooms to keep the water in and the cracks out. [IMAGE_PLACEHOLDER]
The molecular reality of hydration
Hydration is the chemical reaction that occurs when water is added to Portland cement, creating a crystalline structure that locks the mortar to both the subfloor and the tile. This process requires a specific temperature range and moisture level to achieve maximum bond strength. If the wood subfloor is too dry, it will suck the water out of the thinset before the chemical reaction is finished. This results in a weak, powdery bond. You should always wipe the subfloor with a damp sponge before spreading mortar. This satisfies the thirst of the wood so it does not steal the water from the cement. The same applies to the tile itself. If you are using an uncoupling membrane, the hydration happens between the fleece of the membrane and the mortar. This is a microscopic mechanical lock. If you disturb the tile while it is curing, you break those crystals. Once they are broken, they do not grow back. You have to leave the floor alone for at least 24 hours. No walking on it. No grouting it. Just let the chemistry work. Check out tile cleaning tips once the floor is fully cured, but not a second before.
| Substrate Material | Flexibility Rating | Moisture Resistance | Required Thickness |
|---|---|---|---|
| CDX Plywood | Moderate | Low | 3/4 inch minimum |
| OSB (Standard) | High | Very Low | Not Recommended |
| Advantech / Enhanced OSB | Low | High | 23/32 inch |
| Cement Backer Board | Zero | High | 1/4 or 1/2 inch |
| Uncoupling Membrane | Engineered | High | 1/8 inch |
The 1/8 inch that ruins everything
A variation of 1/8 inch over ten feet is the maximum allowable deviation for a subfloor intended for large format tile according to the ANSI A108.02 standard. Failure to meet this flatness requirement leads to lippage, where the edges of adjacent tiles are not flush. Most people think a little dip is fine. They think they can just add more thinset. This is a mistake. Mortar is not a leveler. As mortar dries, it shrinks. If you have a thick patch of mortar in a low spot, it will shrink more than the thin areas, pulling the tile down with it and creating an uneven surface. This is why I spend so much time with a straightedge and floor patch. You want the floor to be a flat plane. If you are working with eco friendly tile solutions, they often have very sharp, rectified edges. These edges are unforgiving. Even a 1/32 inch difference will catch a toe or a vacuum cleaner. Use a leveling system with clips and wedges to hold the tiles in place while the mortar sets. It is the only way to guarantee a professional result on a wood subfloor.
Pre-Installation Checklist
- Check joist span and spacing for L/360 compliance.
- Verify subfloor thickness is at least 1 1/8 inch total.
- Screw down any loose subfloor panels to eliminate squeaks.
- Sand down high spots and fill low spots with a high strength leveler.
- Vacuum the entire floor to remove dust that prevents bonding.
- Wipe the subfloor with a damp sponge to prevent flash drying.
- Layout your tiles to avoid thin cuts at the walls.
- Ensure you have the correct notched trowel for the tile size.
- Mix mortar to the manufacturer specifications for water ratio.
- Plan your exit so you do not trap yourself in a corner.
The final verdict on underlayments
The choice between cement backer board and uncoupling membranes depends on the specific structural needs of the project, with membranes offering superior protection against lateral movement and moisture. Cement board adds rigidity but does not isolate the tile from the subfloor as effectively as a membrane. I prefer uncoupling membranes because they allow the wood and the tile to move independently. It is a system designed for the realities of wood frame construction. When the house settles or the seasons change, the membrane absorbs the stress. If you use cement board, you must embed it in a bed of thinset and tape the seams with alkali resistant mesh tape. If you skip the tape, the seams will telegraph through to your grout. No one wants to see a grid of cracks in their floor. After the installation is done, you can focus on the finishing touches like chic baseboard designs or updating your baseboards makeover ideas. But remember, the beauty of the top layer is irrelevant if the foundation is flawed.
“Substrate preparation is 90 percent of the job; the tile is just the victory lap.” – Master Flooring Axiom
Don’t be the guy who rushes the prep. Be the guy whose floors are still solid when the next generation moves in.