
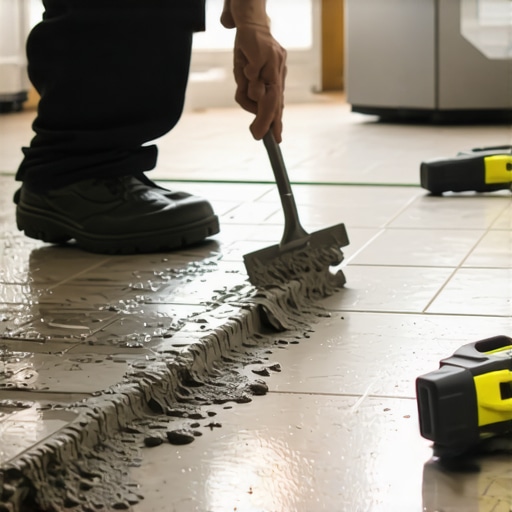
The hidden engineering of a flat bathroom floor
Most guys skip the leveling compound. They think the underlayment will hide the dip. It won’t. I spent three days grinding concrete on a job last month just so the floor wouldn’t click like a castanet. I have spent twenty five years with my knees on the substrate and my hands covered in thin-set, and I can tell you that the floor you walk on is only as good as the physics of the slab beneath it. When you are dealing with large format tile, meaning anything where one side is longer than fifteen inches, you are not just laying a floor. You are performing structural engineering. If that floor has a dip of even three sixteenths of an inch, your tile will lippage. You will trip on the edges, the grout will crack, and the whole installation will fail within two years. This is not about aesthetics. This is about the chemistry of the bond and the rigidity of the substrate.
The 1/8 inch rule for large format tile
To level a bathroom floor for large format tile, you must achieve a flatness tolerance of 1/8 inch over a 10 foot radius using a self leveling underlayment or mechanical grinding. This process requires removing all contaminants, applying a high solids acrylic primer to create a molecular bridge, and pouring a cementitious compound with high compressive strength. Failure to meet this specification leads to hollow spots where the tile is unsupported, causing structural fractures under point loads.
Why your subfloor is lying to you
You look at a plywood subfloor or a concrete slab and it looks straight. It is not. Wood joists crown and sag over decades. Concrete slabs settle and curl at the edges as they cure. When you bring in a 24 by 48 inch porcelain plank, that tile has zero flex. It is a rigid sheet of baked earth. If the floor beneath it has a valley, the tile will bridge that valley. When you step on it, the tile bows. Porcelain does not like to bow. It likes to snap. I have seen fifteen thousand dollar wide plank walnut floors cup because of moisture, but I have seen just as many tile floors fail because the installer was too lazy to use a straightedge. You need to pull a string line or use a six foot level to find the highs and lows. You are looking for deflection, which is the amount a floor bends under weight. For natural stone or large tile, you need a deflection rating of L over 720. That means the floor should not move more than the length of the span divided by 720.
“A floor is only as good as the subfloor beneath it; deflection is the enemy of every joint.” – Master Flooring Axiom
The molecular reality of the primer bond
You cannot just pour leveling compound onto a dusty floor. It will peel up like a scab. The chemistry of the bond requires a clean, porous surface. I always tell people to check the porosity of their concrete. Drop a few beads of water on the floor. If the water beads up, you have a sealer or a contaminant like oil or wax. You have to grind that off. If the water soaks in, you are ready for primer. The primer is a specialized polymer that penetrates the pores of the substrate and provides a tacky surface for the leveler to grab onto. It prevents the dry subfloor from sucking the water out of the leveling compound too fast. If the water leaves the mix too quickly, the cement doesn’t hydrate properly, and you end up with a chalky, weak mess that will crack under the weight of your showers that wow in the future. I use a soft bristle broom to work the primer into the pores. No puddles, just an even film.
Self leveling compound as a liquid engineering tool
Mixing the compound is where most people fail. They eyeball the water. You cannot eyeball the water in a cementitious leveler. If you add too much, the sand settles to the bottom and the polymer rises to the top, creating a brittle surface. If you add too little, it won’t flow, and you will be left with ridges that you have to grind down later. I use a high speed drill and a paddle mixer to get a pancake batter consistency. Once it is poured, I use a gauge rake to set the depth and a spiked roller to release the air bubbles. Those bubbles are the enemy. They create tiny voids that weaken the floor. You have about twenty minutes before it starts to set, so you have to move fast. It is a dance of timing and physics. Once it is down, stay off it. The crystalline structure is forming, and any vibration can ruin the integrity of the pour.
| Substrate Metric | Standard Tile Requirement | Large Format Tile Requirement |
|---|---|---|
| Flatness Tolerance | 1/4 inch in 10 feet | 1/8 inch in 10 feet |
| Deflection Limit | L/360 | L/720 |
| Surface Profile | CSP 1 to CSP 3 | CSP 3 to CSP 5 |
| Moisture Vapor | < 5 lbs / 1000 sqft | < 3 lbs / 1000 sqft |
The ghost in the expansion gap
Expansion is the silent killer of floors. Everything in your house moves. The wood moves with humidity, and the concrete moves with temperature. If you pour your leveling compound right up against the drywall or the wall studs, you have created a monolithic slab that has nowhere to go. When it expands, it will heave in the middle. I always install a foam perimeter strip. It acts as a cushion. It gives the floor room to breathe. People worry about how it looks, but that is what chic baseboard designs are for. They cover that gap. Without that gap, your grout lines will turn to powder. I have walked into bathrooms where the grout was popping out like popcorn because the installer didn’t leave room for the house to move. It is a basic rule of the TCNA, yet I see it ignored on every second job site.
- Clear all debris and vacuum the floor with a HEPA filter.
- Seal any holes or cracks in the subfloor to prevent leveler leakage.
- Check for floor flatness using a 10 foot straightedge.
- Apply the manufacturer recommended primer with a nap roller or brush.
- Mix the leveling compound using the exact water ratio specified.
- Pour from the lowest point and work toward the exit.
- Use a spiked roller to eliminate air entrapment.
The specific requirements for modern wet areas
In a bathroom, you are dealing with moisture. Even if you are not in the shower pan itself, the humidity levels fluctuate wildly. This affects the bond of the thin-set. If your floor is not flat, you will try to compensate by adding more thin-set under the tile. This is called back buttering and build up. But thin-set is not a leveling agent. As thin-set cures, it shrinks. If you have a half inch of thin-set in one spot and an eighth of an inch in another, they will shrink at different rates. This pulls the tile down unevenly, creating the very lippage you were trying to avoid. You must start with a flat plane. Once you have that, the installation of your tile and the eventually necessary tile cleaning tips become much easier to manage. A flat floor stays cleaner because there are no ridges to trap dirt and grime.
Final thoughts on substrate preparation
Taking the time to level a floor is the difference between a professional and an amateur. It is a messy, difficult, and technical process that requires patience and the right tools. I don’t care if you are a DIY enthusiast or a contractor with a crew. If you skip the prep, you are building on sand. The tile is the skin, but the subfloor is the skeleton. Make sure that skeleton is straight. Your knees, your back, and your wallet will thank you ten years from now when the grout is still intact and the tile hasn’t moved a millimeter. If you ever run into trouble with old grout on an existing job, you might look into grout restoration secrets to save the day, but for a new install, the leveler is your best friend. Floor work is hard, but doing it twice is harder. Get it flat, get it right, and let the physics work in your favor.