
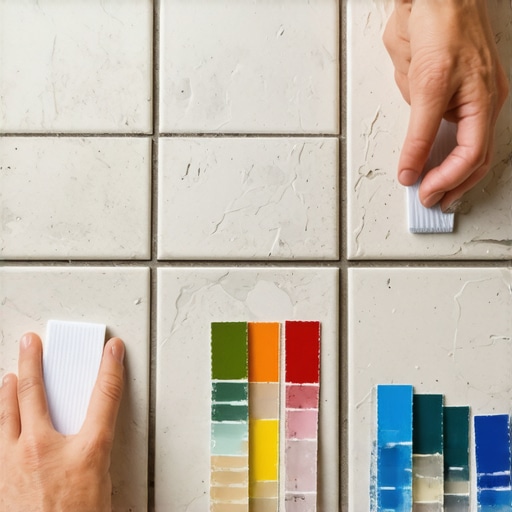
The ghost in the faded joint
Grout color matching requires analyzing the original pigment, the current state of oxidation, and the chemical composition of the existing material. To achieve a perfect match on an old tile floor, you must clean the existing joints deeply to reveal the true color, as years of traffic and cleaning chemicals alter the surface appearance significantly. Most installers fail because they match to a dirty surface. I spent three days grinding concrete on a job last month just so the floor would not click like a castanet. That same level of obsessive prep applies to grout. If your subfloor has even a micro-millimeter of deflection, your new grout will crack and fall out no matter how well the color matches. Most guys skip the leveling compound. They think the underlayment will hide the dip. It won’t. You have to address the structural integrity before you ever pick up a color card. If you are working on a bathroom, you might find tile cleaning tips for a sparkling bathroom in 2025 helpful to reveal the actual hue beneath the grime.
The chemistry of pigment migration
Pigment migration and UV degradation are the primary reasons why new grout never looks like the old grout right out of the bag. When cementitious grout cures, the water evaporates and leaves behind a microscopic network of pores. These pores trap dirt, oils, and minerals from mop water. Over time, the iron oxides used to tint the grout react with the environment. To combat this, you must use a professional grade grout colorant or a high-polymer modified repair grout. You are not just matching a color. You are matching a history of wear.
“A floor is only as good as the subfloor beneath it; deflection is the enemy of every joint.” – Master Flooring Axiom
This axiom is vital. If your tiles are moving even slightly, the grout will pulverize into a fine powder. You need to ensure the bond is chemical and mechanical. For those looking to upgrade the surrounding area, exploring baseboards makeover ideas to elevate your space can provide a clean frame for your newly repaired floor.
Why your subfloor is lying to you
Subfloor instability is the hidden culprit behind grout failure and color inconsistencies in older installations. When a subfloor flexes, it creates tension at the grout line. This tension causes micro-fractures. These fractures allow moisture to penetrate, which then darkens the grout from the inside out. This is why some spots look darker than others even after a thorough cleaning. I have seen countless DIY jobs where the homeowner thought they had a staining problem, but they actually had a joist problem. If you do not fix the bounce, the grout will never stay. For a more permanent solution in damp areas, check out grout restoration secrets for long-lasting results to understand the long-term maintenance of these systems. The physics of the installation dictates that the grout is the weakest link. It is designed to be the sacrificial element in the flooring assembly.
Testing the dry down reality
The dry down reality refers to the significant color shift that occurs as grout transitions from a wet slurry to a fully cured solid. Never trust the color of wet grout. It will always look three to four shades darker than the finished product. To get it right, you must mix a small batch, apply it to a scrap piece of cement board, and force-dry it with a hair dryer or heat gun. This provides a glimpse into the future. Even then, the ambient humidity in your home affects the hydration of the cement. High humidity slows the dry time and can actually darken the final shade. This is particularly problematic in areas like showers with a style trendy ideas for small bathrooms where moisture is constant. You must control the climate during the 72 hour curing window to ensure color consistency across the entire repair zone.
| Grout Type | Color Stability | Best Use Case | Cure Time |
|---|---|---|---|
| Sanded Grout | Moderate | Joints wider than 1/8 inch | 72 Hours |
| Unsanded Grout | High | Narrow joints and polished tile | 48 Hours |
| Epoxy Grout | Extreme | High moisture and heavy traffic | 24 Hours |
| Acrylic Resin | High | Repair and color refreshing | 12 Hours |
The 1/8 inch that ruins everything
A deviation of just 1/8 inch in joint width or subfloor height can cause the new grout to reflect light differently than the old grout. This optical illusion makes the color look wrong even if the pigment is a perfect match. Shadows cast by slightly lipped tiles will darken the perceived color of the grout. You must ensure that the repair area is scraped out to a depth of at least two thirds of the tile thickness. If you just smear a thin layer of new grout over the old stuff, it will peel off like a sunburn within weeks. This is a mechanical failure. For those interested in the latest aesthetic trends, chic baseboard designs that transform rooms in 2025 can help mask the edges where tile meets the wall.
“Curing is a chemical reaction, not a drying process; the presence of water is necessary for the formation of the crystalline structure.” – TCNA Technical Manual
This means you cannot just walk away. You have to monitor the moisture levels during the first few days.
Grout restoration in modern showers
Shower grout repairs are uniquely challenging due to the constant exposure to soap scum and high-pressure water. The minerals in your water supply will eventually stain the grout, making a match nearly impossible with standard off the shelf products. In these cases, using an epoxy-based grout is often the only way to ensure the repair lasts. Epoxy is non-porous and holds its color far better than cement. If you are planning a full bathroom refresh, look at showers that wow modern designs for 2025 for inspiration on materials that are easier to maintain. While most people want the thickest underlayment, too much cushion actually causes the locking mechanisms on LVP to snap under pressure, and the same principle of ‘less is more’ applies to the thickness of grout joints. You want the smallest possible gap that still allows for structural movement. If you need further assistance, you can always contact us for expert advice on your specific flooring challenge.
The checklist for a perfect match
- Deep clean the existing grout with a neutral pH cleaner.
- Identify if the original grout was sanded or unsanded.
- Scrape out the damaged grout to a depth of 5mm.
- Mix a test batch and dry it completely before application.
- Use distilled water to prevent mineral staining during the mix.
- Apply with a rubber float at a 45 degree angle.
- Seal the entire floor after the repair has cured for 7 days.
By following these steps, you ensure that the repair is not just a cosmetic fix, but a structural restoration. If you are interested in sustainability, consider eco-friendly tile solutions for sustainable homes in 2025. Matching old grout is an art form that requires the patience of a chemist and the eye of an artist. It is not a task to be rushed. If the color is slightly off, you can use a grout pen to fine-tune the shade after it has dried, but this should be your last resort. Always aim for a physical match first. For more information on how we handle your data, please see our privacy policy. If you want to avoid the mess of replacement, how to refresh grout without replacing it is a solid alternative for older floors that are still structurally sound.