
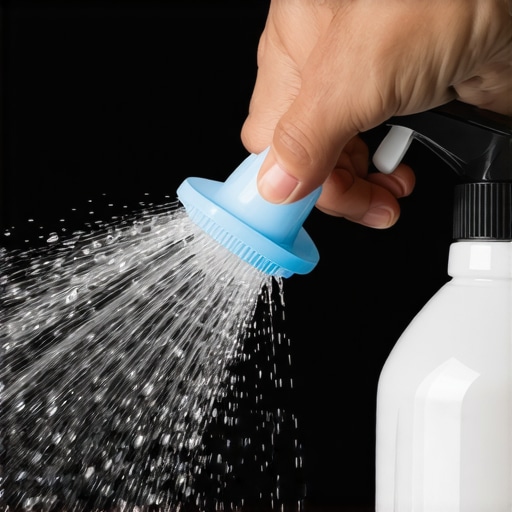
Why your shower nozzles are choking
Removing calcium buildup requires breaking the chemical bond between mineral ions and the surface of your shower fixture. You must use an acidic agent like white vinegar or a specialized citric acid solution to dissolve the solid calcium carbonate. Professional maintenance ensures the internal pressure valves remain functional and prevents spray pattern distortion.
I spent three days grinding concrete on a job last month just so the floor wouldn’t click like a castanet. That same level of obsession applies to plumbing fixtures. Most guys think a clogged shower head is just a minor annoyance. They are wrong. It is a symptom of a larger systemic failure in the home water chemistry. I once walked into a luxury master suite where the homeowner had installed a thousand dollar rainfall head. Within six months, it was shooting water sideways onto the custom walnut vanity because the installer ignored the hard water levels in the local supply. The mineral deposits had crystallized inside the precision-milled apertures, turning a high-end experience into a frustrated trickle. You do not just wipe this off. You have to understand the physics of the blockage. When water evaporates at the nozzle tip, it leaves behind a microscopic layer of calcium and magnesium. Layer by layer, these minerals build a fortress that is harder than the plastic it clings to. If you let it go too long, the pressure builds up inside the unit and can actually blow the internal seals. Then you are not just cleaning, you are replacing hardware. This guide treats your shower head like the mechanical engine it is.
The chemistry of hard water deposits
Calcium carbonate forms when hard water sits on a surface and the liquid component evaporates into the atmosphere. This leaves behind solid mineral crystals that bind to metal and rubber at a molecular level. To remove them, you need a low pH solution to trigger a chemical reaction.
The white crust you see is not just dirt. It is a geological event happening in your bathroom. Calcium carbonate reacts poorly to acetic acid. When you submerge a nozzle in vinegar, the acid breaks the ionic bonds. You will see bubbles. That is carbon dioxide gas being released as the solid rock turns back into a liquid state. This is why tile cleaning tips for a sparkling bathroom in 2025 always emphasize the right chemical balance. Using a harsh bleach on calcium does nothing. It might kill mold, but it will leave the mineral skeleton intact. You need to focus on the pH. I keep a gallon of 6 percent acidity white vinegar in my truck at all times. It is the only thing that works without melting the finish on the fixtures. You have to be careful with the dwell time. Leave a chrome fixture in acid too long and you will see the finish begin to pit. It is a delicate dance between dissolving the stone and preserving the metal. We are looking for the sweet spot where the buildup softens enough to be brushed away with a stiff nylon tool.
“A floor is only as good as the subfloor beneath it; deflection is the enemy of every joint.” – Master Flooring Axiom
The mechanical failure of ignored fixtures
Neglected shower nozzles lead to internal pressure imbalances that can fatigue the shower arm and mixing valve. When apertures are blocked, the backpressure forces water through the smallest available openings at velocities higher than the manufacturer intended. This causes rapid wear of rubber gaskets and O-rings.
It is about the flow rate. Modern shower heads are designed with flow restrictors to meet federal standards. These tiny plastic discs are the first things to clog. Once the restrictor is jammed with grit, the water starts searching for any exit. I have seen shower arms crack at the threads because the pressure had nowhere else to go. You have to pull the head off the wall to do this right. Do not just tie a bag of vinegar to the pipe and hope for the best. You need to flush the debris out from the inside. Take the head off. Remove the screen. This is where you will find the real culprits. Tiny pebbles of calcium often get trapped behind the mesh screen. If you do not remove them, they will just move back into the nozzles the second you turn the water on. It is like trying to fix a clogged drain by cleaning the sink. You have to go to the source of the obstruction. While the head is off, check the threads. If you see white powder in the grooves, that is a sign of a slow leak that has been evaporating for years. It is time to clean those threads and apply fresh plumber tape. This is how a pro ensures the job stays fixed.
| Mineral Type | Hardness Level | Removal Method | Recommended Dwell Time |
|---|---|---|---|
| Calcium Carbonate | Low to Moderate | White Vinegar | 30 to 60 Minutes |
| Magnesium Scale | Moderate | Citric Acid | 45 Minutes |
| Silica Buildup | High | Mechanical Scrubbing | N/A |
| Iron Staining | Variable | Oxalic Acid | 15 Minutes |
Tools for precision descaling
Effective descaling requires a combination of chemical dissolution and mechanical agitation. You need a soft-bristled brush to reach into the nozzle recesses and a needle tool for clearing individual ports. Avoid metal picks that can scratch the finish or enlarge the precision-engineered spray holes.
- Distilled white vinegar with at least 5 percent acidity
- A heavy duty plastic zip top bag and rubber bands
- An old toothbrush with stiff nylon bristles
- A set of precision picks or a safety pin
- Microfiber cloths for final polishing
- Plumber tape for reinstallation
Start by filling your bag with enough vinegar to submerge the entire face of the shower head. Secure it tightly with a rubber band. This is the soaking phase. If the buildup is severe, let it sit for a full hour. Do not exceed two hours on plated finishes. Once the time is up, remove the bag and turn the shower on full hot. This thermal shock helps dislodge the softened minerals. Now, take your toothbrush and scrub in a circular motion. You are trying to flick the debris out of the holes, not push it deeper. If a few holes are still stubborn, use the safety pin. You have to be gentle. If you widen the hole, the spray pattern will be ruined forever. You will have one fat stream of water hitting you in the eye while the rest of the head is a mist. Balance is everything. After scrubbing, wipe it down with a damp microfiber cloth. This removes the acidic residue that can cause spotting later on. If you are dealing with showers that wow modern designs for 2025, you likely have silicone nozzles. These are easier. You can often just massage them with your thumb to break the scale loose. But the internal chamber still needs that vinegar flush to stay clean.
The impact on surrounding surfaces
Hard water scale does not stop at the shower head. It migrates down to the tile, grout, and baseboards. Mineral deposits on these surfaces create a porous anchor point for mold and mildew to thrive. Professional maintenance of the fixture prevents the spread of scale to the rest of the bathroom.
When your shower head is spraying wildly, it is drenching areas that were never meant to be soaked. I see it all the time on the perimeter. The water hits the top of the tile and runs behind the caulk line. Suddenly, you have rot in your wall studs because a $2 nozzle was clogged. This is why chic baseboard designs that transform rooms in 2025 require a dry environment to last. If you have a spray nozzle hitting your baseboards every morning, they will swell and peel within a year. The minerals also clog the pores in your grout. Once the grout is packed with calcium, it becomes impossible to clean. You end up needing grout restoration secrets for long lasting results just to fix the damage caused by a neglected shower head. It is a chain reaction. One mechanical failure leads to an aesthetic disaster. I tell my clients that the shower head is the heartbeat of the bathroom. If it is restricted, the whole room suffers. Keep the spray directed where it belongs. Keep the minerals out of the joints. This is how you protect a five figure bathroom renovation from a five cent problem. It will save you thousands in the long run.
Long term prevention strategies
Preventing calcium buildup requires controlling the water chemistry before it reaches the fixture or performing frequent light maintenance to stop crystal formation. Installing a point of use filter or a whole house water softener is the most effective way to eliminate mineral issues entirely.
If you do not want to be on a ladder with a bag of vinegar every three months, you need to change the water. A water softener swaps calcium ions for sodium ions. Sodium does not form hard crystals. It is a simple ion exchange that happens in a resin tank. For those who cannot afford a full system, a shower head filter is a decent compromise. It won’t remove all the hardness, but it will catch the heavy sediment. You should also get into the habit of wiping down the nozzles after your last shower of the day. If the water does not sit there and evaporate, the minerals cannot deposit. It takes ten seconds. Use a squeegee or a dry towel. It makes a massive difference. You can also look into how to refresh grout without replacing it if you realize the hard water has already done its work on the floor. Consistency is the key. A pro doesn’t wait for the machine to break. A pro maintains the machine so it never has the chance to fail. That is the difference between a homeowner and a master of the craft. Keep your tools clean. Keep your water soft. Your plumbing will thank you for it.
“Deflection is the silent killer of the modern walk-in shower.” – TCNA Technical Manual