
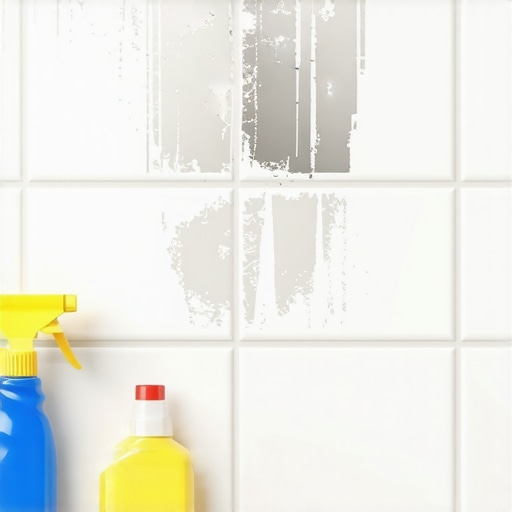
I spent three days grinding concrete on a job last month just so the floor wouldn’t click like a castanet. That experience applies just as heavily to bathroom walls. Most guys skip the leveling or cleaning phase. They think the new tile or a bit of underlayment will hide the dip or the ridges of old mastic. It won’t. If you leave that old, fossilized adhesive on the drywall or cement board, you are building your new shower on a foundation of failure. I have seen fifteen thousand dollar projects fail because a contractor was too lazy to scrape off ten pounds of old glue. My hands smell like WD-40 and I have spent twenty five years seeing what happens when physics meets poor preparation. You cannot cheat the bond.
The chemical ghost on your drywall
Removing old adhesive requires breaking the chemical or mechanical bond between the residue and the substrate without destroying the wall itself. You must identify if you are dealing with water-based mastic or a cementitious thin-set. Mastic is a sticky organic polymer that often softens with heat. Thin-set is a mineral-based product that requires mechanical force to break. Understanding this molecular difference determines whether you use a heat gun or a specialized scraper. If you ignore this, you will likely rip the paper face off your drywall, turning a simple cleaning job into a full-scale demolition project. This is about managing the shear strength of the old material while preserving the integrity of the surface behind it.
When you look at a wall after a showers renovation begins, you see a map of history. Every ridge of old adhesive tells a story of how the previous installer worked. If the ridges are sharp and brittle, it is likely a modified thin-set. If they are yellowed and feel slightly gummy when poked with a screwdriver, you are looking at old organic mastic. Organic mastics were the standard for decades in residential bathrooms. They are susceptible to moisture, which is why they often fail near the tub line. Removing them is a test of patience. You are not just scraping. You are performing a surgical extraction of a polymer that has had thirty years to cure into the pores of the wall.
“A floor is only as good as the subfloor beneath it; deflection is the enemy of every joint.” – Master Flooring Axiom
Identifying the fossilized bond
To identify your adhesive type, apply a damp rag to a small section for ten minutes to see if it softens. If the adhesive turns back into a paste, it is a water-soluble organic mastic. If it remains hard and stone-like, it is a cement-based thin-set. This distinction is the most important step in your workflow. Cement-based materials require you to use a hammer and a flat-edge chisel or a wide-blade scraper. Organic mastics require heat or chemical softening agents. Using the wrong method wastes hours and usually leads to unnecessary wall damage that will complicate your next tile installation.
The physics of these bonds is fascinating. Thin-set works by creating a mechanical lock. It flows into the microscopic pits and valleys of the substrate and hardens into a mineral lattice. Mastic works more like a glue, relying on surface tension and chemical adhesion to the paper or board. When you try to remove thin-set from drywall, the bond is often stronger than the drywall itself. This is why many professionals choose to cut out the drywall entirely and replace it with fresh cement board. However, if the adhesive is on a masonry wall or a stable cement board, mechanical removal is the way to go. You have to respect the material properties. If you fight the chemistry, the chemistry wins every time.
The physics of mechanical removal
Mechanical removal involves using sharp blades and targeted impact to shear the adhesive away from the wall surface. You need a heavy-duty floor scraper with a replaceable four-inch steel blade. Hold the blade at a thirty-degree angle to the wall. This angle allows the edge to get under the ridge of the adhesive without digging into the gypsum core of the drywall. If the adhesive is particularly stubborn, a small oscillating tool with a flat scraper attachment can provide the high-frequency vibration needed to shatter the bond of brittle thin-set. Always wear a mask because this process creates fine particulate matter that is terrible for your lungs.
I have seen guys try to use a vibrating sander to remove old glue. That is a rookie mistake. All you do is melt the mastic and gum up your sandpaper in six seconds. You need a clean shear. Imagine the adhesive is a scab on the wall. You want to lift it, not grind it. If you are working around baseboards, you have to be even more careful. The transition between the wall and the floor is where moisture likes to hide. If the adhesive there is damp, it might come off easily, but it might also indicate a leak that has compromised the wall studs. Check everything. Do not just scrape and ignore the signs of rot.
| Adhesive Type | Removal Method | Risk Level | Tools Required |
|---|---|---|---|
| Organic Mastic | Heat & Scrape | Medium | Heat Gun, Scraper |
| Cement Thin-set | Mechanical Shear | High | Chisel, Hammer, Oscillator |
| Epoxy Grout/Glue | Chemical Stripper | Extreme | Solvent, Respirator |
| PVA Wall Glue | Warm Water | Low | Sponge, Putty Knife |
Chemical softening strategies
Chemical removal uses solvents to break the polymer chains in the adhesive, making it pliable enough to wipe or scrape away. Many modern strippers are citrus-based and safer for indoor use in small bathrooms. You apply the gel, cover it with plastic wrap to prevent evaporation, and let it sit for several hours. This is especially effective for old yellow carpet glue that some genius decided to use on a bathroom wall. Once the chemical has done its work, the adhesive should have the consistency of peanut butter. You then scrape it into a bucket and dispose of it according to local environmental regulations.
Never use harsh chemicals like methylene chloride in a small, unventilated bathroom. You will pass out before you get the first square foot cleaned. Even with citrus-based cleaners, you need a fan moving air out of the room. The goal is to soften the adhesive just enough so it releases its grip on the wall. After the adhesive is gone, you must wash the wall with clean water or a neutralizing agent. If you leave chemical residue on the wall, your new thin-set will not bond. It will just slide off the wall like grease on a frying pan. This is where many grout restoration projects go wrong. They forget about the chemical film left behind by cleaning agents.
Why your subfloor is lying to you
The wall is just a vertical subfloor, and if it is not flat within an eighth of an inch over ten feet, your tile will lippage. People think the adhesive removal is just about getting the wall clean. It is actually about getting the wall flat. If you leave small humps of old glue, your new tile will sit unevenly. When you go to apply the tile, those humps will cause the corners of the tiles to stick out. This creates shadows and tripping hazards if it were on a floor, but on a wall, it just looks like amateur hour. I have spent years fixing bathrooms where the homeowner thought a thick layer of thin-set would hide a bumpy wall. It never does.
Thin-set shrinks as it cures. If you have a half-inch of mud in one spot and an eighth of an inch in another, they will shrink at different rates. This pulls the tiles out of alignment. You want a consistent, thin layer of adhesive. That only happens if the wall is perfectly clean. If you are struggling with a particularly bad wall, it is often faster and cheaper to rip out the drywall and install new moisture-resistant backing. This allows you to check the studs for plumb and add blocking for grab bars or new showers fixtures. Do not be afraid of a little demolition if it means a better end result.
- Check for lead paint if the house was built before 1978.
- Use a shop vac with a HEPA filter to catch dust.
- Keep a five-gallon bucket handy for debris.
- Protect your tub or shower pan with a heavy drop cloth.
- Always use eye protection when chipping cementitious materials.
- Mark the locations of your studs before you start scraping.
Preparation for the next layer
After the adhesive is removed, you must patch any gouges and prime the surface before installing new materials. If you ripped the paper off the drywall, you must seal the exposed gypsum with a product like Gardz or a similar sealer. If you don’t, the gypsum will suck the moisture out of your new thin-set or patch, causing it to fail. Once the sealer is dry, use a setting-type joint compound to smooth out the surface. This is the stage where you ensure your baseboards will sit flush against the wall. A flat wall is the secret to a professional-looking finish.
Think about the grout. If your wall is uneven, your grout lines will vary in width as you try to compensate for the tiles not sitting flat. You can learn how to refresh grout all day long, but you can’t fix a structural alignment issue with a bit of colorant. The prep work is eighty percent of the job. The actual tiling is just the reward for doing the prep right. Use a long straightedge to check the wall in multiple directions. If you see light under the level, you have more work to do. This is the difference between a floor that lasts thirty years and one that starts cracking in three.
Humidity and the regional trap
The humidity in coastal regions or swampy climates like Houston can reactivate old water-based adhesives during the removal process. If you are working in a high-humidity environment, you might find that the adhesive becomes gummy just from the moisture in the air once the tiles are removed. This makes mechanical scraping nearly impossible as the blade just slides over the muck. In these cases, you need to use a dehumidifier in the bathroom for twenty four hours before you start the removal process. You want that adhesive as brittle as possible.
In dry climates like Phoenix, the adhesive might be so baked and hard that it has become part of the wall structure. Here, the risk is cracking the substrate. You might need to use a bit of moisture to soften the top layer before scraping. Every region has its own quirks. I have worked in basements in the Northeast where the dampness made the old mastic smell like sour milk the moment I hit it with a scraper. You have to adapt your technique to the environment. If the air is wet, dry it out. If the wall is too dry and brittle, give it a light mist. Control the environment, or it will control the quality of your bond.
The final inspection of the substrate
Once you think you are done, run a flat trowel across the entire surface to feel for any remaining snags or high spots. Your ears will tell you more than your eyes. A flat trowel clicking against a hidden ridge of thin-set is a signal that you are not ready for tile. You want a smooth, zipping sound. If you are planning on using eco-friendly tile solutions, remember that many of these products are thinner or made from recycled glass, which can be translucent. Any leftover adhesive or dark stains on the wall might show through the tile. A clean, white, flat substrate is mandatory for high-end glass tile work.
I have seen guys try to use a belt sander on a wall. Do not do that. You will gouge the studs and create a dust cloud that will settle in every room of the house for a month. Stick to the hand scrapers and the heat guns. It is slow, hard work. It is why I have the calluses I do. But when you set that first row of tile and it sits perfectly plumb and flat, you will be glad you spent the extra time on the adhesive. A master floor installer knows that the finish is only a reflection of the start. Clean your walls, prep your surface, and do not take shortcuts. Your future self will thank you when the grout lines stay straight and the tiles stay on the wall where they belong.