
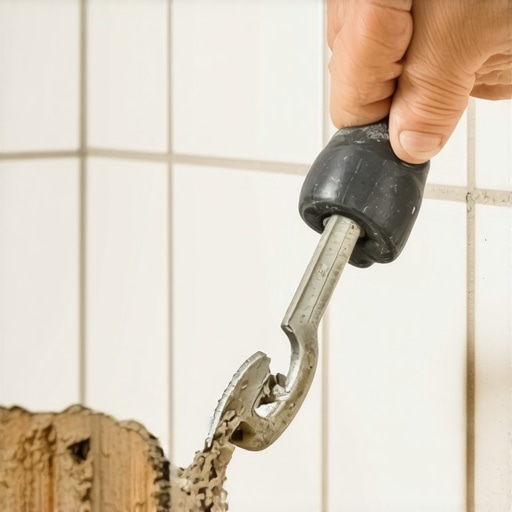
Repairing a cracked grout joint in a shower corner requires more than a simple smear of new paste. To repair a cracked grout joint in the shower corner, you must remove the old, rigid material entirely and replace it with a 100% silicone sealant that matches your grout color. This change of plane represents a movement joint where two different surfaces meet, and rigid grout cannot withstand the inevitable shifting of the house structure without fracturing. I spent three days grinding concrete on a job last month just so the floor wouldn’t click like a castanet, and showers are no different. I once walked into a house where a forty thousand dollar marble shower was rotting from the inside because the installer used hard grout in the corners. Within six months, the house settled, the grout cracked, and water migrated into the wall studs. That mistake cost the homeowner a full tear-out. Most guys skip the prep and just put a fresh layer of grout over the old crack. It will not hold. You are fighting physics, and the physics of a shower corner are relentless. Water finds the path of least resistance through capillary action, and a hairline fracture in a corner is an open door to structural rot.
The structural lie of rigid grout
Rigid grout fails in shower corners because it lacks the modulus of elasticity required to handle the thermal expansion and structural settling of a home. When you have two walls meeting at a ninety degree angle, they are often attached to different framing members. As the humidity in the home changes, or as the weight of the water in the tub or shower pan shifts the subfloor, those two walls move independently. Cementitious grout is a brittle material made of Portland cement, sand, and pigments. It is designed for the static environment of a flat wall, not the dynamic environment of a corner. If you want a result that lasts, you need to understand grout restoration secrets for long lasting results. The National Wood Flooring Association and the Tile Council of North America both agree on one fundamental truth regarding these transitions.
“A floor is only as good as the subfloor beneath it; deflection is the enemy of every joint.” – Master Flooring Axiom
This principle applies equally to walls. If the substrate moves, a rigid joint will snap. That is why industry standards demand a flexible sealant at every change of plane, including floor to wall and wall to wall transitions.
Why physics dictates the change of plane
A change of plane refers to any intersection where two surfaces meet at an angle, necessitating a flexible joint to absorb movement. Think of your shower like a living organism. When you turn on the hot water, the tile and the substrate beneath it expand. When the shower cools, they contract. If the corner is filled with hard grout, there is no room for this movement. The grout is crushed or pulled apart, resulting in the common vertical cracks you see. For those looking for showers that wow modern designs for 2025, the focus is often on the aesthetics, but the engineering must come first. Many homeowners assume their tile is waterproof. It is not. Tile and grout are merely the first line of defense. The real waterproofing happens behind the scenes, but a cracked corner allows excessive water to sit against the waterproofing membrane, eventually finding a way through a pinhole or a fastener. You must treat the corner as a functional gasket, not just a cosmetic fill. The bond must be tenacious enough to stick to the tile edges while remaining pliable enough to stretch without tearing. This balance is the difference between a dry wall and a moldy mess.
| Material Type | Flexibility Rating | Moisture Resistance | Best Application |
|---|---|---|---|
| Sanded Grout | None | Low | Floor joints over 1/8 inch |
| Unsanded Grout | None | Low | Wall joints under 1/8 inch |
| Acrylic Caulk | Moderate | Medium | Dry area baseboards |
| 100% Silicone | High | Maximum | Shower corners and wet areas |
Choosing the right chemical bond
Selecting a 100% silicone sealant is mandatory for shower corners because it provides the chemical durability and waterproof properties that acrylic or latex caulks lack. Do not be fooled by tubes labeled as siliconized acrylic. These are water based products that shrink as they cure and eventually peel away from the tile. You need a neutral cure silicone if you are working with natural stone, as acetoxy cure silicones can sometimes etch the finish of delicate marble or limestone. If you are wondering how to refresh grout without replacing it, you must understand that the corner is the exception. You cannot simply refresh it; you must replace it with the correct material. High quality silicone is now available in hundreds of colors that match every major grout manufacturer. This allows for a visual match that looks like grout but behaves like rubber. The chemistry of silicone involves a polymer chain that remains stable under UV light and constant water exposure. It does not provide a food source for mold, unlike the organic binders found in cheaper caulks. When you apply it correctly, you create a permanent barrier that moves with the house.
Surgical removal of the failed material
Removing the old grout is the most labor intensive and vital part of the repair process to ensure the new sealant has a clean surface for adhesion. You cannot stick silicone to old grout. It will fail. You need a carbide tipped grout saw or a multi-tool with a diamond grit blade. I prefer the manual hand saw for corners because it gives me tactile feedback. If you press too hard with a power tool, you will chip the glaze on the tile or pierce the waterproofing membrane behind it. You need to clear out at least 1/4 inch of depth. This creates a channel where the silicone can form a thick bead. A thin smear of silicone on the surface will simply peel off like a sunburn. You also need to clean the edges of the tile with isopropyl alcohol. This removes any soap scum or mineral deposits. If the tile edge is not pristine, the silicone will not form a molecular bond. I have seen guys try to use bleach, but bleach leaves a residue. Alcohol evaporates completely, leaving a bone dry surface. This is the grit and the grime of the trade that homeowners often overlook.
- Use a manual grout saw to remove the cracked material.
- Vacuum the joints to remove all dust and debris.
- Wipe the tile edges with 91 percent isopropyl alcohol.
- Allow the area to dry for at least 24 hours before sealing.
- Tape off the edges for a clean, professional finish.
The dry cycle that installers ignore
Moisture trapped behind the tile is the primary cause of early sealant failure, so the joint must be completely dry before applying new silicone. If you showered this morning and try to caulk this afternoon, you are sealing in water. That water will turn into vapor as the room warms up, pushing the silicone away from the tile before it even cures. You should run a fan in the bathroom for 24 to 48 hours before you start the application. Use a hair dryer or a heat gun on a low setting to blow out any hidden moisture from the corner. You might think it is dry because it looks dry on the surface, but the substrate behind the tile can hold water for days. Professional installers use moisture meters to check the saturation levels, but for a DIY repair, the time and heat method is your best bet. If you are also looking at baseboards makeover ideas to elevate your space, remember that moisture management is universal. Even your baseboards will rot if the shower is leaking behind the walls. Patience is the one tool you cannot buy at the hardware store, but it is the one you need the most for this job.
Applying the bead with mechanical precision
The secret to a perfect silicone bead is the combination of a steady hand, a high quality dripless caulk gun, and a smoothing tool or a gloved finger dipped in soapy water. Start by cutting the nozzle of your silicone tube at a forty five degree angle, making the opening slightly smaller than the joint itself. Apply consistent pressure as you move down the corner. You want to push the material into the gap, not just lay it on top. Once the bead is down, you have a limited window of time before it starts to skin over. This is where the artistry comes in. If you use the taping method, pull the tape immediately after smoothing. Do not wait for the silicone to dry, or you will pull the edges of your new joint right off the wall. Many people use too much silicone. You want a concave profile that stays within the confines of the corner. This prevents water from pooling on top of the bead. If you are maintaining a clean look, consider checking tile cleaning tips for a sparkling bathroom in 2025 to ensure your new joints stay white and bright.
Preventing future hairline fractures
Maintaining the integrity of your shower joints requires annual inspections and the use of non-abrasive cleaners that do not degrade the silicone polymer. Harsh chemicals can cause silicone to become brittle over time. Stick to pH neutral cleaners. If you notice a small tear or a spot where the silicone is lifting, do not just patch it. Cut out that section and redo it. While most people want the thickest underlayment, too much cushion actually causes the locking mechanisms on LVP to snap under pressure, and similarly, too much movement in a wall assembly will eventually overtax even the best silicone. Ensure your shower is properly ventilated to reduce the thermal stress on the joints. High humidity and extreme heat cycles accelerate the aging of all building materials. If your house is prone to significant settling, you might need to redo these corner joints every five to seven years. It is a small price to pay to avoid a major structural repair. Keep an eye on your chic baseboard designs near the shower for any signs of swelling or discoloration, as this is often the first warning sign of a corner leak. A floor is only as good as the subfloor beneath it, and a shower is only as good as its weakest joint.
“Movement joints are not an admission of failure; they are a requirement for success in any tiled assembly.” – Tile Council Standards
Final inspection involves checking the bond after 24 hours. If it feels firm and rubbery, you have successfully engineered a solution that will withstand the house breathing for years to come.