
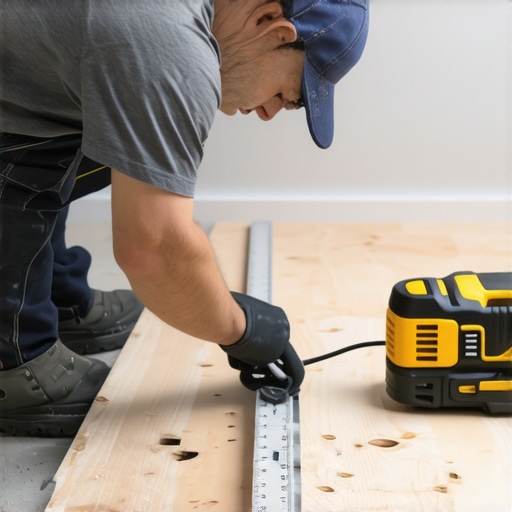
I smell the sharp bite of oak dust and the greasy scent of WD-40 every time I step into a bathroom renovation. It is the scent of a job that is about to go sideways if you do not respect the physics of the house. Most guys skip the leveling compound. They think the underlayment will hide the dip. It won’t. I spent three days grinding concrete on a job last month just so the floor wouldn’t click like a castanet. When you see a baseboard floating half an inch above a tile floor, you are looking at an installer who gave up. They tried to hide a structural failure with a bead of caulk that will eventually crack, yellow, and peel. A floor is a performance surface, not a decoration, and the bathroom is the most hostile environment in the home. Water, steam, and the constant shifting of the house joists mean that your trim work must be architecturally sound. If the floor is not level, you do not force the trim to bend. You scribe the trim to the floor. This is the difference between a builder-grade hack job and a professional finish that lasts for decades. In this guide, I will break down the molecular reality of material selection and the structural geometry of the perfect scribe.
The physics of the bathroom floor slope
A sloping bathroom floor occurs due to joist deflection, house settling, or improper subfloor preparation before tile installation. To fix this, you must understand that the baseboard must remain perfectly level on its top edge while its bottom edge follows the chaotic contours of the tile. If you simply push the board down, you create tension that will eventually pull the nails out of the studs. The house is alive. It breathes with the seasons. In a bathroom, the moisture levels can jump from thirty percent to ninety percent in the span of a fifteen-minute shower. This causes wood fibers to expand and contract. If the trim is under tension because you forced it against a hump in the floor, that tension will find an exit. It will manifest as a gap at the miter or a split in the paint. You must treat the baseboard as a sacrificial element that we shape to the rigid reality of the floor. Before you even touch a saw, you need to understand that the subfloor beneath your tile is likely the culprit. Whether it is an old mud bed that has sagged or a modern plywood subfloor that lacks the proper thickness, the baseboard is your final chance to mask those sins. To understand more about the aesthetic goals of this process, you can look into chic baseboard designs that transform rooms in 2025 which require this level of precision.
“A floor is only as good as the subfloor beneath it; deflection is the enemy of every joint.” – Master Flooring Axiom
The molecular reality of trim materials in high moisture
Choosing between PVC, MDF, and solid wood for bathroom baseboards depends entirely on the proximity to water and the expected humidity levels. In my twenty-five years on my knees, I have seen MDF turn into a soggy marshmallow within three years of installation in a poorly ventilated bathroom. MDF is essentially compressed sawdust and glue. When water hits it, the capillary action pulls moisture deep into the core, causing it to swell to twice its original thickness. Solid wood is better, but it is prone to warping and cupping if the back is not sealed. For a bathroom, especially around showers with a style that might splash, I always recommend solid PVC trim. It has a closed-cell structure. It does not rot. It does not move. When you scribe PVC, the shavings look like snow, and the edge remains crisp. If you are working with tile, you also need to think about the grout lines. A floor is not just a slope, it is a series of microscopic peaks and valleys. If your scribe is not precise, you will see light gaps every time the board passes over a grout joint. This is why cleaning is essential, as detailed in tile cleaning tips for a sparkling bathroom in 2025, because even a small piece of debris under the board can throw off your scribe line by an eighth of an inch.
| Material | Moisture Resistance | Scribing Difficulty | Best Use Case |
|---|---|---|---|
| Solid PVC | Excellent | Easy | Wet rooms and high-traffic bathrooms |
| Finger-Jointed Pine | Moderate | Medium | Powder rooms with low humidity |
| MDF (Medium Density Fiberboard) | Poor | Difficult | Dry areas only, never near showers |
| Solid White Oak | Good | Hard | High-end custom builds with site-finished floors |
The geometry of the perfect scribe
Scribing is the process of using a compass or a dedicated scribing tool to transfer the exact profile of an uneven floor onto a piece of trim. You start by leveling the baseboard. You do not let the board sit on the floor. Instead, you hold it against the wall and use a spirit level to ensure the top edge is perfectly horizontal. You will notice that one end might be touching the floor while the other end has a massive gap. This gap is your master measurement. You set your compass to the widest point of that gap. As you drag the compass point along the floor, the pencil marks the baseboard. This pencil line is a topographical map of your floor. The physics here is simple but unforgiving. If your pencil is not perfectly vertical, your line will be inaccurate. I have seen guys try to freehand this and it always looks like a jagged mess. You want a smooth, continuous line. Once the line is marked, you take the board to the sawhorses. This is where the back-cut comes into play. You do not cut the board at a ninety-degree angle. You bevel the cut at about five to ten degrees toward the back. This ensures that the front edge, the part you actually see, makes crisp contact with the tile while the back of the board stays clear of any thin-set lumps or grout humps. If you are dealing with old tile, you might even need to consider grout restoration secrets for long-lasting results to ensure the surface is stable enough for a tight fit.
- Spirit level (at least 4 feet long)
- Proportional dividers or a high-quality compass
- Jigsaw with a fine-tooth scrolling blade
- Block plane or power planer for fine adjustments
- Blue painter tape to prevent splintering on the cut line
- Pencil with a hard lead (2H) for a sharp line
The ghost in the expansion gap
An expansion gap is a structural necessity that allows the floor and walls to move independently without causing mechanical failure in the finish. Many homeowners want the baseboard to be slammed tight against the floor. This is a mistake. While we want the scribe to look tight, there should be no downward pressure. The floor needs to breathe. If you are installing over a floating floor like LVP, this is even more critical. If you lock the floor down with heavy baseboards and nails, the floor will buckle when the temperature changes. The scribe allows you to maintain the illusion of a perfect fit while the floor remains free to move beneath it. I once saw a wide-plank walnut floor cup until it looked like a potato chip because the installer didn’t leave enough room at the perimeter. The baseboards were forced up by the expanding wood, ripping the trim nails right out of the pine studs. It was a fifteen-thousand-dollar heartbreak. In a bathroom, you also have to worry about the interface between the trim and the tile. If you are using baseboards makeover ideas to elevate your space, remember that the bottom of the scribe should be sealed with a thin bead of 100 percent silicone, not caulk. Silicone remains flexible. It acts as a gasket. It prevents shower water from seeping under the baseboard and rotting out your bottom plate.
“Every house is moving; your job as a finisher is to hide that movement without fighting it.” – TCNA Handbook Commentary
The final word on structural integrity
Professional baseboard installation on a sloping floor is about managing tolerances and respecting the materials. You are not just putting up a piece of plastic or wood. You are creating a transition between two different structural planes. When you take the time to scribe, you are acknowledging that the world is not square, level, or plumb. You are using your skills to create the illusion of perfection. This requires patience. It requires a sharp pencil and an even sharper saw blade. It requires an understanding of why the floor is sloping in the first place. If the slope is more than an inch over eight feet, you shouldn’t be scribing; you should be looking at the floor joists in the crawlspace. But for the standard settling of a home, the scribe is your best tool. It elevates a room. It makes the floor look like it was carved into place. Never settle for the gap. Never rely on the caulk. Get on your knees, find the high point, and draw the line. That is how a pro does it. That is how you ensure the bathroom remains a sanctuary rather than a source of maintenance headaches. For those interested in the bigger picture of bathroom design, exploring showers that wow modern designs for 2025 can provide the context for why these fine details matter so much in a modern luxury home.