
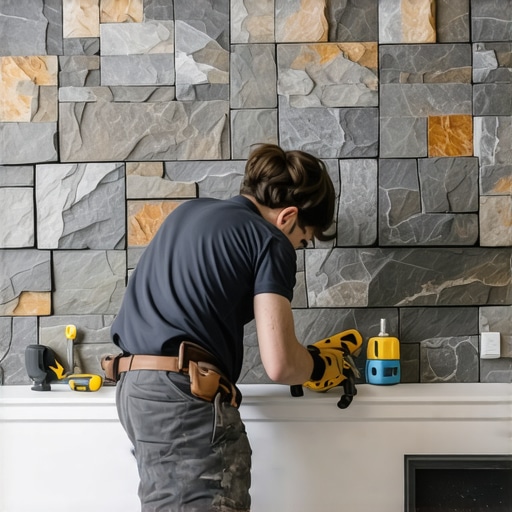
How to Scribe Baseboards to a Textured Stone Wall Without Gaps
I spent three days grinding concrete on a job last month just so the floor wouldn’t click like a castanet. Most guys skip the leveling compound. They think the underlayment will hide the dip. It won’t. If you cannot get the subfloor flat, your baseboards will never look right. You see, the baseboard is the final handshake between the vertical wall and the horizontal plane of the floor. When that wall is a rugged, textured stone surface, that handshake becomes a technical wrestling match. I have spent twenty five years with sawdust under my nails, and I can tell you that a tight fit against stone is not about luck. It is about geometry and the cold, hard physics of the back bevel. If you want a result that looks like the wood grew out of the stone, you have to stop thinking like a carpenter and start thinking like a stone mason with a woodworker’s precision. Most people settle for gaps and fill them with enough caulk to sink a ship. That is a failure of craft. We are going to look at how to transfer the exact topography of limestone or fieldstone onto a piece of poplar or oak with zero tolerance for error.
The logic of transferring irregular geometry
Scribing baseboards to stone requires a precision compass to mirror the wall topography onto the wood surface followed by a back bevel cut with a jigsaw. This mechanical transfer accounts for every bump and dip in the masonry to ensure a tight structural fit without using unsightly fillers. The stone is the master and the wood is the slave. You cannot change the stone easily, so the wood must adapt. This starts with understanding the maximum depth of the stone’s protrusion. If a stone sticks out half an inch, your scribe line must account for that half inch across the entire length of the board. I always tell my apprentices that if you miss the scribe by a sixteenth, you might as well have missed by a mile. The eye caught in the shadow of a gap will find the flaw every time. You are effectively creating a custom interlocking joint where one side is 250 million year old rock and the other is a fresh piece of milled lumber. This is where chic baseboard designs that transform rooms in 2025 come into play, as the profile of the wood must be simple enough to accept the scribe without losing its visual character.
Essential tools for an architecturally sound fit
A variable speed jigsaw with a fine tooth scrolling blade and a metal compass are the primary instruments for a successful scribe. The jigsaw allows for the intricate movements required to follow a stone profile while the compass ensures the mathematical distance between the wall and the wood remains constant. Do not use a cheap plastic compass from a school kit. You need a tool with a locking nut that will not slip halfway through the run. One slip and your entire board is scrap. I prefer using a dedicated scribing tool with a solid brass thumb screw. It feels heavy in the hand and stays where you put it. You also need a block plane to fine tune the edge after the main cut. Sometimes the jigsaw blade wanders. The block plane brings it back to the line with microscopic accuracy. If you are doing a baseboards makeover ideas to elevate your space project, having a high quality belt sander with 80 grit paper can also help with the heavy lifting of the back bevel. The physics of the cut is simple. You are removing material from the back of the board so that only the very front edge touches the stone. This creates a knife edge that can tuck into the small crevices of the grout and rock.
| Tool Type | Primary Function | Material Impact |
|---|---|---|
| Locking Compass | Geometric transfer | Surface marking |
| Fine Tooth Jigsaw | Primary material removal | Edge definition |
| Block Plane | Microscopic refinement | Surface smoothing |
| Abrasive Sandpaper | Back beveling | Structural thinning |
The physics of the back bevel
The back bevel is a 45 degree angle cut away from the face of the wood that allows the front edge to make contact with the stone. This technique ensures that the thickness of the board does not interfere with the irregular peaks of the masonry surface. When you look at a piece of 3/4 inch baseboard, that 3/4 inch thickness is your enemy. If you cut the wood straight, the back of the board will hit a bump in the stone before the front does. This leaves a gap at the front that looks terrible. By beveling the cut, you make the contact point as thin as a dime. It allows the wood to dive into the hollows of the stone. I have seen guys try to scribe with a straight cut. They spend four hours and it still looks like a hack job. You have to remove that meat from the back. It is the same principle used in high end crown molding. You are creating a hollow space for the stone to live in. This is especially important when dealing with tile cleaning tips for a sparkling bathroom in 2025 because a tight fit prevents water and dust from accumulating behind the baseboard, which is the primary cause of mold growth in transitions between tile and wood.
“A floor is only as good as the subfloor beneath it; deflection is the enemy of every joint.” – Master Flooring Axiom
Step by step execution of the master scribe
Executing a perfect scribe involves leveling the board, setting the compass to the deepest gap, and tracing the stone profile before cutting at a steep angle. This sequence ensures the board remains level with the floor while perfectly contouring to the vertical irregularities of the wall surface. Follow this checklist for a professional result.
- Level the baseboard against the floor and secure it with a few temporary spacers to prevent shifting.
- Apply blue painter tape to the face of the wood to make your pencil line more visible and prevent wood splintering.
- Find the widest gap between the stone and the wood and set your compass to exactly that width plus one sixteenth of an inch.
- Hold the compass perfectly level as you drag the point along the stone and the pencil along the wood.
- Use a jigsaw to cut along the waste side of the line at a 45 degree angle toward the back of the board.
- Test the fit and use a block plane or rasp to remove high spots until the wood sits tight against the rock.
If you find that the stone is too aggressive, you may need to use a small grinder to knock down a particularly sharp point on the masonry. This is rare, but sometimes a single stone protrudes so far that it would compromise the structural integrity of the wood board if you scribed around it. I always prefer to modify the wood, but you have to be the judge on the job site. If you feel overwhelmed, you can always reach out via the contact us page for professional guidance on complex installations.
Chemistry of the bond and expansion gaps
Adhesive selection for stone to wood transitions must account for the different expansion coefficients of the two materials to prevent the joint from failing during seasonal humidity shifts. A high tack polyurethane adhesive provides the flexibility needed to maintain the bond while the wood moves. Wood is alive. It breathes. Stone is dead and static. When the humidity hits 80 percent in the summer, that poplar baseboard is going to swell. If you have glued it rock solid to the stone with a brittle adhesive, something is going to crack. Usually, it is the wood. You need an adhesive that stays slightly rubbery. Polyurethane is the king here. It grips the porous surface of the stone and the fibrous surface of the wood equally well. I once saw a job where the guy used liquid nails on solid oak against a limestone wall. By the next winter, the wood had shrunk and pulled away, taking chunks of the limestone face with it because the glue was too strong and too brittle. Always leave a tiny gap at the floor for expansion. Never pin the baseboard so hard against the floor that the floor cannot move. This is a common mistake in showers that wow modern designs for 2025 where people forget that even bathroom materials need room to breathe.
“The National Wood Flooring Association (NWFA) states that a minimum of a half inch expansion space is required at all vertical obstructions to allow for natural wood movement.” – NWFA Technical Manual
The role of the subfloor in baseboard alignment
A level subfloor is the foundation of a clean baseboard scribe because any vertical deviation in the flooring will cause the scribe line to tilt and creates an uneven visual line at the top of the trim. Professional installers often grind concrete or use self leveling underlayment before addressing the wall scribe. If the floor goes up and down, the baseboard follows it. This means the scribe line you just drew is now invalid. I spent half my career fixing floors that were not flat. People think the baseboard hides the floor. No, the baseboard highlights the floor. If you are working on showers with a style trendy ideas for small bathrooms, you know that space is tight. Every line is visible. If your floor is out of level by even an eighth of an inch, the top of your baseboard will look like a wave. I use a six foot level to check the floor before I even take the baseboards out of the truck. If there is a dip, I fill it. If there is a hump, I grind it. This ensures that when I scribe the wood to the stone, the wood is starting from a perfectly horizontal baseline. This level of detail is what separates a mechanic from a handyman. It is the difference between a floor that lasts fifty years and one that starts squeaking in six months.
Managing the dust and the cleanup
Scribing against stone creates significant fine dust from both the wood and the masonry, necessitating the use of HEPA filtered vacuums and proper ventilation to protect the interior environment. Keeping the workspace clean prevents abrasive stone dust from scratching the newly installed flooring. Stone dust is particularly nasty. It is silty and gets into everything. When I am scribing, I have a vacuum hose taped to my jigsaw. I also use a sacrificial piece of thin plywood on the floor to protect the finish. You do not want to be sliding a piece of wood back and forth on a stone floor while you are fitting it. You will scratch the stone or the finish on the wood. It is about respect for the materials. We talk about this a lot when discussing eco friendly tile solutions for sustainable homes in 2025. Longevity is the ultimate form of sustainability. If you install it right the first time, it never needs to be replaced. That starts with a clean job site and a perfect scribe. When you finally push that board into place and it clicks against the stone with no gaps, that is the best feeling in the world. It is the signature of a master. No caulk, no gaps, just a perfect marriage of stone and wood. For more details on maintaining these transitions, you can check our grout restoration secrets for long lasting results which covers how to handle the interface between masonry and trim. Finally, always refer to our privacy policy for how we handle your data when you seek professional flooring advice.