Most guys skip the leveling compound. They think the underlayment will hide the dip. It won’t. I spent three days grinding concrete on a job last month just so the floor wouldn’t click like a castanet. If you are starting your first bathroom project, you need to understand that the tile is just the skin. The skeleton is the subfloor. Most beginners fail because they treat tile like a sticker rather than a structural element. You have to respect the physics of the house. You have to respect the moisture. I have spent twenty five years with a level in my hand. I have seen what happens when someone rushes the prep. It is not pretty. It is expensive. It involves a sledgehammer and a lot of regret. We are going to do this right. We are going to look at the chemistry of the thin set and the structural integrity of the joists. We are going to build a floor that outlasts the mortgage.
The subfloor secret to a permanent installation
Subfloor preparation requires structural rigidity, moisture testing, and deflection calculations to prevent grout cracking or tile delamination. A bathroom floor is a high moisture environment that demands a stable foundation. You cannot just slap tile onto plywood and hope for the best. Plywood expands and contracts at a different rate than ceramic or porcelain. When those two materials fight, the tile loses. You need a substrate that is dead flat. I am talking about a tolerance of one eighth of an inch over ten feet. If you have a dip, you fill it with self-leveling underlayment. If you have a hump, you grind it down. You also need to check your joist spacing. If your floor bounces when you walk on it, your tile will pop. We call this deflection. For standard ceramic, you need an L/360 rating. For natural stone, you need L/720. This means the floor should not bend more than the length of the span divided by three hundred and sixty. It is simple math that saves your grout lines.
“A floor is only as good as the subfloor beneath it; deflection is the enemy of every joint.” – Master Flooring Axiom
The chemistry of the thin set bond
Polymer modified thin set provides chemical adhesion and mechanical interlocking between the substrate and the tile body for a permanent bond. Not all bags of powder at the hardware store are the same. You need a modified thin set for most modern bathroom tiles. The polymers in the mix allow for a tiny bit of flexibility. They also help the mortar stick to non porous surfaces like porcelain. When you mix your thin set, you want the consistency of peanut butter. If it is too runny, the tile will sink. If it is too dry, it will not grab the tile. You also need to understand the open time. This is the window you have to work before the mortar starts to skin over. Once it skins over, the bond is dead. I have seen homeowners try to save money by using five year old thin set from their garage. Do not do that. The chemicals degrade. Buy a fresh bag. Your floor depends on it.
| Tile Material | Water Absorption Rate | Janka Hardness (Relative) | Best Use Case |
|---|---|---|---|
| Porcelain | Less than 0.5% | Extremely High | Heavy traffic and showers |
| Ceramic | 3% to 7% | Medium | Walls and light traffic floors |
| Natural Stone | Varies | High but porous | High end aesthetic areas |
Setting the layout without the heartbreak
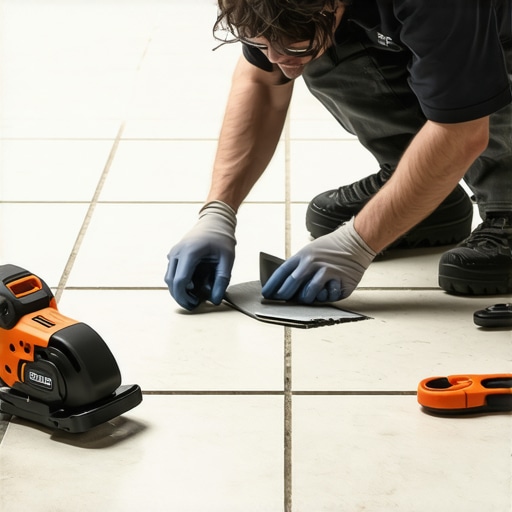
Layout planning involves snapping chalk lines, dry fitting tiles, and calculating expansion gaps to avoid sliver cuts at the perimeter walls. Do not just start in a corner. Your walls are not square. I have never seen a perfectly square bathroom in my life. If you start at one wall, by the time you get to the other side, your grout lines will look like a staircase. You find the center of the room. You snap two chalk lines that intersect at ninety degrees. Then you dry fit your tiles. This is where you see the future. If you end up with a tiny half inch sliver of tile at the wall, you shift your center line. You want your cuts to be balanced. You also need to account for the thickness of the baseboards. If you are looking for chic baseboard designs that transform rooms in 2025, remember that they need to cover your expansion gap. Every floor needs a space at the wall to breathe. Without it, the floor will tent when the house settles.
The physics of the trowel and coverage
Trowel notch selection ensures mortar coverage and air pocket elimination through directional troweling for maximum bond strength. Beginners always use the wrong trowel. If you are using a large format tile, you need a larger notch. The goal is ninety five percent coverage in a wet area like a bathroom. You should not see any voids under the tile when you pull one up to check. Use a square notch or a U notch trowel. Always trowel in straight lines. Never use swirls. Swirls trap air pockets. Straight lines allow the air to escape when you set the tile. This is basic physics. If you have air trapped under your tile, that tile will crack the first time someone drops a bottle of shampoo on it. I always back butter my tiles. This means I spread a thin layer of mortar on the back of the tile before I set it into the ridges. It is like double sided tape. It is the only way to be sure.
- Check subfloor for moisture using a pin meter
- Verify joist deflection limits before starting
- Install cement backer board or uncoupling membrane
- Mix thin set to a creamy peanut butter consistency
- Dry fit the entire floor to check for sliver cuts
- Use spacers to maintain perfect grout line consistency
- Back butter every tile for maximum adhesion
Managing the wet areas and showers
Waterproofing membranes create a liquid tight barrier that protects the building envelope from capillary action and vapor transmission. In a bathroom, water is the enemy. It wants to get under your tile. It wants to rot your floor joists. If you are tiling near showers that wow modern designs for 2025, you need a waterproofing system. This usually means a liquid applied membrane or a fabric sheet. You apply it over your backer board. This creates a bathtub under your tile. Even if water gets through the grout, it cannot get to the wood. Most beginners think grout is waterproof. It is not. Grout is porous. It is a filter, not a seal. Without a membrane, you are just waiting for a mold problem. I have torn out enough rotten subfloors to know that the five hundred dollars you spend on waterproofing is the best insurance policy you can buy.
“Cementitious grout is a porous medium; the secondary drainage plane is the true hero of the wet room.” – TCNA Handbook Wisdom
Grout is more than a filler
Grout application requires consistent mixing, proper slaking, and thorough cleaning to achieve color uniformity and stain resistance. Once your tile is set and the thin set has cured for twenty four hours, you grout. You need to pull out all your spacers first. If you leave them in, they will show through the grout. Mix your grout with the same care you used for the thin set. Let it slake. This means you let it sit for ten minutes so the chemicals can fully react, then you mix it again. Push the grout into the joints with a rubber float at a forty five degree angle. You want to pack it tight. When you clean it, use as little water as possible. If you use a soaking wet sponge, you will wash the pigment out of the grout. This leads to splotchy colors. If you are dealing with old grout in other parts of the house, check out tile cleaning tips for a sparkling bathroom in 2025 to keep things looking fresh. Properly installed grout should be hard and consistent.
The final transition with baseboards
Baseboard installation provides the aesthetic finish and functional protection for the perimeter expansion gap in a tiled bathroom. Your tile floor is not finished until the baseboards are on. These boards hide the messy cuts at the wall. They also prevent water from running down behind the tile. In a bathroom, I always recommend a gap between the bottom of the baseboard and the tile. I use a piece of scrap tile as a spacer. Then I fill that gap with a bead of high quality silicone caulk. Do not use grout at the wall. The wall and the floor move at different rates. Grout will crack and fall out. Silicone stays flexible. It creates a watertight seal. If you want to elevate the look of your room, you can explore baseboards makeover ideas to elevate your space. It is the final detail that makes a beginner job look like a master installation. Take your time with the miters. A tight corner is the sign of a craftsman who cares about the structural integrity and the finish. No shortcuts. No excuses. Just a floor that will stand for decades.